
Dodge Grand
Caravan Headlight Bulbs Replacement Guide
How to change a low beam, high beam,
front turn signal or side marker light bulb in a 2008 to 2014 Dodge Grand
Caravan.

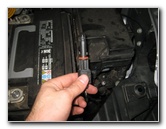
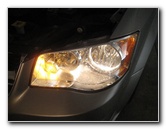
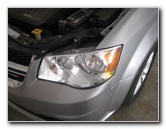 2013 Grand Caravan Headlight |
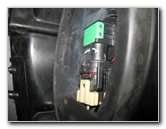 Base of Low Beam Bulb |
 1/4 Turn Counterclockwise |
| This
automotive maintenance tutorial was specifically written to assist
owners of the 5th generation or "Generation V" (2008, 2009, 2010,
2011, 2012, 2013 & 2014) Dodge Grand Caravan in changing a burnt
out low beam, high beam, front turn signal or side marker bulb in
the headlight assemblies. Owners of other Chrysler, Dodge, Jeep or RAM vehicles such as the Avenger, 200, 300, Town & Country, Challenger, Charger, Dart, Durango, Journey, Patriot, Wrangler, Grand Cherokee, Compass, 1500, 2500, 3500, C/V Tradesman and ProMaster may also find these DIY instructions to be helpful. Replacement bulbs for the 2011-2014 models with their part numbers are as follows: Low Beam # H11, High Beam # H11, Turn Signal # 3757A or 3757NA and Side Marker # 2825. The 2008-2010 models have the dual filament # H13 headlight bulb and the # 3157 turn signal light bulb. No tools are needed to change any of the bulbs in either the driver side or passenger side headlight housings. |
||
|
|
||
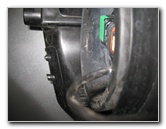
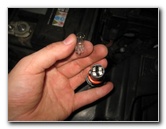
 Rotated Counterclockwise |
 Pull Out Low Beam Bulb |
 Pry Off Black Retaining Clips |
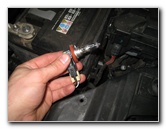
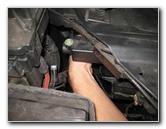
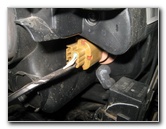
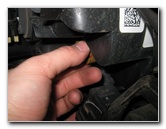
| The first two steps
are to open the hood and then move to the side of the vehicle with the burnt
out headlight bulb. The Low Beam bulb is located near the middle of the housing closer to the outer edge. Reach in behind the headlight and rotate the base of the old low beam bulb 1/4 turn counterclockwise before pulling it straight out of the housing. Gently pull back the black plastic retaining clips on the base of the bulb to disconnect the power plug. You may need to use a flathead screwdriver to pry off the clips. |
||
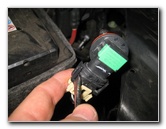
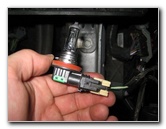
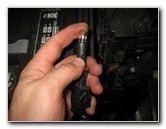
 Disconnect Power Plug |
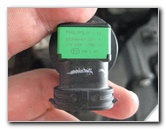 Philips H11 LL Low Beam |
 Push On Electrical Connector |
| Try to avoid
touching the glass part of the new halogen low beam bulb with your fingers
or anything greasy in the engine bay.
If you do get the new bulb dirty, wipe it clean with an alcohol moistened paper towel. Push the electrical connector straight on to the base of the new low beam bulb until the two retaining clips click securely in to place. |
||
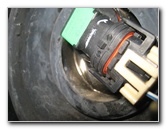
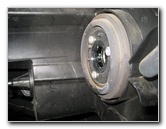
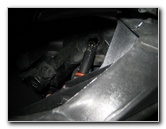
 Insert New Low Beam |
 1/4 Turn Clockwise - Lock |
 High Beam - Inner Corner |
| Insert the new low
beam bulb in to the socket and rotate it 1/4 turn clockwise to secure it in
place. The High Beam bulb is located closer to the inner corner of the headlight assembly next to the turn signal light. |
||
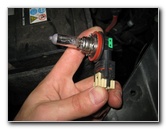
 Base of Old High Beam |
 1/4 Turn Counterclockwise |
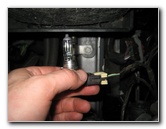 Pull Out Old High Beam Bulb |
| Rotate the base of the old high beam bulb 1/4 turn counterclockwise and pull it straight out of the housing. | ||
|
|
||
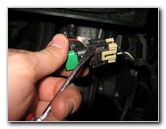 Pry Off Retaining Clips |
 Disconnect Power Plug |
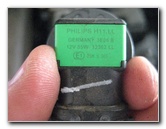 Philips H11 LL High Beam |
| Gently pull back the black plastic retaining clips to disconnect the power plug from the base of the old high beam bulb. | ||
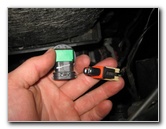
 Push On Electrical Connector |
 High Beam Socket In Housing |
 Insert New High Beam Bulb |
| Try to avoid
touching the glass part of the new halogen high beam bulb with your fingers
or anything greasy in the engine bay.
If you do get the new bulb dirty, wipe it clean with an alcohol moistened paper towel. Push the power plug straight on to the base of the new # H11 high beam bulb until it clicks securely in to place. |
||
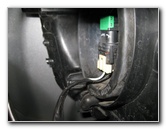
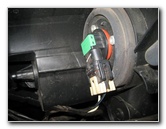
 1/4 Turn Clockwise - Lock |
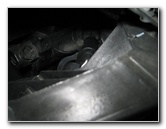
 Turn Signal Bulb Socket |
 1/4 Turn Counterclockwise |
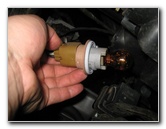
| Insert the new high
beam bulb in to the housing and rotate it 1/4 turn clockwise to lock it in
place. The Turn Signal bulb socket is located near the inner corner of the headlight assembly just below the high beam light. Rotate the tan/orange base of the socket 1/4 turn counterclockwise before pulling it straight out of the housing. |
||
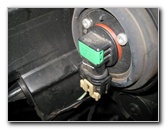
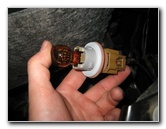
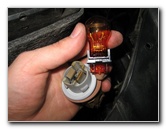 Pull Out Old Turn Signal Bulb |
 Push In New # 3757A Bulb |
 1/4 Turn Clockwise - Lock |
| Pull the old turn
signal bulb straight out of the socket and push in a new amber colored #
3757A or 3757NA bulb. Re-insert the socket in to the housing and rotate it 1/4 turn clockwise to lock it in place. |
||
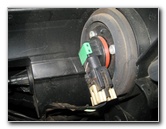
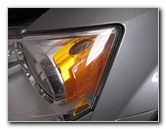 Side Marker Light |
 Side Marker Bulb Socket |
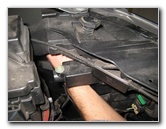 1/4 Turn To Loosen |
| The Front Side
Marker light bulb socket is located near the outer edge of the headlight
housing.
Almost every other car I've worked on, all of the bulb sockets have to be turned the normal counterclockwise (loosen or "lefty loosy") direction in order to remove them. Every other bulb socket on this vehicle was also the standard procedure. This may have been a fluke or a manufacturing defect on this particular minivan. So if you have to replace a front side marker bulb, first try gently loosening the bulb socket in the standard counterclockwise (lefty loosy) direction and if that doesn't work, continue with the steps below. Rotate the small black plastic base of the side marker bulb socket 1/4 turn clockwise (see note above) to loosen it before pulling it straight out of the housing. |
||
 Remove Bulb Socket |
 Pull Out Old Side Marker Bulb |
 Push In New # 2825 Bulb |
| Pull the old bulb
straight out of the socket and push in a new clear glass #
2825 bulb. (If necessary, you may also use any other miniature wedge base bulbs such as the # 168, 158, W5W, 194 or a compatible LED unit.) |
||
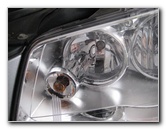
 1/4 Turn To Secure - Lock |
 Test New Headlight Bulbs |
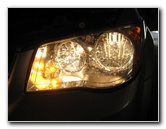 Testing High Beam Bulb |
| Re-insert the side
marker bulb socket in to the housing and rotate it 1/4 turn
counterclockwise (see note above) to secure it in place.
(If your front side marker bulb sockets are the standard counterclockwise = loosen or "lefty loosy" and clockwise = tighten or "righty tighty", re-install the sockets in that manner instead.) Test the new light bulbs by turning on the headlights, activating the hazard signals and flashing the high beams. Be sure to record the bulb change in your vehicle's service records. For more, check out my other
Dodge Grand Caravan DIY Maintenance Guides. |
||
| If you found this guide to be helpful,
please consider making a small donation by clicking on the PayPal.com
"Donate" button located to the right of this paragraph. Thank you!
(Note: I am not a registered charity. Donations are not tax deductible.) |