
Dodge Charger
3.6L V6 Engine Air Filter Replacement Guide
How to clean or change the engine air
filter in a 7th generation 2011 to 2014 Dodge Charger with the Pentastar 3.6L V6
motor.

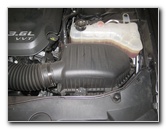 2014 Charger Engine Air Box |
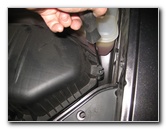
 Remove Phillips Head Screw |
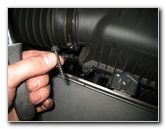 Phillips Screw Removed |
| This
automotive maintenance tutorial was specifically written to assist
owners of the seventh generation (2011, 2012, 2013, 2014 & possibly
also the revised 2015) Dodge Charger sedan in cleaning or changing
the engine air filter element for the Pentastar 3.6 liter V6 motor. Owners of other Chrysler, Dodge, RAM, Volkswagen, Lancia or Fiat vehicles equipped with the Pentastar 3.6L V6 engine such as the Avenger, Challenger, Durango, Grand Caravan, Journey, Grand Cherokee, 200, 300, Town & Country, Routan, Freemont, Wrangler, Voyager, Thema, 1500 and ProMaster may also find these DIY instructions to be helpful. A few compatible replacement filters with their part numbers are as follows: Fram CA11257, Wix # 49746, Pentius PAB11257, Ecogard XA6167, AEM 28-20460, K&N 33-2460, aFe 30-10220, Mahle LX 2615 and Hastings AF1488. The only tool needed to access the OEM engine air filter is a standard Phillips head screwdriver. A wet/dry shop vacuum can be useful if you plan on cleaning and re-using the old filter. |
||
|
|
||
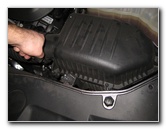
 Remove Phillips Screws |
 3 Phillips Screws Removed |
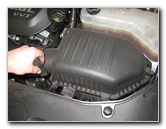
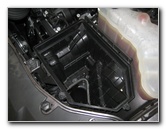
 Lift Off Top Half Air Box |
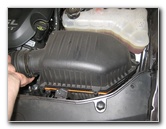
| The black plastic
engine air box is located at the front right (passenger side) of the engine
bay. Remove the three screws along the front edge by turning them counterclockwise with the Phillips head screwdriver. Set the three screws aside in a safe place. Gently lift the top cover of the air box to expose the old filter. |
||
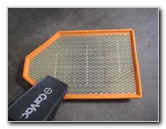
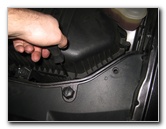
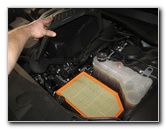 OEM Air Filter Exposed |
 Pull Out Old Air Filter |
 Inspect Both Sides |
| Pull the old air
filter out of the bottom half of the box. Inspect both sides of the old filter. If the old filter looks relatively clean, tap off any large debris and remove any fine dust with a vacuum. If the old filter is dark grey or black and clogged with debris such as dirt, dust, hair, insects, leaves, twigs and pollen, it should be replaced with a new element. I'd recommend buying the Fram CA11257 filter since it has the best reviews on Amazon. Or if you'd prefer to have a washable and re-usable engine air filter, check out the K&N 33-2460, which needs to be cleaned and re-oiled every 50,000 miles. |
||
|
|
||
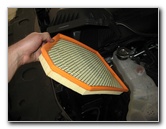
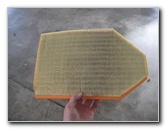
 Clean With Vacuum |
 Debris - Bottom Half Air Box |
 Install New Air Filter |
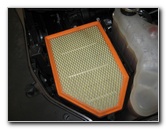
| If your vacuum has
a crevice attachment, clean out any debris or sand at the bottom half of the
air box. Install the new filter in to the bottom half of the air box with the pleats facing down and the wire mesh facing up towards you.. |
||
 Insert Tabs In To Slots |
 Lower Air Box Cover |
 Re-Insert Phillips Screws |
| Line up the tabs on
the rear edge of the air box cover and slide them in to the slots on the
bottom half of the box. Close the top half of the air box. |
||
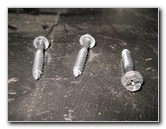
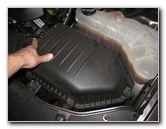
 Tighten Screws Clockwise |
 3rd Screw Tightened |
 Engine Air Filter Replaced |
| Re-insert the three
Phillips head screws and tighten them in the clockwise direction until they
are snug. Don't forget to record the filter change in your vehicle's service records. For more,
check out my other
2011-2014 Dodge Charger DIY Repair & Maintenance Guides. |
||
| If you found this guide to be helpful,
please consider making a small donation by clicking on the PayPal.com
"Donate" button located to the right of this paragraph. Thank you!
(Note: I am not a registered charity. Donations are not tax deductible.) |