
Honda Civic
1.8L I4 Engine Oil Change Guide
How to change the motor oil and replace
the oil filter in a 9th generation 2012-2015 Honda Civic with the R18Z1 engine.

 2013 Civic R18Z1 1.8L I4 |
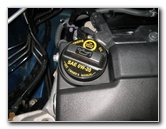 Oil Filler Cap SAE 0W-20 |
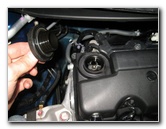 Twist Off Oil Filler Cap |
| This
automotive maintenance tutorial was specifically written to assist
owners of the ninth generation (2012, 2013, 2014, 2015 and probably
also the 2016 model year) Honda Civic with the R18Z1 1.8 liter
inline four cylinder engine in changing the motor oil and replacing
the oil filter. Owners of other Honda or Acura vehicles such as the Accord, Crosstour, CR-V, CR-Z, Fit, Insight, Odyssey, Pilot, Ridgeline, Stream, ILX, TSX, TLX, TL, RLX, RDX and MDX may also find these DIY instructions to be helpful. The tools and other items needed to complete this procedure include a floor jack, two jack stands, a Phillips head screwdriver, a 17mm socket, a 3/8" drive ratcheting wrench, 4 quarts of new motor oil (SAE 5W-20 or SAE 0W-20 for 2013+ models) and a new oil filter. A few compatible replacement cartridge style oil filters with their part numbers are as follows: Mobil 1 M1-110, Royal Purple 10-2867, K&N PS-1010, Bosch 3323, Fram XG7317, Purolator L14610, Wix 57356, Pennzoil HPZ-37, ACDelco PF2057, Mahle OC 707, Honda 15400-PLM-A02, Ecogard S4612, Beck Arnley 041-0812 and Fram PH7317. |
||
|
|
||
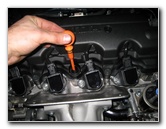 Pull Up Oil Dipstick |
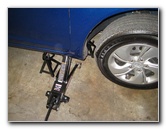 Lift Front of Vehicle |
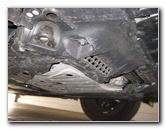 Under Engine Cover |
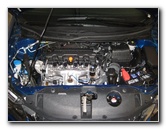
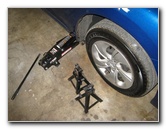
| The first three
steps are to warm up the engine for a few minutes, park the vehicle on a
level surface and then turn off the engine.
Warming up the engine to near operating temperature will help suspend any contaminants within the old oil and also allow it to drain out more quickly. Then open the hood, twist off the oil filler cap in the counterclockwise direction and lift up the orange handled oil level dipstick an inch or two. Removing the oil filler cap and pulling up the dipstick will help prevent a vacuum from forming and help the old oil drain out more quickly. Raise the front of the vehicle with the floor jack and securely support it with the two jack stands. I found it easiest to just raise the front passenger side of the vehicle to access the drain bolt and filter. |
||
 Skid Plate / Splash Guard |
 Loosen Phillips Head Screws |
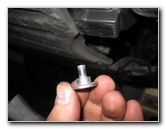 First Screw Removed |
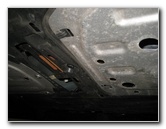
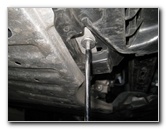
| The oil pan and oil
filter are protected by a silver metal under engine cover (A.K.A. "skid
plate or "splash guard"). Remove the four silver metal screws that hold the cover in place by turning them counterclockwise with the Phillips head screwdriver. |
||
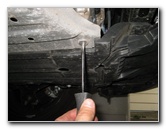 Remove 2nd Screw |
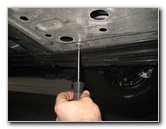 Remove Rear Screw |
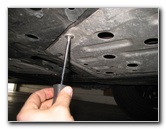 Remove 4th Screw |
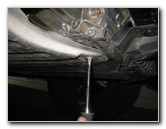
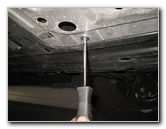
| There is one screw
near each of the four corners of the under engine cover. Set the four screws aside in a safe place. |
||
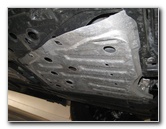
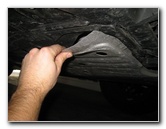 Pull Out Metal Cover |
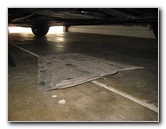 Under Engine Cover Removed |
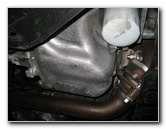 Oil Pan & Filter Location |
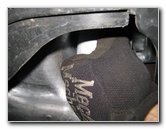
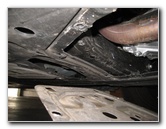
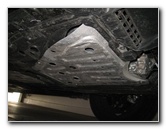
| Carefully pull the
front edge of the metal under engine cover away from the bottom of the
vehicle. Be careful since the edges are somewhat sharp. You may want to wear protective gloves before handling it. Then slide the cover backwards to disengage the two slots from the tabs on the rear edge. Once the cover has been removed, you'll be able to see the silver metal oil pan with the drain bolt on the rear edge. The oil filter is located at the front of the oil pan. |
||
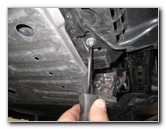
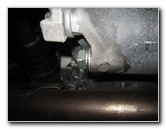 17mm Oil Drain Bolt |
 Under Engine Cover Screws |
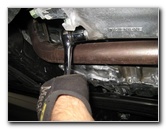 Loosen 17mm Oil Drain Bolt |
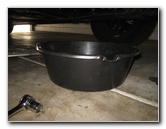
| Slide the used oil
catch container to just below the oil drain bolt.
I'd recommend wearing nitrile rubber gloves to keep the used oil from coming in contact with your skin. Used motor oil may be carcinogenic (cancer causing). Loosen the oil drain bolt by turning it counterclockwise with a 17mm socket and 3/8" drive ratcheting wrench. |
||
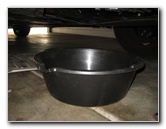 Used Oil Catch Basin |
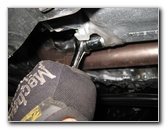 Tighten 17mm Drain Bolt |
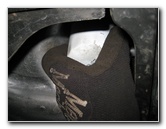 Twist Off Old Oil Filter |
| Spin out the oil
drain bolt and allow the old oil to drain in to the catch container for at
least a few minutes or until the flow slows to an occasional drip. If the oil drain bolt has a washer, inspect it and replace it if necessary. Re-insert the oil drain bolt and spin it in a few turns by hand in the clockwise direction to prevent it from becoming cross threaded. Tighten the oil drain bolt with the 17mm socket and ratcheting wrench in the clockwise direction to just past hand tight or about 29 lb-ft of torque. Move the used oil catch container to just below the old oil filter. Twist off the old oil filter in the counterclockwise direction. If you have trouble turning the old oil filter, use an oil filter wrench such as the Lisle # 63600. |
||
|
|
||
 Drain Oil From Filter |
 Dip Pinky Finger In New Oil |
 Lubricate Rubber O-Ring |
| Allow the old oil
to drain from the filter receptacle for at least a few minutes. I'd recommend buying the Fram PH7317 oil filter since it has the best reviews on Amazon. Dip your pinky finger in to some new oil and lubricate the the rubber o-ring gasket on the new oil filter. Lubricating the o-ring gasket on the new filter will help it form a better seal, prevent oil leaks and also make it easier to remove during the next oil change. |
||
 Spin On New Oil Filter |
 Line Up Tabs & Slots |
 Slide Tabs In To Slots |
| Spin on the new oil
filter in the clockwise direction to about 1/4 to 1/3 turn past hand tight.
Do not over tighten the oil filter to prevent from damaging the rubber o-ring gasket which may lead to oil leaks. Double check that the drain bolt and new oil filter are tight before moving on to the next steps. Line up the slots on the rear edge of the under body cover with the tabs on the back of the access opening. Slide the tabs in to the slots and then push the front edge of the cover in to place. |
||
 Re-Insert Cover Screws |
 |
 Tighten Screws Clockwise |
| Re-insert the four screws and tighten them in the clockwise direction with the Phillips head screwdriver until they are snug. | ||
 Engine Cover Replaced |
 Lower Vehicle From Stands |
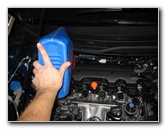
 Insert Automotive Funnel |
| Check that the four
under engine cover screws are securely in place. Lower the vehicle from the jack stands using the floor jack. Insert the automotive funnel in to the oil filler hole. The R18Z1 1.8L I4 engine's total capacity for an oil change with filter replacement is 3.9 U.S. Quarts (3.7 liters). The 2013, 2014, 2015 & possibly also the 2016 Honda Civic require SAE 0W-20 oil. (The earlier model years may use SAE 5W-20 oil instead. Please check your owner's manual or the numbers printed on the oil filler cap.) It is far better to have slightly less oil than necessary in the engine than to overfill it. Running an engine that has been overfilled with oil may cause damage to seals, gaskets or other components. |
||
 Pour In New Oil |
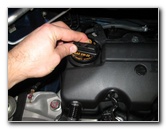 Spin On Oil Filler Cap |
 Check Dipstick Oil Level |
| Only pour in about
3 to 3.5 U.S. quarts of the new oil, re-insert the dipstick and twist on the
oil filler cap. Run the engine for a minute or two, turn it off and allow the oil to drain down to the pan for at least 5-10 minutes. Pull out the orange oil level dipstick, wipe it clean, re-insert and pull it out again to check the oil level. If necessary, slowly pour in more oil and repeatedly check the level on the dipstick until it reaches the top of the cross hatched area at the end of the dipstick which indicates the "Full" or "Max" line. You may not need to pour in the entire 3.9 U.S. quarts (3.7L) of for the level to reach the "Full" line depending on how long you drained out the old oil. Once the level is correct, re-insert the dipstick and double check that the oil filler cap is tight. To reset the oil life meter, there are two procedures depending on your model year. Turn the ignition key to the "On" position but do not start the engine. Press the "Select/Reset" button on the left side of the steering wheel until the "Oil Life%" is displayed below the tachometer (RPM gauge). Press and hold the "SEL/RESET" button for about 5-10 seconds until the display starts to flash. Release the "SEL/Reset" and then push and hold it once again until the oil life resets to 100%. For Civic models with the "Intelligent Multi-Information Display" (i-MID) LCD screen in the center of the dashboard located to the right of the digital speedometer (MPH) and equipped with steering wheel buttons, the procedure is a bit different. Turn the ignition key to the "On" position but do not start the engine. Press the "Menu" button and navigate using the UP arrow to "Vehicle Information". Hit the "Select" (Enter) button in the center of the control pad. Navigate to "Maintenance Info" and press the "Select" button to view the next screen. Once you see the "Oil Life" meter, press and hold the "Select / Reset" (Enter) button in the center of the four arrows. Then you will see the question "Would you like to reset maintenance information?" - navigate down to the "Yes" option and press the "Select" (Enter) button in the center of the four arrows. Then you should see "Maintenance information has been reset". Be sure to record the oil change in your vehicle's service records. It would be a good idea to check your parking spot, garage or driveway for drops of fresh oil which may indicate a leak from the drain bolt or the new filter. For more, check out my other
2012-2015 Honda Civic DIY Repair & Maintenance Guides. |
||
| If you found this guide to be helpful,
please consider making a small donation by clicking on the PayPal.com
"Donate" button located to the right of this paragraph. Thank you!
(Note: I am not a registered charity. Donations are not tax deductible.) |