
Nissan Murano
License Plate Light Bulbs Replacement Guide
How to change a burnt out license plate
light bulb in the tailgate of a 3rd generation 2015 to 2018 Nissan Murano.

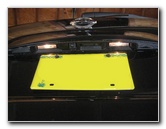
 2017 Murano License Plate |
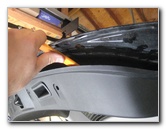
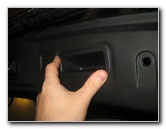
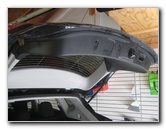 Open Tailgate Door |
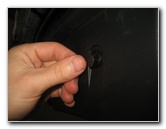
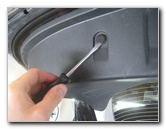 Pry Out Center of Fastener |
| This
automotive maintenance tutorial was specifically written to assist
owners of the third generation (2015, 2016, 2017, 2018 and probably
also the face lifted 2019 & 2020 model years) Nissan Murano SUV in
changing a burnt out license plate light bulb in the tailgate door. Owners of other Nissan and Infiniti vehicles such as the Rogue, Pathfinder, Armada, Versa, Sentra, Altima, Maxima, Leaf, 370Z, GT-R, Frontier, Titan, NV200, Q50, Q70, Q60, QX30, QX50, QX60, QX70 and QX80 may also find these DIY instructions to be helpful. The compatible replacement miniature wedge base light bulb part number is 2825 (also known as W5W). For brighter license plate lights, install 2825 LED bulbs. The tools needed to access and replace the bulbs include a small flathead screwdriver and a plastic pry bar tool. |
||
|
|
||
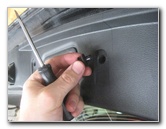
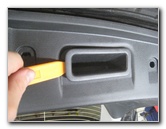
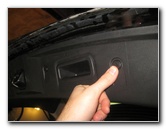
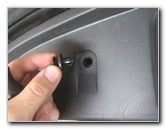 Pull Out Pop Rivet |
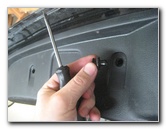 2nd Fastener |
 Release 3rd Fastener |
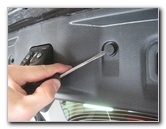
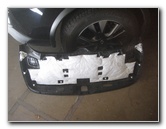
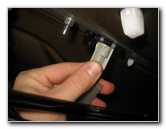
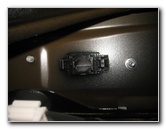
| The first step is
to open the tailgate door for the cargo area. Locate the round black plastic fasteners along the bottom edge of the plastic interior panel on the inside of the tailgate door. Gently pry out the center part of each fastener with a small flathead screwdriver. Then pry out the base of the fastener to remove it from the underside of the panel. |
||
 Remove 4th Fastener |
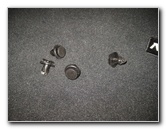 Four Fasteners Removed |
 Pry Off Interior Panel |
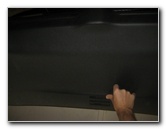
| Repeat the process
for the other fasteners along the bottom edge of the tailgate's interior
panel. Set the four fasteners aside in a safe place. Use a plastic pry bar tool to gently release the pop rivet friction fasteners along the bottom and both sides of the tailgate panel. |
||
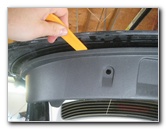
 Pry Out Pop Rivets |
 Remove Pull Handle |
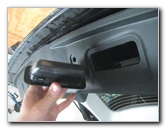 Pull Handle Removed |
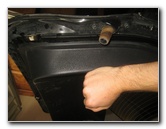
| Pry out the
rectangular shaped door pull handle from the bottom of the tailgate. Set the pull handle piece aside in a safe place. |
||
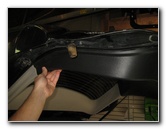
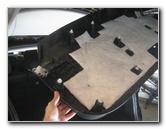 Remove Tailgate Panel |
 Interior Panel Removed |
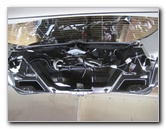 Metal Tailgate Exposed |
| Carefully remove the interior tailgate panel and set it aside in a safe place. | ||
|
|
||
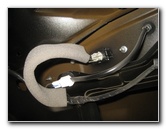 Bulb Sockets Exposed |
 |
 1/4 Turn Counterclockwise |
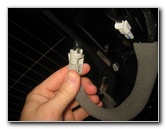
| Locate the two grey
plastic light bulb sockets. Rotate the bulb socket 1/4 turn in the counterclockwise direction before pulling it straight out of the housing. |
||
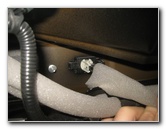
 Bulb Socket Removed |
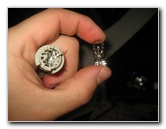 Pull Out Old Light Bulb |
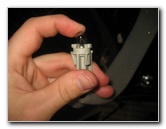 Push In New Light Bulb |
| Pull the old light
bulb straight out of the socket. Push a new number 2825 miniature wedge base light bulb straight into the socket. (It is also known as part number W5W.) If you would like to have brighter license plate lights, install some compatible 2825 LED bulbs. |
||
 Empty Bulb Housing |
 1/4 Turn Clockwise - Lock |
 Line Up Tailgate Panel |
| Insert the bulb
socket into the housing and rotate it 1/4 turn in the clockwise direction to
secure it into place. You may want to test the new license plate light bulbs before re-installing the tailgate panel. If you installed LED bulbs and they don't work at first, try pulling them out of the socket, rotating them 180 degrees and then push them back into the sockets. Some LED bulbs are polarized and will only work when installed in the correct orientation. To test the new bulbs, turn on the parking lights or press the "Unlock" button on the key fob to re-activate the exterior lights. |
||
 Firmly Tap In Pop Rivets |
 |
 Re-Insert Door Pull Handle |
| Line up the plastic
panel with the underside of the tailgate door. Firmly tap in the pop rivet friction fasteners all along the bottom edge and both sides of the panel. Pop the door pull handle back into place. |
||
 Re-Insert Plastic Fasteners |
 Pop In Center To Lock |
 Test New Light Bulbs |
| Re-insert the four
plastic fasteners and then push in the center of each fastener to secure it
into place. Be sure to record the bulb change in your vehicle's service records. For more,
please check out all of my
2015-2018 Nissan Murano DIY Repair & Maintenance Guides. |
||
| If you found this guide to be helpful,
please consider making a small donation by clicking on the PayPal.com
"Donate" button located to the right of this paragraph. Thank you!
(Note: I am not a registered charity. Donations are not tax deductible.) |