
Acura MDX
Rear A/C Transistor Replacement Guide
How to change the rear A/C blower motor
transistor (thermal resistor) in a 1st generation 2001 to 2006 Acura MDX.

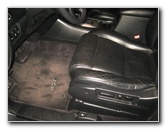 2006 MDX Driver Seat |
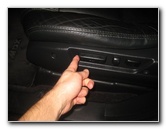 Move Power Seat Back |
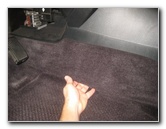
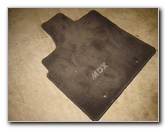 Remove Floor Mat |
| This
automotive maintenance tutorial was specifically created to assist
owners of the first generation (2001, 2002, 2003, 2004, 2005 & 2006)
Acura MDX in changing a faulty or "burnt out" rear air conditioning
blower fan motor power transistor (or "thermal resistor") unit or
just simply cleaning the old one. Owners of other Acura or Honda vehicles such as the RDX, ILX, TLX, RLX, TL, CL, RSX, RL, TSX, ZDX, NSX, Integra, Pilot, Accord, Civic, Fit, Clarity, CR-V, CR-Z, HR-V, Odyssey, Element and Ridgeline may also find these DIY instructions to be helpful. The OEM transistor in this 2006 Acura MDX Touring was part number Denso 077800-0870. A few other compatible replacement transistor assemblies with their part numbers are as follows: Acura 79330-S3V-A51, Honda 79330S3VA51, YXGood 79330-S3V-A51, American Horsepower Presto AHP-79330S3VA51 and ECCPP 79330-S3V-A51. The only tool needed to remove and replace the rear HVAC system's power transistor is a flathead screwdriver. |
||
|
|
||
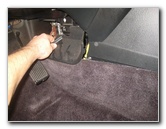
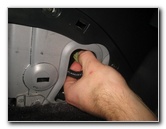
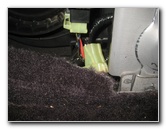
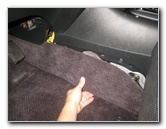
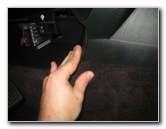
 Pull Off Kick Panel |
 Release Top Retaining Clip |
 Access Cover Removed |
| The first two steps
are remove the driver's floor mat and move the power seat all the way back. Gently pull off the carpeted kick panel located at the bottom of the center console. There are several metal and plastic retaining clips that need to be released. Set the access cover aside in a safe place. |
||
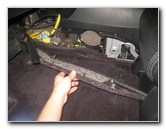
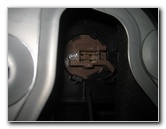
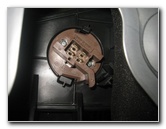
 Rear A/C Filter & Transistor |
 Clean Metal Filter Screen |
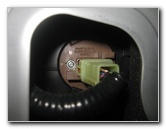 Brown Plastic Transistor |
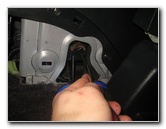
| If your rear A/C
system was making strange sounds such as a rattling, vibrating, screeching
or squealing noise when it was working, you should clean the metal filter
screen and the "squirrel cage" blower fan motor assembly. Check out my 2001-2006 Acura MDX Rear A/C Blower Motor & Filter Screen Cleaning Guide. The round brown plastic rear A/C power transistor is located behind the metal filter screen. It can be accessed through an opening in the silver metal center console frame. |
||
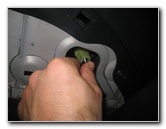
 Push In Release Tab |
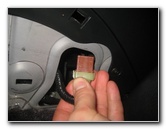 Pull Off Power Plug |
 View of Release Button |
| Push in the release button on the bottom side of the yellow / tan and brown plastic electrical connector before sliding it straight out of its socket. | ||
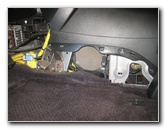
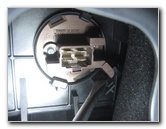
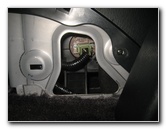
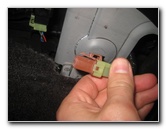 Move Electrical Connector |
 Tuck Out of the Way |
 Old Power Transistor |
| Tuck the electrical
connector out of the way. If you look closely, you'll notice that the old transistor is held in place by a grey plastic locking tab. |
||
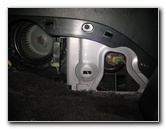
 Lock Tab - Bottom Right |
 Push Down Plastic Tab |
 Rotate CLOCKWISE |
| Use a flathead screwdriver to gently push down the lock tab until it is clear of the brown arm at the bottom right of the transistor. | ||
|
|
||
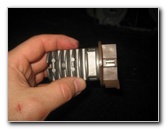
 1/4 Turn Clockwise - Unlock |
 Pull Out Old Transistor |
 Denso 077800-0870 |
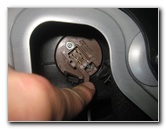
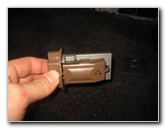
| Hold the plastic
lock tab down with one hand and rotate the old transistor about 1/4 turn
with the other hand in the CLOCKWISE direction. (Do not turn the transistor in the counterclockwise direction. Many automotive parts and light bulb sockets are removed in the counterclockwise direction and then installed in the clockwise direction, so this procedure is the opposite of the usual automotive DIY steps.) The OEM (original equipment manufacturer) part number in this 2006 Acura MDX Touring was a Denso 077800-0870. (Some MDX or Pilot owners have had luck opening the old transistor, checking it with a multimeter and replacing a thermal fuse inside the unit. It seems like new generic transistors are relatively inexpensive, so I won't be exploring that option.) |
||
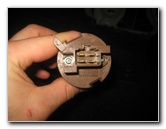
 Inspect Old Unit |
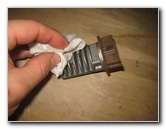 Clean Off Dust & Debris |
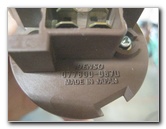 Original Part Number |
| The rear A/C in our MDX was still working properly, so I just cleaned off the dust and lint on the ribbed area. | ||
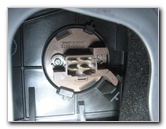
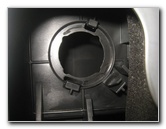 Transistor Housing Socket |
 Slide In New Transistor |
 1/4 Turn Counterclockwise - Lock |
|
I recommend buying the XA 79330-S3V-A51 blower motor transistor since it has excellent reviews on Amazon. Slide the new transistor straight into the housing with the brown plastic arm pointing down towards the ground. Rotate the new transistor approximately 1/4 turn in the COUNTERCLOCKWISE direction to secure it in place. Double check that the new unit is securely in place with the brown plastic arm locked between the two black plastic tabs. |
||
 Electrical Connector |
 Push On Power Plug |
 Power Plug Replaced |
| Push the electrical
connector straight into its socket on the new transistor until it clicks
securely into place. Double check that the power plug is secure. |
||
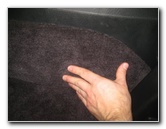
 Carpeted Trim Cover |
 Plastic Tab - Front Edge |
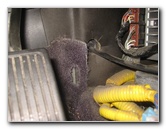 Slot - Carpet Liner |
| Locate the plastic tab on the front edge of the kick panel and its corresponding slot on the carpet liner near the accelerator (gas) pedal. | ||
 Re-Insert Tab In Slot |
 Push In Retaining Clips |
 Secure Rear Fasteners |
| Re-insert the tab
on the front edge of the access panel into its slot. Line up the metal and plastic retaining clips on the back side of the panel with their slots. Push on the kick panel to secure it in place. |
||
 Center Console Panel Replaced |
 Rear of Cover Secured |
 Replace Floor Mat |
| Double check that
the friction fasteners along the front, middle and rear of the kick panel
are secured. Replace the floor mat and push the two hooks through their holes near the rear edge to make sure the mat doesn't slide forward, bunch up under the brake and/or accelerator pedal and inhibit your driving. Be sure to record the transistor change in your SUV's service records. For more,
please check out all of my
2001-2006 Acura MDX DIY Repair & Maintenance Guides. |
||
| If you found this guide to be helpful,
please consider making a small donation by clicking on the PayPal.com
"Donate" button located to the right of this paragraph. Thank you!
(Note: I am not a registered charity. Donations are not tax deductible.) |