
Chrysler 300
Engine Air Filter Replacement Guide
How to change the engine air filter in a
2nd generation 2011 to 2017 Chrysler 300 with the Pentastar 3.6L V6 motor.

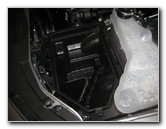
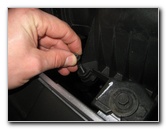
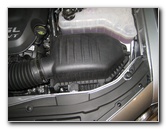
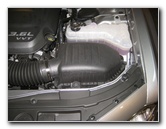 2016 300 Engine Air Box |
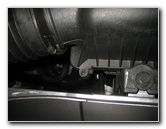 Front Left Screw |
 Loosen Counterclockwise |
| This
automotive maintenance tutorial was specifically written to assist
owners of the second generation (2011, 2012, 2013, 2014, 2015, 2016
& 2017) Chrysler 300, 300C or 300S sedan in cleaning or changing
the engine air filter element for the Pentastar 3.6 liter V6 motor. Owners of other Chrysler, Dodge, Jeep and RAM vehicles such as the Town & Country, 200, Pacifica, Avenger, Charger, Journey, Challenger, Dart, Durango, Magnum, Grand Caravan, Grand Cherokee, Renegade, Wrangler, Compass, Liberty, Patriot, ProMaster, 1500 and C/V Tradesman minivan may also find these DIY instructions to be helpful. A few compatible replacement air filters with their part numbers are as follows: Fram CA11257, K&N 33-2460, AEM 28-20460, Ecogard XA6167, Cleenaire EAF1746, Purolator A36167, Hastings AF1488, Chrysler 4861746AB, Champion CAP11052 and Premium Guard PA6167. To remove the air box cover, you'll need either an 8mm socket with an extension bar and a 1/4" drive ratcheting wrench, a Phillips head screwdriver or a flathead screwdriver. |
||
|
|
||
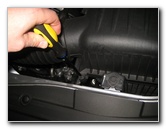
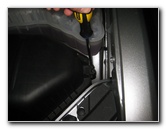
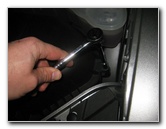
 Remove Front Left Screw |
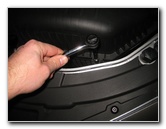 Loosen Front Right Screw |
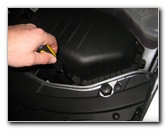 Using Flathead Screwdriver |
| The first two steps
are to open the hood and then move to the right (driver) side of the engine
bay. The engine air box is located just behind the driver side headlight assembly and in front of the coolant overflow tank. To remove the top half of the air box, remove the three screws by turning them counterclockwise. You can use either an 8mm socket, a flathead screwdriver or a Phillips head screwdriver. There are two screws on the front edge (one on the left, another on the right side) and the third screw is on the far right corner. |
||
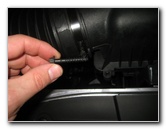
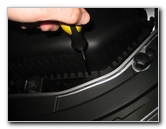
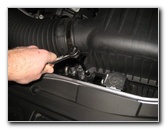
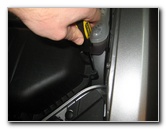 Remove Right Side Screw |
 Three Screws Removed |
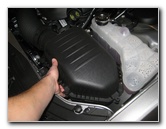 Lift Off Air Box Cover |
| Set the three
screws aside in a safe place. Pull up the top half of the air box to access the old filter. |
||
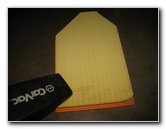
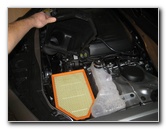 Old Filter Exposed |
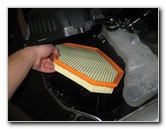 Lift Out Old Air Filter |
 Old Filter Removed |
| Lift the old air filter out of the bottom half of the box. | ||
|
|
||
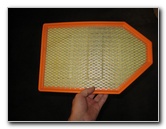
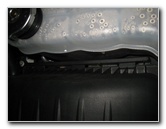
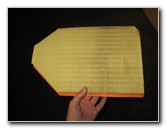 Inspect Both Sides |
 Clean With Vacuum |
 Clean Bottom Air Box |
| Inspect both sides
of the old filter.
If the old filter is dark grey or black and clogged with dirt, dust, hair, insects, leaves, twigs, soot, pollen and other debris, it should be replaced with a new element. I recommend buying the Fram CA11257 engine air filter since it has excellent reviews on Amazon. If the old filter is relatively clean, just tap out the large debris and remove any fine dust with a vacuum cleaner. If your vacuum cleaner has a crevice attachment, clean out any sand or debris in the bottom half of the air box. |
||
 Install New Air Filter |
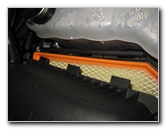 Line Up Three Tabs & Slots |
 Slide Tabs In To Slots |
| Lower the new air
filter in to the bottom half of the air box with the pleats facing down and
the metal wire mesh facing up towards you. Line up the three plastic tabs on the rear edge of the air box cover with the slots on the bottom half. Lower the air box cover and slide the tabs back in to their slots. |
||
 Spin In Three Screws |
 Tighten Clockwise |
 Tighten With Screwdriver |
| Spin in the three
screws a few turns by hand so that they don't fall down in to the engine
bay. Tighten the screws in the clockwise direction with the screwdriver or an 8mm socket and a 1/4" drive ratcheting wrench. |
||
 Or Use 8mm Socket |
 Tighten 3rd Screw |
 Engine Air Filter Replaced |
| Try to avoid over
tightening the three screws to prevent from cracking the plastic air box
housing. Be sure to record the engine air filter change in your vehicle's service records. For more, check out all of my
2011-2017 Chrysler 300 DIY Repair & Maintenance Guides. |
||
| If you found this guide to be helpful,
please consider making a small donation by clicking on the PayPal.com
"Donate" button located to the right of this paragraph. Thank you!
(Note: I am not a registered charity. Donations are not tax deductible.) |