
Dodge
Challenger Engine Air Filter Replacement Guide
How to clean or change the engine air
filter element in a 3rd generation 2008-2015 Dodge Challenger with photos.

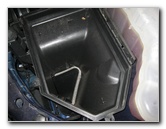
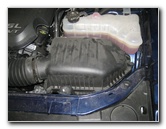
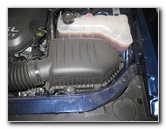 2015 Challenger Engine Air Box |
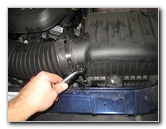
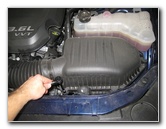 Loosen Front Left Screw |
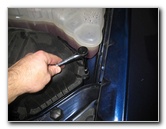
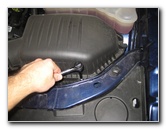 Front Middle Screw |
| This
automotive maintenance tutorial was specifically written to assist
owners of the third generation (2008, 2009, 2010, 2011, 2012, 2013,
2014, 2015 & possibly also the 2016 model year) Dodge Challenger in
cleaning or changing the engine air filter element. Owners of other Chrysler, Dodge and RAM vehicles such as the Town & Country, 300, 200, Avenger, Charger, Journey, Dart, Durango, Grand Caravan, and Ram C/V Tradesman minivan may also find these DIY instructions to be helpful. A few compatible replacement filters for the 2008, 2009 & 2010 model years are as follows: Fram CA9838, K&N 33-2295, Wix 42843, Hastings AF1298, Mopar 5019002AA, Purolator A35560, Mahle Original LX 3075 and Pentius PAB9838. Some compatible filters for the 2011-2016 model years include the following: Fram CA11257, Wix 49746, Ecogard XA6167, Pentius PAB11257, Hastings AF1488, Purolator A36167 and K&N 33-2460. The tools needed to complete this procedure include an 8mm socket with a 1/4" drive ratchet or a Phillips head screwdriver. |
||
|
|
||
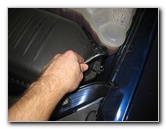 Loosen 8mm Side Screw |
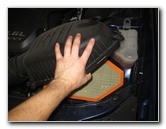 Lift Air Box Cover |
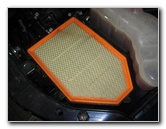
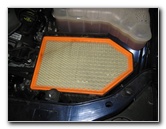 Old Air Filter In Box |
| The engine air box
is located at the front right (driver) side of the engine bay just in front
of the coolant overflow recovery reservoir. Loosen the three screws along the front edge by turning them counterclockwise with an 8mm socket and 1/4" drive ratcheting wrench or you could instead use a Phillips head screwdriver. The screws will remain attached to the air box cover. Lift the top half of the air box off the lower half. |
||
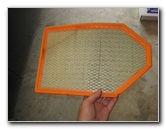 Inspect Both Sides |
 Clean With Vacuum |
 Clean Out Bottom Half |
| Inspect both sides
of the old filter. If the old filter is relatively clean, tap out the large debris and remove any fine dust with a vacuum. If the old filter is dark grey or black and clogged with dirt, dust, hair, insects, leaves, oily exhaust soot, twigs and pollen, it should be replaced with a new element. I recommend buying either the Fram CA9838 (2008-2010 model years) or the Fram CA11257 (2011-2016 model years) engine air filters since they have excellent reviews on Amazon. Clean out any sand or debris in the bottom half of the air box. |
||
|
|
||
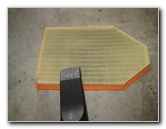
 Insert New Air Filter |
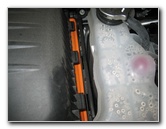 Line Up 3 Tabs With Slots |
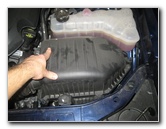 Push On Air Box Cover |
| Lower the new
filter in to the lower half of the air box with the pleats facing down and
the wire mesh facing up towards you. Line up the three plastic tabs on the rear edge of the air box cover with their corresponding slots on the bottom half of the box. Slide the tabs in to the slots and push the top half of the air box down in to place. |
||
 Tighten 8mm Screws |
 Turn Clockwise |
 Engine Filter Replaced |
| Tighten the three
8mm screws by turning them in the clockwise direction with the socket and
ratcheting wrench or a Phillips head screwdriver. Double check that the two halves of the air box are flush together with no parts of the new filter visible at the edges. For more,
check out my other
2008-2015 Dodge Challenger DIY Repair & Maintenance Guides. |
||
| If you found this guide to be helpful,
please consider making a small donation by clicking on the PayPal.com
"Donate" button located to the right of this paragraph. Thank you!
(Note: I am not a registered charity. Donations are not tax deductible.) |