
Dodge Charger
Tail Light Bulbs Replacement Guide
How to replace the brake, turn signal and
reverse bulbs in the tail light assembly of a 2006-2010 Dodge Charger.

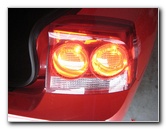
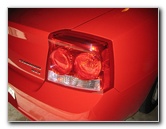 Dodge Charger Tail Light |
 First Wing Nut In Trunk |
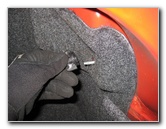 Remove Wing Nut |
| This
automotive "how-to" guide was specifically written to assist owners
of the 2006-2010 Dodge Charger in replacing the brake (stop),
reverse (back up) and turn signal bulbs in the tail light assembly. Owners of other Dodge or Chrysler vehicles such as the 300C, Magnum, Challenger, Caliber, Journey, Avenger, Nitro, Durango, Grand Caravan, 200 and Town & Country minivan may also find this guide to be useful. Replacement light bulbs from Sylvania and other manufacturers with their respective part numbers are as follows: brake light bulb # 3057, rear turn signal light bulb # 3057, and reverse light bulb # 921. No tools are needed to replace any of the bulbs in the tail light assembly of a 2006, 2007, 2008, 2009 or 2010 Dodge Charger. |
||
|
|
||
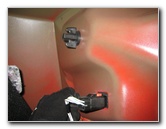 2 Other Wing Nuts |
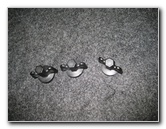 3 Wing Nuts Removed |
 Pull Off Tail Light Assembly |
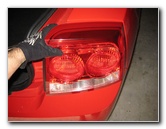
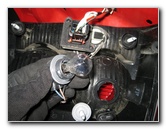
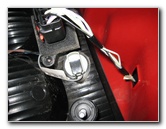
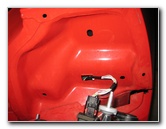
| The first steps are
to open the trunk and locate the one exposed black plastic wing nut or
"thumb screw" sticking out of the trunk carpet on the opposite side of the tail
light assembly.
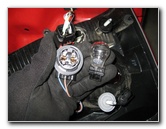
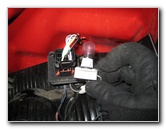
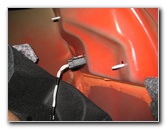
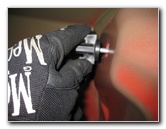
Remove the first wing nut by turning it counter clockwise until it comes off the screw end. Then peel back the trunk carpet to reveal the other two wing nuts that hold the tail light assembly to the car. Remove those two wing nuts by turning them counter clockwise. Keep one hand on the tail light assembly as you take off the 3rd and final wing nut to prevent it from falling down and damaging the paint on the bumper. |
||
 Rear of Tail Light |
 1/4 Turn Counter Clockwise |
 |
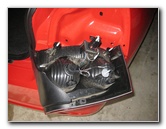
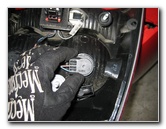
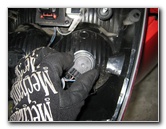
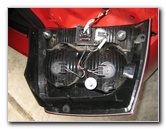
| Gently pull the
tail light assembly off the rear of the car and set it down on the bumper.
Put a rag or towel between the bumper and the tail light to help prevent scratches on the lip of the bumper. |
||
 Pull Out Bulb & Socket |
 Pull Bulb Straight Out |
 |
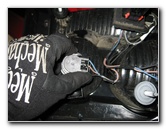
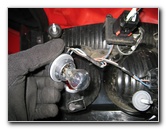
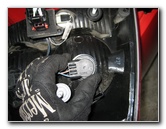
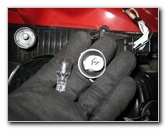
| To remove any of the three light bulb sockets from the tail light, turn the base of the socket 1/4 turn counter clockwise and pull it straight out. | ||
|
|
||
 |
 |
 # 3057 Light Bulb |
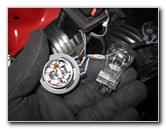
| To remove any of
the three light bulbs from their sockets, pull the bulb straight out of the
socket.
If you have trouble removing the bulbs, try gently wiggling them while pulling. |
||
 |
 |
 |
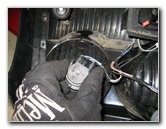
| Depending on which
bulb you need to replace, push in a new #
3057 (brake & turn signal) or #
921 (reverse) light bulb straight into the socket. If you would like to have brighter tail lights, choose some compatible 3057 LED or 921 LED bulbs. |
||
 Reverse Light Bulb |
 # 921 Back Up Bulb |
 Pull Bulb Straight Out |
| Insert the new bulb into the tail light assembly and rotate the socket 1/4 turn clockwise to secure it in place. | ||
 Light Bulb(s) Replaced |
 Line Up Screws & Holes |
 Tail Light Screws In Trunk |
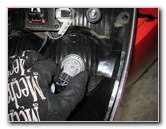
| To re-install the
tail light assembly, line up the screw ends and spikes on the rear of the
assembly with the corresponding holes on the rear of the vehicle. Push the tail light assembly back on to the rear of the car until it rests flush with the painted body panels. |
||
 Tighten Thumb Screws |
 Replace Carpet & Wing Nut |
 Testing New Tail Light Bulbs |
| Screw on the two
wing nuts at the corner of the trunk by turning them clockwise.
Then push the trunk carpeting back in place and secure it with the 3rd wing nut. Test the new tail light bulb(s) by turning on the parking lights, activating the hazard signals and having someone step on the brake pedal while putting the transmission in reverse. Be sure to record the bulb change in your vehicle's service records. For more, check out my
Dodge
Charger Maintenance & Repair Guides page. |
||
| If you found this guide to be helpful,
please consider making a small donation by clicking on the PayPal.com
"Donate" button located to the right of this paragraph. Thank you!
(Note: I am not a registered charity. Donations are not tax deductible.) |