
Dodge Journey
Fog Light Bulbs Replacement Guide
How to change a burnt out fog light bulb
in the front bumper of a 1st generation 2009 to 2014 Dodge Journey SUV.

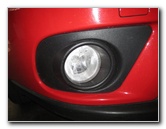 2013 Journey Fog Light |
 Black Wheel Well Liner |
 Pull Out Plastic Fasteners |
| This
automotive maintenance tutorial was specifically written to assist
owners of the 1st generation (2009, 2010, 2011, 2012, 2013 & 2014)
Dodge Journey SUV in changing a burnt out fog light bulb in the
front bumper. Owners of other Chrysler, Dodge and RAM vehicles with similar fog light housings such as the Town & Country, 300, 200, Avenger, Challenger, Charger, Dart, Durango, Grand Caravan, RAM 1500 and Ram C/V Tradesman may also find these DIY instructions to be helpful. A replacement fog light bulb for the 2010 to 2014 model years is part number 2504 (or Phillips 12276 PSX24W). The bulb is available from manufacturers such as Sylvania, GE, ACDelco, Philips and PIAA. (The 2009 Journey uses the # 9145 fog light bulbs.) The tools needed to access the fog light bulbs include a flathead screwdriver and/or a pair of needle nose pliers. |
||
|
|
||
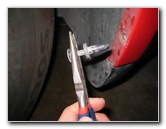
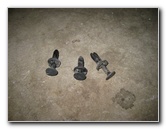 3 Fasteners Removed |
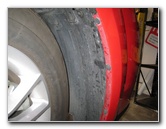
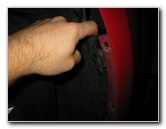 Pull Back Wheel Well Liner |
 Look In To Fog Light |
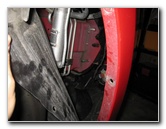
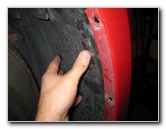
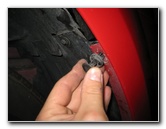
| Move to the front
wheel by the burnt out fog light bulb that you would like to replace. Remove the three black plastic pop rivet fasteners along the outer edge of the wheel well liner or "splash guard". To remove each fastener, first pry out the round center piece to unlock it and then pull out the entire fastener. Carefully pull back the wheel well liner to access the fog light bulb. |
||
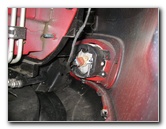 Rear of Fog Light Housing |
 Squeeze Sides - Pull Out Bulb |
 Fog Light Bulb Socket |
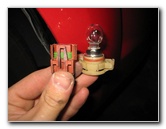
| Reach in and
squeeze the two light tan colored plastic retaining clips on the sides of
the old bulb to release it from the socket. (Do not pry out the clips on the old bulb, instead push them in towards each other.) |
||
|
|
||
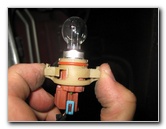
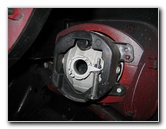
 Disconnect Power Plug |
 Push In New Fog Light Bulb |
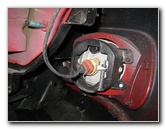 Push On Electrical Connector |
| Press the release
tab on the power plug and disconnect it from the base of the old bulb. Push a new # 2504 bulb straight in to the socket until the two retaining clips click securely in to place. The 2504 bulb is also known as PSX24W such as the Philips 12276. (The 2009 model year Journey uses a # 9145 bulb.) Push the power plug straight on to the base of the new bulb until it clicks securely in to place. |
||
 Replace Plastic Splash Guard |
 Push In Pop Rivet Fasteners |
 3 Fasteners Replaced |
|
Push the black plastic wheel well liner back in to place. Re-insert the three black plastic fasteners in to their corresponding holes and then pop the center piece down to lock them in place. Test the new fog light bulbs by turning on the headlights and activating the fog light switch.
For more, check out my other
Dodge Journey Repair & Maintenance Guides. |
||
| If you found this guide to be helpful,
please consider making a small donation by clicking on the PayPal.com
"Donate" button located to the right of this paragraph. Thank you!
(Note: I am not a registered charity. Donations are not tax deductible.) |