
Ford Mustang Map Light Bulbs
Replacement Guide
How to change a burnt out map light bulb
in the overhead console of a revised 5th generation 2010 to 2014 Ford Mustang.

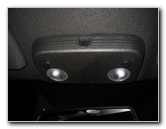 2012 Mustang Map Lights |
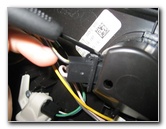
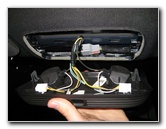
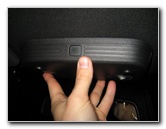
 Gently Pry Off Housing |
 2 Metal Friction Fasteners |
| This
automotive maintenance tutorial was specifically written to assist
owners of the updated fifth generation (2010, 2011, 2012, 2013 &
2014) Ford Mustang in changing a burnt out overhead map light bulb. Owners of the earlier 5th generation Mustangs from 2005 to 2009 and possibly the 4th generation 1994 to 2004 models with similar overhead consoles may also find these DIY instructions to be helpful. A replacement map light bulb is part number 168 from manufacturers such as Sylvania, GE, Eiko, and PIAA. You may also use any other 5 watt miniature wedge base bulbs such as the # 2825, W5W, 194 or an LED unit. The only tool needed to change the bulbs is a small flathead screwdriver used to pry the housing out of the headliner. |
||
|
|
||
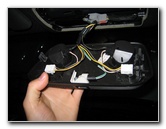
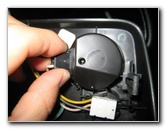
 Push In Retaining Clips |
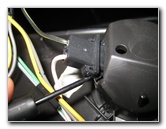
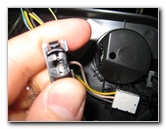
 Release Bulb Socket |
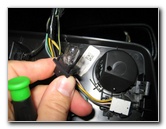 Bulb Socket Removed |
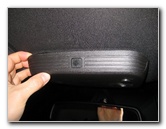
| The overhead map
lights housing is held in place to the headliner by two metal friction
fasteners. Gently pull the housing straight down with your fingers or pry each side loose with the flathead screwdriver. Squeeze in the two sides of the black plastic bulb socket or push the clips in with the flathead screwdriver to release them. Pull the bulb socket straight out of the housing. |
||
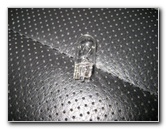 Pull Out Old # 168 Bulb |
 Map Light Bulb Socket |
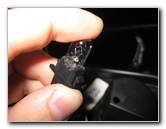 Push In New Bulb |
| Pull the old bulb
straight out of the socket and push in a new #
168 bulb. You can also use any other 5 watt miniature wedge base bulb such as the number W5W, 2825, 194, 158 or a compatible LED unit. |
||
|
|
||
 Re-insert Bulb Socket |
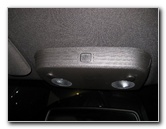
 Raise Console To Roof |
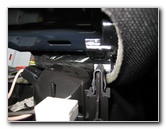 Line Up Metal Fasteners |
| Push the socket
back in to the housing until the two clips click securely in to place. Raise the console up to the headliner and line up the two metal friction fasteners with the corresponding holes in the roof. |
||
 Push Housing In Place |
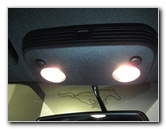 Test New Map Light Bulbs |
 Console Flush To Headliner |
| Carefully push the
housing back in to place. Check that the fasteners are fully inserted and
that there are no gaps between the headliner and map light housing. Test the new map light bulbs by pressing the round black plastic "On/Off" buttons. For more,
check out my other
Ford Mustang Repair & Maintenance Guides. |
||
| If you found this guide to be helpful,
please consider making a small donation by clicking on the PayPal.com
"Donate" button located to the right of this paragraph. Thank you!
(Note: I am not a registered charity. Donations are not tax deductible.) |