
Chevrolet
Aveo 12V Automotive Battery Replacement Guide
How to change a dead 12 volt car battery
in the engine bay of a 1st generation 2007 to 2011 GM Chevy Aveo with pictures.

 Chevy Aveo 12V Car Battery |
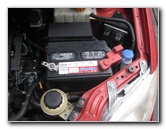
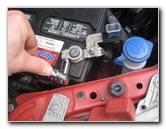
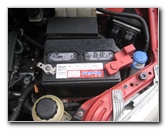
 Loosen Negative Terminal |
| This
automotive maintenance tutorial was specifically written to assist
owners of the revised first generation (2007, 2008, 2009, 2010 &
2011) GM Chevrolet Aveo sedan in changing a dead 12 volt car battery
in the engine bay. Owners of other General Motors vehicles such as the Buick Verano, Regal, LaCrosse, Cascada, Encore, Enclave, Envision, GMC Canyon, Sierra 1500, Terrain, Yukon, Denali, Savana, Spark, Sonic, Cruze, Malibu, Impala, Volt, Camaro, Corvette, SS, Trax, Equinox, Traverse, Tahoe, Suburban, Colorado, Silverado and Express may also find these DIY instructions to be helpful. The OEM battery is a "Group Size" 86. A few other compatible replacement batteries with their part numbers are as follows: Optima 8025-160 25, Odyssey 75/86-PC1230DT, EverStart MAXX-86, Super Start 86EXT, Duralast Gold 86FT-DLG, Valuegrade 86-630VG and Bosch 86-630B. The only tools needed to remove the old battery and install the new one include a 10mm socket with a 1/4" drive ratchet or a 10mm wrench. |
|
|
|
|
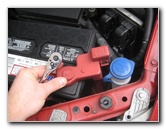
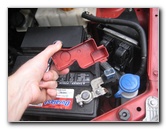 Pull Off Red Plastic Cover |
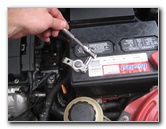
 Loosen Positive Terminal Nut |
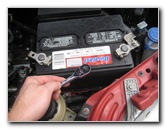
| Open the hood and
move to the right side of the engine bay. The 12 volt car battery is located just behind the power steering fluid reservoir and in front of the fuse box. First loosen the 10mm nut on the negative "-" terminal by turning it counterclockwise. Pull the negative terminal off the battery post, wrap it in a small towel and tuck it away on the side of the battery to help prevent accidental electrical contact. Then pull the red plastic cover off the positive terminal. Loosen the positive terminal nut by turning it counterclockwise with the 10mm socket and a 1/4" drive ratcheting wrench. |
|
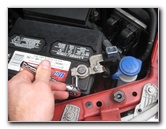
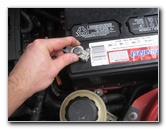
 Loosen 10mm Nut |
 Battery Hold Down Bar |
|
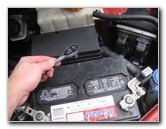
The battery hold down bar or "clamp" was missing on our Aveo. So I'm just pretending to remove it in the next few pictures. Loosen the two 10mm nuts on the battery hold down bar by turning them counterclockwise. |
|
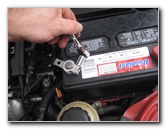
 Lift Off Battery Hold Down Bar |
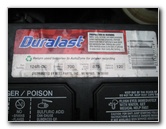 Duralast 124R-DL |
| Unhook the two "J"
bars and set the battery hold down clamp aside in a safe place. Gently pull the old 12 volt battery straight out of the engine bay. |
|
|
|
|
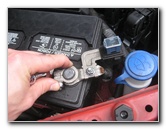 Push On Positive Terminal |
 Tighten 10mm Clockwise |
| Lower the new
battery down in to the engine bay. If you've had an issue with corrosion (white or blue powder) building up on the terminals or the battery posts, I'd recommend installing some felt anti-corrosion washers over the battery posts. Push the positive terminal on to the "+" battery post. Tighten the 10mm terminal nut by turning it clockwise until is is snug. |
|
 Replace Red Plastic Cover |
 Push On Negative Terminal |
| Close the red
plastic cover over the positive battery terminal. Then push the negative terminal on to the "-" battery post. |
|
 Tighten 10mm Nut |
 12V Battery Replaced |
| Tighten the
negative terminal nut by turning it clockwise with the
10mm socket and 1/4"
drive ratcheting wrench. Test the new 12 volt battery by starting the engine and turning on the headlights. For more,
check out my other
2007-2011 GM Chevrolet Aveo DIY Repair & Maintenance Guides. |
|
| If you found this guide to be helpful,
please consider making a small donation by clicking on the PayPal.com
"Donate" button located to the right of this paragraph. Thank you!
(Note: I am not a registered charity. Donations are not tax deductible.) |