
Honda Odyssey
Cabin Air Filter Replacement Guide
How to clean or change the A/C system's
cabin air filter in a 3rd generation 2005 to 2010 Honda Odyssey minivan.

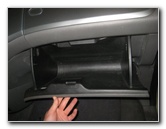
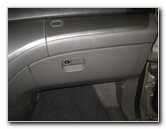 2008 Odyssey Glove Box |
 Open Glove Box - Empty Out |
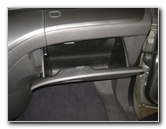
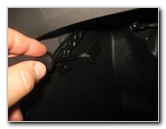
 Left Side - Damper Arm |
| This
automotive maintenance tutorial was specifically written to assist
owners of the third generation (2005, 2006, 2007, 2008, 2009 & 2010)
Honda Odyssey minivan in cleaning or changing the A/C system's cabin
air filter element in the HVAC blower motor housing. Owners of other Honda or Acura vehicles such as the Accord, Civic, Crosstour, CR-V, CR-Z, HR-V, Fit, Element, Insight, Pilot, Ridgeline, Clarity, Crosstour, Elysion, ILX, TSX, TLX, TL, RLX, RDX, NSX and MDX may also find these DIY instructions to be helpful. A few compatible replacement cabin air filters with their part numbers include the following: Fram CF10134, EPAuto CP134, TYC 800003P, Potauto MAP 1003C, K&N VF2001, Bosch 6029C, ACDelco CF3159 and Wix 24815. The only tool that might be necessary for accessing and replacing the cabin air filter is a plastic pry bar tool or a flathead screwdriver. |
||
|
|
||
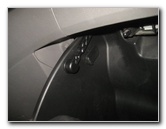
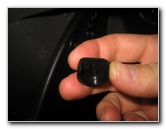
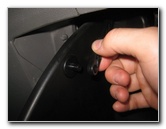
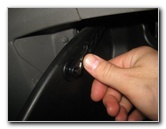
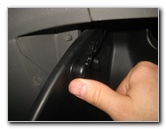
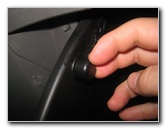 Pull Off Damper Arm Cap |
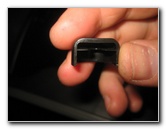
 Plastic Cover Removed |
 Slot - Locking Mechanism |
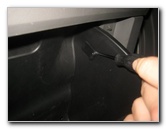
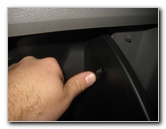
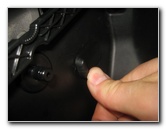
| The first few steps
are to sit in the front passenger seat, open the glove box and empty out the
contents. Then locate the small round black plastic cap on the left side of the glove box that covers the end of the damper arm. Gently pull the cap off towards yourself to unlock the damper arm. Set the plastic cap aside in a safe place. |
||
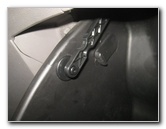 Damper Arm Released |
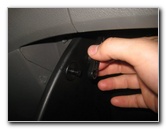 Pull Damper Arm Off Peg |
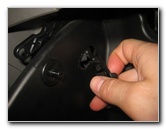
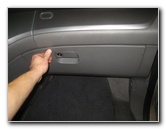
 Pry Out Side Stopper |
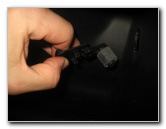
| Pull the glove box
damper arm off its mounting peg. Then use a plastic pry bar tool or a flathead screwdriver to gently pry out the front edge of the plastic side stopper assembly (located closest to you). |
||
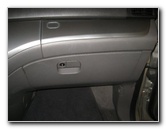
 Remove Side Stop |
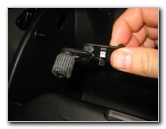 Rubber & Plastic Side Stop |
 Right Side Stop |
| Partially close the
glove box to release the tension from the side stopper before pulling it
straight out of its opening. Repeat the process to remove the side stop on the other side of the glove box. |
||
 Pry Out Side Stopper |
 Side Stop Removed |
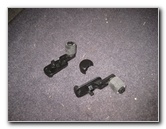 Glove Box Stops & Cap |
| Set the two glove box side stops aside in a safe place with the damper arm retaining clip. | ||
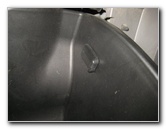
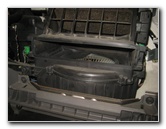
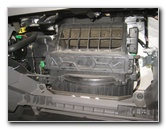
 Lower Glove Box |
 HVAC Blower Motor |
 Push In Release Clip |
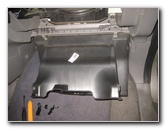
| Gently lower the
glove box away from the dashboard and down to the floor mat. Once the glove box is out of the way, you'll be able to see the HVAC blower motor housing and the rectangular filter access cover. |
||
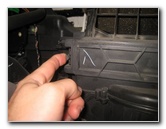
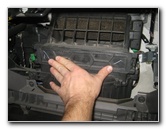
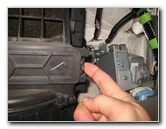 Right Side Retaining Clip |
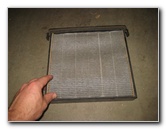
 Slide Out Filter Tray |
 Filter Tray Removed |
| Push in the tabs on
the left and right side of the filter tray to release it from its slot. Slide the filter tray straight out of the slot in the HVAC blower motor housing. |
||
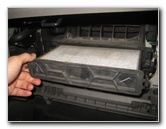
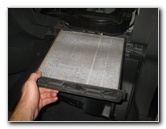
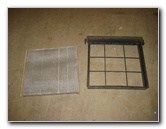
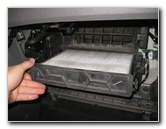
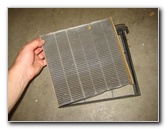 Remove Old Air Filter |
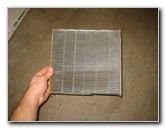 Old Cabin Filter Removed |
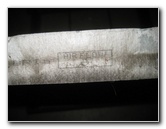
 Inspect Both Sides |
| Lift the old air
filter out of the black plastic frame tray. Inspect both sides of the old air filter. If the old filter is dark grey or black and clogged with dirt, dust, hair, pollen, soot, leaves, insects, twigs and other debris, it should be replaced with a new element. I recommend buying the Fram CF10134 cabin air filter since it has excellent reviews on Amazon. If you prefer to have a filter that can be cleaned and re-used many times, consider purchasing the K&N VF2001 cabin air filter. If the old filter is relatively clean, just tap out the large debris and remove any fine dust with a vacuum cleaner. |
||
|
|
||
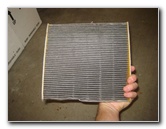
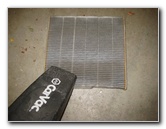 Clean With Vacuum |
 Old Filter & Tray |
 Air Flow Arrow |
| Check your new filter for an "Air Flow" arrow or an "UP" or "Down" indicator arrow. | ||
 Lower Filter Into Tray |
 Empty Cabin Air Filter Slot |
 Slide In Filter Tray |
|
Insert the new filter into the tray with the "Air Flow" arrow pointing down. If your wet/dry shop vacuum has a crevice attachment, consider cleaning out the inside of the blower motor housing and the white plastic "squirrel cage" rotor. Slide the filter tray straight into the slot. |
||
 Push In To Secure Clips |
 New Filter Installed |
 Raise Glove Box |
| Firmly push in the
filter tray until you hear or feel the two retaining clips "click" securely
into place. Raise the glove box up towards the dashboard. |
||
 Re-Insert Rubber Part |
 Snap In Side Stopper |
 Replace Left Side Stop |
| Partially close the
glove box to make room for the side stops. Re-insert the rubber part of the side stops in first. |
||
 Pop In Side Stop |
 Line Up Damper Arm |
 Push Damper Arm On Peg |
| Then swing the plastic part of the side stops closed and firmly snap them back into place. | ||
 Replace Plastic Clip |
 Close Glove Box |
 Cabin Air Filter Replaced |
| Push the hole at
the end of the damper arm over the plastic mounting peg on the left side
wall. Slide the round retaining cover forward on to the damper arm's mounting peg until it clicks securely into place. Replace the contents of your glove box and close the glove box to complete the job. Be sure to record the cabin air filter change in your vehicle's service records. For more, check out all of my
2005-2010 Honda Odyssey DIY Repair & Maintenance Guides. |
||
| If you found this guide to be helpful,
please consider making a small donation by clicking on the PayPal.com
"Donate" button located to the right of this paragraph. Thank you!
(Note: I am not a registered charity. Donations are not tax deductible.) |