
Kia Soul 12V
Automotive Battery Replacement Guide
How to change a dead 12 volt car battery
in the engine bay of a 1st generation 2009 to 2013 Kia Soul with pictures.

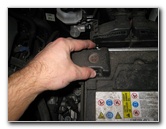
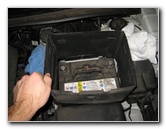
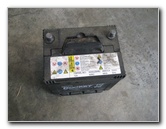
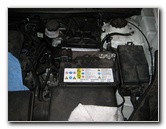
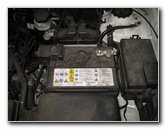 2013 Kia Soul 12V Battery |
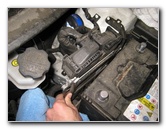
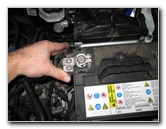
 Loosen 10mm Nut |
 Lift Off Negative Terminal |
| This
automotive maintenance tutorial was specifically written to assist
owners of the 1st generation (2009, 2010, 2011, 2012 & 2013) Kia
Soul in changing the 12 volt automotive battery in the engine bay. Owners of other Kia and Hyundai vehicles such as the Forte, Cadenza, Rio, Optima, Sedona, Sorento, Sportage, Sonata, Accent, Elantra, Veloster, Azera, Tucson, Santa Fe and Genesis may also find these DIY instructions to be helpful. A few compatible aftermarket Group Size 121 batteries with their part numbers include the following: EverStart MAXX-121R (Walmart), AutoCraft Gold 121R-1, Powerstride # 6121RMF and Odyssey PC1200MJT. The tools needed to replace the battery include a 10mm socket or wrench, a 12mm socket, and a 1/4" or 3/8" drive ratchet. I would also recommend wearing gloves and safety eyeglasses. |
||
|
|
||
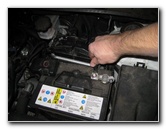
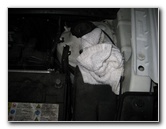 Cover Terminal With Rag |
 "+" Positive Terminal |
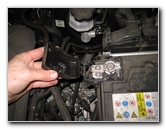 Lift Off Terminal Cover |
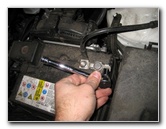
| The first step is
to loosen the nut on the "-" negative terminal on the right (driver side) of
the battery by turning it counter clockwise with the 10mm socket and
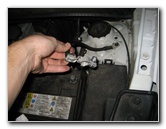
ratcheting wrench. Pull the negative terminal straight off the battery post, wrap it in a small towel and tuck it away on the side. Covering the terminal with a rag or glove will help prevent accidental contact with the battery posts. Then squeeze together the two release tabs on the "+" positive battery terminal cover and swing it open to the left. |
||
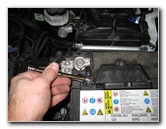
 Loosen Counter Clockwise |
 Pull Off Positive Terminal |
 Cover Positive Terminal |
| Loosen the nut on
the positive terminal by turning it counter clockwise with the 10mm socket
and ratcheting wrench. Pull the positive terminal straight off the battery post, wrap it in a rag and tuck it away on the side. |
||
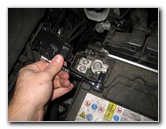
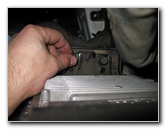
 Pull Off Battery Cover |
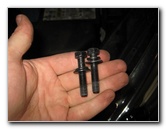
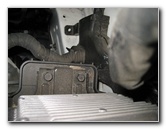 Two 12mm Bolts |
 Loosen Counter Clockwise |
| Lift the battery
cover (A.K.A. "shield" or "box") straight up off the old 12V battery. The old battery is held in place to the plastic battery tray by a metal clamp attached with two 12mm bolts. Loosen the two bolts by turning them counter clockwise with a 12mm socket and ratcheting wrench. |
||
|
|
||
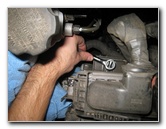
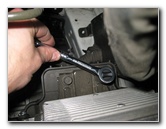 Battery Clamp Bolts |
 Two 12mm Bolts Removed |
 Pull Back Hold Down Clamp |
| You may not have to
entirely remove the two bolts from the hold down clamp in order to lift out
the old battery.
I had some trouble getting the two bolts back in later on, so it might be easier to loosen them just enough to release the battery. |
||
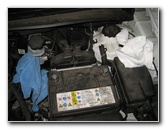
 Clamp Moved Off Battery |
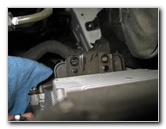
 Lift Out Old 12V Battery |
 Rocket # GB60AL |
| Once the two hold
down bracket bolts have been loosened or removed, you can carefully lift the
old battery out of the engine bay. Be sure to either bring your old battery with you to the store to avoid having to pay a "core" or "disposal" fee when you purchase the new battery. The auto parts store or Walmart will have the old battery properly recycled. The OEM battery in this 2013 Kia Soul was a Rocket brand part number GB60AL (CMF60L-BCI) with 550 CCA (cold cranking amps). |
||
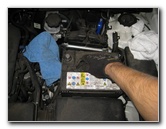
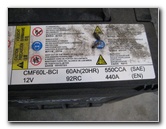 12V 550CCA 440A |
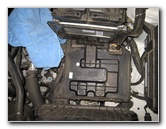 Battery Tray |
 Lower In New Battery |
| Check that the
plastic battery tray is clean of any large debris that might cause the new
battery to not rest flat. Carefully lower the new battery down on to the tray with the "+" positive side on the left and the "-" negative side on the right (driver side). Lower the protective cover down over the new battery. (I forgot this step and had to replace it later.) |
||
 Replace 12mm Bolts |
 Replace Positive Terminal |
 Tighten 10mm Clockwise |
| Secure the rear
bottom edge of the new battery with the metal hold down clamp. Spin in the two bolts by hand a few turns to prevent them from becoming cross threaded. Tighten the bolts by turning them clockwise with the 12mm socket and ratcheting wrench. If you've had a problem with corrosion build up on the battery posts, consider using some felt anti-corrosion washers. Push the "+" terminal over the positive battery terminal on the left side of the new battery. Tighten the terminal by turning the nut clockwise with the 10mm socket and ratcheting wrench. |
||
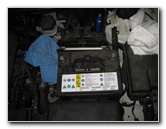
 Replace "-" Terminal |
 Tighten 10mm Nut |
 12V Battery Replaced |
| Push the "-"
terminal over the negative battery post and tighten the 10mm nut in the
clockwise direction. Test the new battery by starting the engine. If the car won't start, try removing the terminals, clean the battery posts and terminals with a wire brush before re-attaching them. For more, check out my other
Kia Soul DIY Maintenance Guides. |
||
| If you found this guide to be helpful,
please consider making a small donation by clicking on the PayPal.com
"Donate" button located to the right of this paragraph. Thank you!
(Note: I am not a registered charity. Donations are not tax deductible.) |