
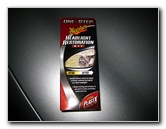
Meguiar's
Headlight Restoration Kit Review & Guide
A user review of the Meguiar's plastic
headlight buffing restoration kit including before and after pictures of two
cars.

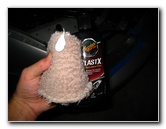
 Meguiar's Restoration Kit |
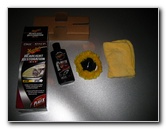 PlastX Plastic Cleaner/Polish |
 Painter's Tape |
| The
headlights on my 2001 Pontiac Grand Prix GTP and my girlfriend's 2005 Toyota
Corolla S were starting to look rather dull and caused the cars to
appear older than their actual age. To remedy the situation, I purchased the Meguiar's Headlight Restoration Kit at Pep Boys for $24.99 plus tax. I'd recommend also picking up some painter's tape to protect the car's painted bodywork around the headlight. I considered buying one of the cheaper options such as the bottle of Turtle Wax headlight restorer or a generic brand buffing compound but neither one came with a buffing pad drill attachment. The power drill polishing and buffing pad is absolutely required unless your car's headlights have only minor hazing. It would have taken me hours to achieve the results below without it. |
||
|
|
||
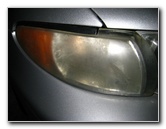
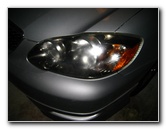
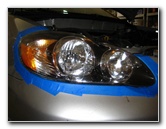
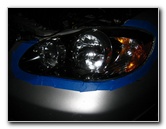
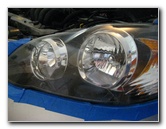
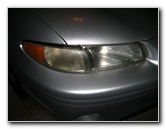 2001 Grand Prix Passenger |
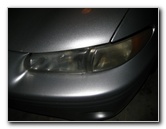 Before Driver Side |
 Turn Signal Housing |
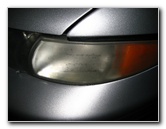
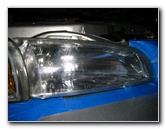
| I started off by taking some "before" pictures of the faded and cloudy headlights on my nearly 10 year old 2001 Pontiac Grand Prix GTP sedan. | ||
 Driver Headlight Housing |
 Passenger Headlight Housing |
 Passenger Turn Signal |
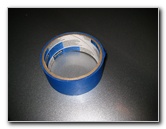
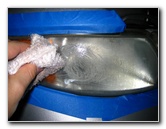
| Then I raised the hood of the car for easier access to the headlights and wrapped painters tape all around the surrounding body work to protect the paint. | ||
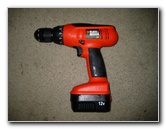 Cordless Black & Decker Drill |
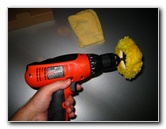 Buffing Pad Attached |
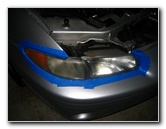 Painter's Tape Protecting |
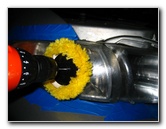
| At first I tried
using my battery powered Black & Decker drill with the Meguiar's polishing
pad to restore the headlights.
The Meguiar's Headlight Restoration Kit directions recommended using a cordless drill for better mobility but I found that my old wired drill had a lot more power and stamina. |
||
 Polishing Compound |
 Rubbing By Hand |
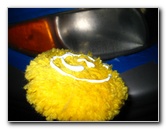 Polisher On Buffing Pad |
| I attempted to apply the PlastX plastic polishing compound with a rag first, but found that it just wasted too much of the product doing it that way. Instead, I switched to applying the buffing compound directly to the drill pad or on the headlight itself. | ||
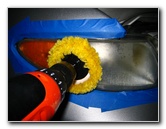 |
 Polishing With Cordless Drill |
 Switched To Wired Drill |
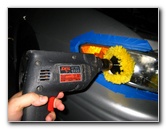
| The directions
recommend starting the drill off slowly to prevent the rubbing compound
liquid from spraying all over the place and also to stop the buffing pad
from making contact with anything other than the headlight.
It also helps to hold the drill at an angle with minimal pressure for better control. Pushing too hard or placing the buffing bad straight on the headlight just makes it very difficult to move it smoothly across the headlight. |
||
|
|
||
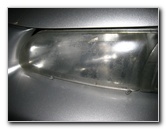
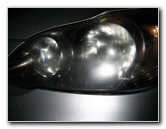
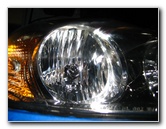
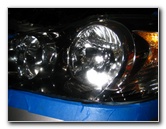
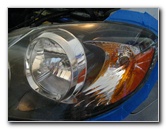
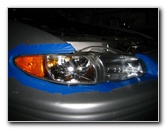 "After" Passenger Side |
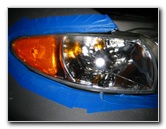 |
 "After" Driver Side |
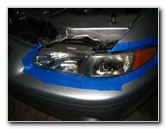
| It took me about
20-30 minutes of buffing per headlight to achieve the results above on my
2001 Pontiac Grand Prix GTP.
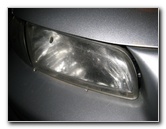
I was impressed with how well the Meguiar's Headlight Restoration Kit was able to wipe years of haziness and cloudiness from the surface of my decade old headlights. Unfortunately, some of the blemishes on the turn signal housing were impossible to remove. It was also harder working on my car's headlights due to their narrow rectangular shape and several sharp plastic points. |
||
 |
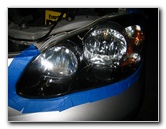
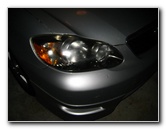 2005 Toyota Corolla Before |
 Passenger Side Before |
| Next I tackled the headlights on our 2005 Toyota Corolla, which I knew would be far easier since they are large and flat with zero protrusions to get in the way. | ||
 Corolla Driver Side Before |
 Driver Side Before |
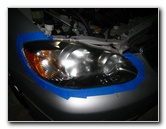 Painters Tape On Body |
| I followed the same procedure for the Corolla and raised the hood before wrapping painter's tape all around the edges of the headlight to protect the paint from the buffing pad. | ||
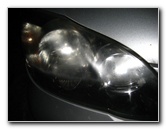
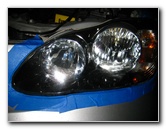
 Hazy Headlight Lens |
 Passenger Side "After" |
 Passenger Side Lens |
| I skipped trying to
use the cordless drill since the battery was already depleted from using it
on my Grand Prix's headlights and went straight for the more powerful corded
drill.
I was able to buff the two Corolla headlights in about 10 minutes each using much less PlastX plastic polish since they only had about 5 years of wear on them. |
||
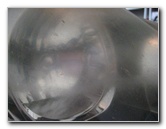
 Driver Side "After" |
 Driver Side Lens Close Up |
 |
| The Corolla's
headlights didn't look "brand new" after using the
Meguiar's
Headlight Restoration Kit on them, but I'd say they went from looking 6 years old to 6
months old.
Buffing away the cloudy appearance from the headlights made a dramatic difference in the apparent age of the vehicle. If you're not feeling too proud of your older car, I'd highly recommend using a headlight restoration kit. I was originally looking to buy a Mothers PowerBall Headlight Restoration Kit ($25), which includes two sandpaper pads to use on especially worn headlights. I think that using the sandpaper pads would have helped cut down the polishing time on my Pontiac Grand Prix's 10 year old headlights. Tips From Dennis Via Email - There is a UV coating over the
face of the headlight lens. Polishing the lens smoothes the plastic but also
removes this protective coating (basically a clear coat). |
||
 Huge Improvement! |
 |
 |
| For more of my
automotive product reviews or how-to guides, click on the following links:
Zaino Bros Show Car Polish Review,
WeatherTech FloorLiner Mats Review,
How To Stop Headlight & Tail Light Condensation,
Sunforce Solar Car Battery Maintainer Review,
Corroded Car Battery Terminal Replacement Guide,
Garmin Nuvi 260W GPS Review,
Automotive Interior Carpet Replacement Guide,
Falken Ziex ZE-512 Tire Review,
Fuzion ZRi Tire Review,
K&N Air Filter Cleaning Guide, and the original
Buffing Faded Headlights Guide.
For more, check out all of my Pontiac
Grand Prix DIY Repair & Maintenance Guides. |
||
| If you found this guide to be helpful,
please consider making a small donation by clicking on the PayPal.com
"Donate" button located to the right of this paragraph. Thank you!
(Note: I am not a registered charity. Donations are not tax deductible.) |