
Sani Seal
Toilet Flange Gasket Installation Guide
How to install a new Sani Seal wax-free
toilet bowl to floor flange polyurethane foam gasket with pictures & a review.

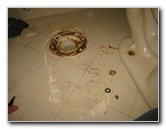
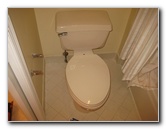 Leaking Toilet - Installed 1994 |
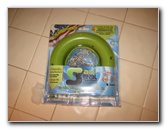 New Sani Seal Foam Gasket |
 Package Contents - Hardware |
| If you've
been seeing water leaking out between the bottom of your toilet bowl
and the floor, you probably need to replace the old wax gasket. Rather than buy another cheap and messy wax toilet seal, I bought the polyurethane foam "Sani Seal" brand gasket that promised easy installation and no mess. It was $12 at Amazon. The items you will need to replace the toilet flange gasket include the following: a flathead screwdriver, an adjustable wrench or pliers, a set of small hand wrenches or a socket set with a ratchet or a set of wrenches and possibly also a hack saw. I would also recommend considering buying a new toilet water supply shut off valve and water supply line (hose) at the same time since they may leak after being moved for the first time in 10, 20 or 30 years. |
||
|
|
||
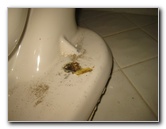
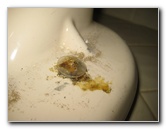
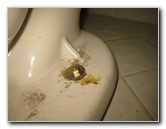
 Pry Off Plastic Screw Cap |
 Plastic Cap Removed |
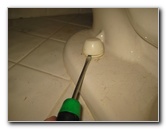
 Hard Water Deposits |
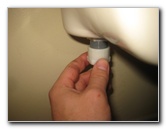
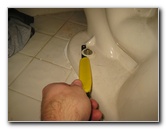
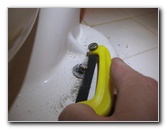
| The first step is
to gently pry off the plastic bolt end covers with a flathead screwdriver. Under one of the bolt end covers, I found that the cap was completely filled with a hard chalk like substance that must have been hard water calcium and other mineral deposits accumulated over 20 years. |
||
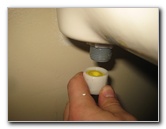
 Loosen Toilet Tank Hose |
 |
 Water Supply Line Disconnected |
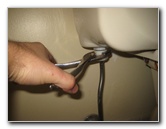
| Loosen the plastic compression nut at the top of the water supply line (hose or "tube") that connects it to the bottom of the toilet tank by turning it counterclockwise. | ||
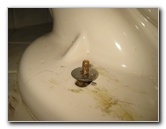
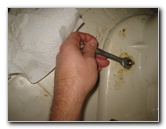
 Loosen 11mm Nut |
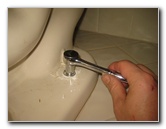 Loosen Counterclockwise |
 Helper Dog By My Side |
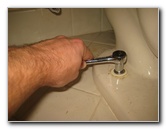
| Loosen the two nuts
that hold the toilet tank in place to the floor by turning them
counterclockwise. On our toilet, the two nuts were 11mm. They might be different on your toilet. While I was working, I heard some panting and
looked to my left to see that my loyal dog was there to offer his help or
just his stinky breath. Either way, at least the moral support was
appreciated.
|
||
 Cut Corroded Bolts |
 Hacksaw Cutting Nut |
 Pry Off Old Washer |
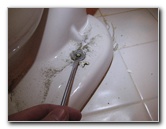
| I quickly realized
that the two nuts and "closet" bolts holding the toilet in place to the
flange were corroded and could not be removed with a wrench. I used a small hack saw to cut through the bolt and through the nuts until they could be broken off with a pair of pliers. Pry off the old metal washers that were under the nuts. |
||
|
|
||
 Plastic Toilet Flange |
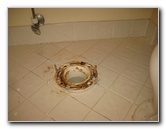 4" Inch Waste Water Pipe |
 Pop Out Bottom of Sani Seal |
| If the plastic
piece under your toilet that fits in to the four inch waste water sewer
drain pipe is broken, please take a look at my
Broken Plastic Toilet Flange Replacement Guide. Pop out the bottom ring on the Sani Seal gasket that was tucked in to the upper ring. |
||
 Bolt Holes In Foam Gasket |
 Lower Seal In Place |
 Lower Toilet Over Bolts |
| Line up the bolt
holes in the Sani Seal with the closet bolts attached to the floor flange. Lower the Sani Seal over the bolts and in to the 4" pipe. Don't worry if you get a little bit of old wax seal on to the Sani Seal. It will still form a good water tight seal. Carefully lower the toilet over the closet bolts. |
||
 Push On Washers |
 |
 Spin On New Nut |
| Push the plastic
washers and then the metal washers on to the bolt ends. Spin on the two new nuts by hand a few turns in the clockwise direction to prevent them from becoming cross threaded. |
||
 Tighten Nuts Clockwise |
 Carefully Tighten Nuts |
 Tighten Compression Nut |
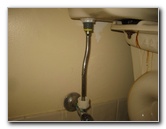
| Lean over the
toilet or carefully sit on the toilet seat and continue tightening the nuts
a fraction of a turn on each side until the toilet no longer wobbles. Try to avoid over tightening the nuts to prevent from cracking the ceramic base of the toilet bowl. Re-attach the water supply hose by spinning on the plastic compression nut in the clockwise direction. An optional step is to seal the bottom edge of the toilet with white indoor caulk. Test the new Sani Seal gasket by flushing it a few times. Watch for water drops from the water supply line or a leak from the water supply valve. So far the Sani Seal is working great and I'm really glad that I chose it instead of a wax seal. I had to take off the toilet and replace the broken plastic flange attached to the waste water pipe. So being able to remove and re-position the toilet several times on the Sani Seal was a big positive point for me. For more,
check out my other
Home Repair &
Maintenance DIY Guides. |
||
| If you found this guide to be helpful,
please consider making a small donation by clicking on the PayPal.com
"Donate" button located to the right of this paragraph. Thank you!
(Note: I am not a registered charity. Donations are not tax deductible.) |