
Smart Fortwo
Headlight Bulbs Replacement Guide
How to change a low beam, high beam,
front turn signal or side marker light bulb in a 2008 to 2014 Smart Fortwo.

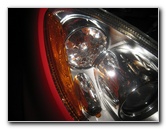
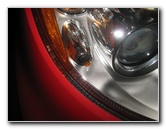
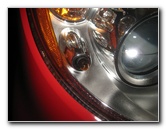
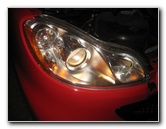
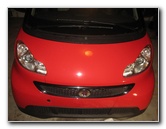
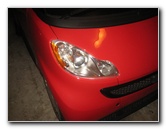 2013 Smart Fortwo Headlight |
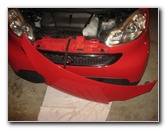
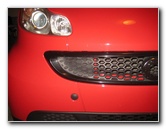 Front Plastic Grille |
 Push In Release Tab |
| This
automotive maintenance tutorial was specifically written to assist
owners of the second generation (2008, 2009, 2010, 2011, 2012, 2013
and 2014) Smart Fortwo compact city car in changing a burnt out low
beam, high beam, front turn signal or side marker light bulb in the
headlight assemblies. Owners of any Smart Fortwo models or trim levels such as the coupe hatchback, cabriolet or "cabrio", electric, pure, passion, forfour, prime and proxy may also find these DIY instructions to be helpful. The compatible replacement light bulb part numbers are as follows: Low Beam # H7, High Beam # H7, Front Turn Signal # 2357A (or 2357NA) and Front Side Marker # 2827 or WY5W. No tools are needed to access and replace any of the light bulbs in either the driver or passenger side headlight housings. |
||
|
|
||
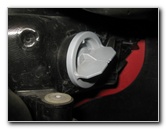
 Swing Open Lever |
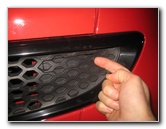 Push In Other Release Tab |
 Swing Open 2nd Lever |
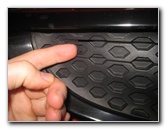
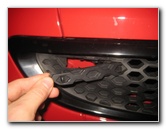
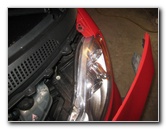
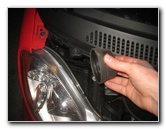
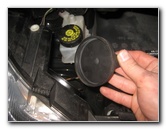
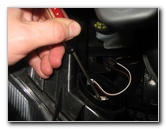
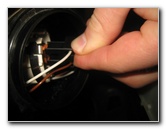
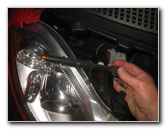
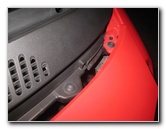
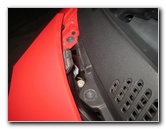
| In order to access
the headlight bulbs, you'll first have to remove the hood (also known as the
"bonnet" or "service flap"). Gently push in the release tab on the black plastic lever in towards the center of the car before swinging it open towards yourself. Repeat the process for the lever on the other side of the black plastic grille. |
||
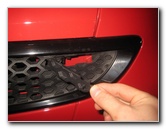
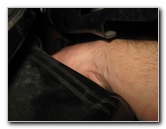
 Lift Front of Service Flap |
 Pull Forward - Swing Open |
 Remove Tabs - Rear Edge |
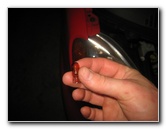
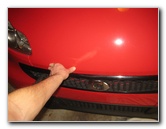
| Gently lift up the
front edge of the service flap. Pull the service flap slightly forward towards yourself. Once the two black plastic tabs on the rear edge of the flap (closest to the windshield) are removed, you can pull it off the front of the car. |
||
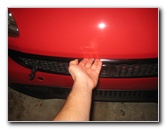
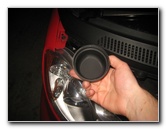
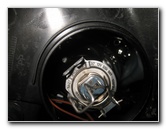
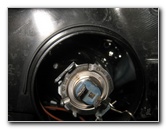
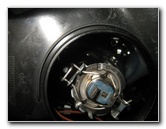
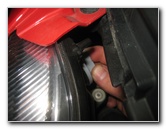
 Insert Hooks In Openings |
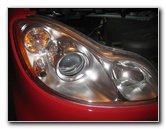 Passenger Side Headlight |
 Low Beam Rubber Cover |
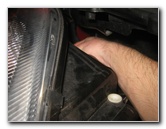
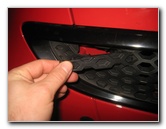
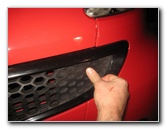
| There are plastic
hooks on the back side of the service flap. Hang the service flap on the front edge of the car. I just put a towel on the ground and gently let it rest on the floor. The low beam light bulb is located at the center of the headlight housing. |
||
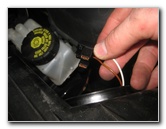
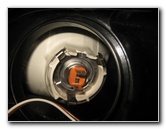
 Rubber Cover Removed |
 Base of Low Beam Bulb |
 Pull Off Electrical Connector |
| Pull the rubber
cover off the back side of the low beam bulb housing. Then gently pull the black plastic power plug off the old low beam bulb. |
||
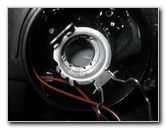
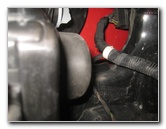
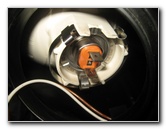
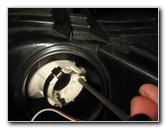
 Metal Retaining Arms |
 Push Clip In & Down |
 Retaining Clip Released |
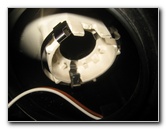
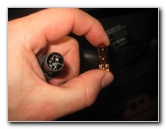
| There is a metal
retaining clip that holds the low beam bulb in place. Push in the metal loop near the top of the bulb socket and pull it down to release the metal retaining arms from their hooks. Swing open the metal retaining arms down and off the back of the old light bulb. |
||
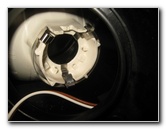
 Pull Out Old Light Bulb |
 Empty Bulb Housing |
 Install New Low Beam |
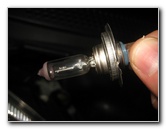
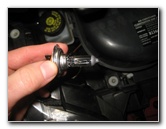
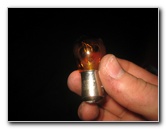
| Pull the old light
bulb straight out of the housing. Try to avoid touching the glass part of the new halogen H7 low beam light bulb with your fingers or anything greasy in the engine bay. If you do get the new bulb dirty, wipe it clean with a paper towel and some rubbing alcohol. Insert the new # H7 low beam bulb in to the housing. |
||
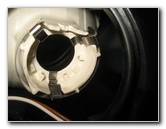
 Close Retaining Clip |
 Rubber Cover |
 Rubber Cap Replaced |
| Swing the retaining
arms closed over the new light bulb. Push the top of the retaining clip forward and up to secure it in the two metal hooks. Push the power plug on to the base of the new low beam bulb. Push the rubber cap back in to place over the low beam bulb housing. |
||
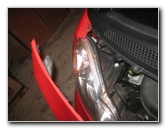
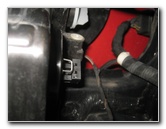
 High Beam - Inner Corner |
 Pull Off Rubber Cover |
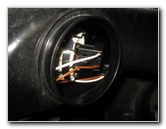 Base of Old High Beam |
| The high beam light
bulb is located near the inner corner of the headlight housing. Pull the black cover off the back side of the high beam housing. |
||
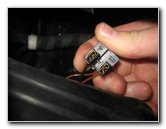
 Pull Off Power Plug |
 Old High Beam Bulb |
 Tilt Bulb Down - Pull Out |
| Pull the black
plastic electrical connector straight off the base of the old high beam
bulb. Gently tilt the old high beam bulb down and pull it out of the housing. |
||
|
|
||
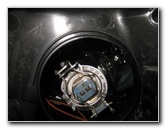
 High Beam Bulb Housing |
 Demonstration - Push Back Clip |
 Metal Spring Clips |
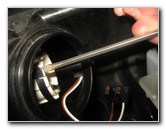
| If you have trouble
removing the old high beam bulb, you may need to gently push down the tabs
on the silver metal retaining ring that surrounds the bulb. Use a flathead screwdriver to gently push in the metal tabs to release the old high beam bulb. |
||
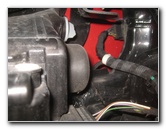
 |
 Close Up of Retaining Clips |
 |
 Push In New High Beam |
 Push On Power Plug |
 Push On Rubber Cover |
| Push a new number
H7 high beam bulb in to the
housing. Push the electrical connector straight on to the base of the new high beam bulb. Re-attach the rubber cover on the rear of the high beam housing. |
||
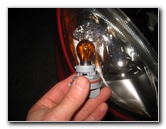
 Turn Signal - Outer Corner |
 1/4 Turn Counterclockwise |
 Remove Bulb Socket |
| The front turn
signal light bulb is located near the outer edge of the headlight housing. Rotate the grey plastic turn signal bulb socket 1/4 turn counterclockwise before pulling it straight out of the housing. |
||
 Push Down & 1/4 Turn CC |
 Install New Turn Signal |
 1/4 Turn Clockwise - Lock |
| Push the old turn
signal light bulb down in to the socket and rotate it 1/4 turn
counterclockwise before pulling it straight out. Push a new amber colored number 2357A light bulb down in to the socket and rotate it 1/4 turn clockwise to secure it in place. Re-insert the bulb socket in to the housing and rotate it 1/4 turn clockwise to secure it in place. |
||
 Side Marker - Outer Corner |
 1/4 Turn Towards Outside |
 Side Marker Bulb Socket |
| The front side
marker light bulb is located at the outer corner of the headlight housing. To remove the front side marker bulb socket, you have to rotate it 1/4 turn towards the outside of the car. The side marker light bulb socket removal procedure is the same for both the driver or passenger side headlight housing. Just twist the bulb socket towards the outside of the car. |
||
 Pull Out Old Light Bulb |
 Push In New Light Bulb |
 1/4 Turn Towards Inside |
| Pull the old light
bulb straight out of the socket. Push in a new amber colored number 2827 or WY5W light bulb straight in to the socket. Re-insert the bulb socket in to the housing and rotate it 1/4 turn towards the inside of the car to secure it in place. |
||
 Side Marker Bulb Replaced |
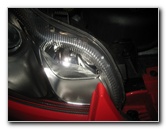
 Test New Headlight Bulbs |
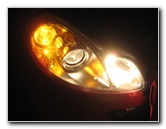 Testing High Beam Bulb |
| To test the new light bulbs, turn on the headlights, activate the hazard signals and flash the high beams. | ||
 Line Up Rear of Hood |
 Re-Insert Plastic Tabs |
 Close Front Edge |
| Carefully lift the
hood (or "service flap") towards the windshield. Re-insert the two black plastic tabs on the rear edge of the service flaps in to their corresponding slots on the cowl. (The cowl is the black plastic area in between the service flap and the windshield.) Push down the front edge of the service flap. |
||
 Close Plastic Latch |
 Push To Secure Clips |
 Service Cover Replaced |
| Swing closed the
two plastic levers in the grille. Push in the two levers to secure the retaining clips. Double check that the service flap is securely in place. Be sure to record the headlight bulb change in your car's service records. For more, check out all of my
2008-2014 Smart Fortwo DIY Repair & Maintenance Guides. |
||
| If you found this guide to be helpful,
please consider making a small donation by clicking on the PayPal.com
"Donate" button located to the right of this paragraph. Thank you!
(Note: I am not a registered charity. Donations are not tax deductible.) |