
Toyota 3S-FE
2.0L I4 Engine Oil Change Guide
Pictures illustrated instructions for
changing the motor oil & filter on a Toyota 3S-FE DOHC 2 liter inline four
cylinder engine.

| This oil change guide was specifically written to assist owners of Toyota vehicles equipped with the 3S-FE 1998cc (2.0L) DOHC I4 engine that was manufactured from 1986 through the year 2000. Some of the Toyota automobiles that have the 3SFE motor include the Camry (1987-1992), Celica (1986-1989), RAV4 (1994-2000), Corona, Carina II / E / ED (1987-1998), Avensis (1997-2000), Curren, Vista, Gaia, MR2, Ipsum, Liteace Noah & the Townace Noah van. | ||
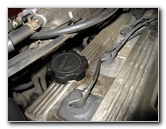
 1994 Toyota Carina ED |
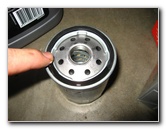
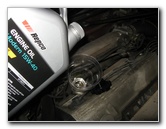
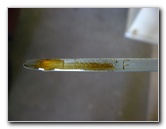
 3S-FE Oil Filter Location |
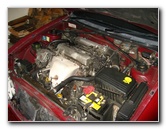 1998ci DOHC I4 Motor |
| This right
hand side drive 1994 Toyota Carina ED was imported from Japan into New
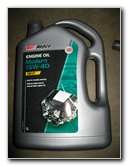
Zealand in 2001. We purchased it in early 2010 in Auckland for $2,700 NZD (~$2,000 USD) with 228,000 km (141,000 miles) on the odometer. A few months and 7,000 km (4,300 miles) later, the oil on the 3S-FE engine's dipstick looked dark. We'll be selling it very soon and as a courtesy to the next owner, I decided to change the oil. I went to the local Repco Auto Parts store and purchased a 5 litre bottle of SAE 15W-40 engine oil, a Ryco Z386 oil filter, and a 0-25mm adjustable crescent wrench. The total cost was about $68 NZD or $49 USD. The 3S-FE engine requires about 3.5 to 3.7 litres (3.7 to 4.0 Quarts) of oil for an oil change with filter replacement. To remove the oil drain bolt, you'll need a 14mm socket with a 3/8" drive ratchet or an adjustable crescent wrench would also work. |
||
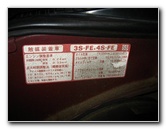 3S-FE / 4S-FE Sticker |
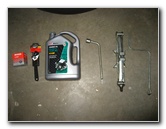 Oil Change Tools/Supplies |
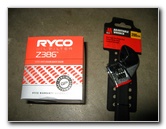 New Oil Filter & Wrench |
| The first step in
any oil change is to start the engine so that it warms up the old oil and
any contaminant particles become suspended.
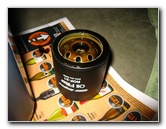
While the engine was running, I gathered up the new oil, the new oil filter, the wrench, and the car's jack. Besides the Ryco Z386 oil filter, the engine will also accept the following other new oil filters: Mobil 1 M1-103, Repco ROF-21, Purolator PL14476 or L14476, K&N PS-1003, Fram PH4967 or the OEM Toyota 90915-YZZF2. |
||
 5 Litre 15W-40 Oil |
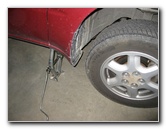
 Jack Up Driver Side |
 Front Driver Jack Point |
| Once the engine was
warmed up to operating temperature, I drove the car into the garage, engaged
the emergency parking brake and turned off the engine.
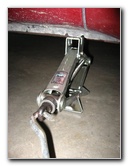
I used the car's jack from the trunk (boot) to raise the right hand side (driver side) of the car off the ground to allow easier access to the oil drain bolt. If you have them, it's best to use jack stands to support the car as an extra precaution in case the jack fails. You should also chock the rear wheels to prevent the car from rolling in case the emergency brake fails. (Due to a lack of jack stands since we're 8,500 miles from home on vacation in NZ, I instead used about a dozen pieces of sturdy firewood and metal army surplus boxes as multiple back ups to support the car in case the jack failed.) The jack point is between two notches in the metal with a small arrow stamped in between them. |
||
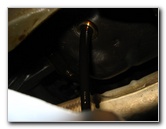
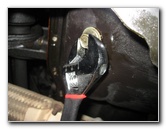
 Oil Drain Bolt |
 Driver Side of Engine |
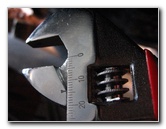 Wrench Set To 14mm |
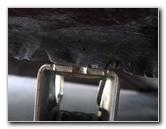
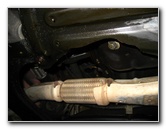
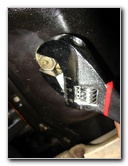
| The oil drain bolt
on the 3S-FE engine is located just past the front right hand side wheel and
before an exhaust pipe.
On this right hand drive car, the oil drain bolt is in front of where the driver's feet would rest. In the U.S. on a left hand drive vehicle, the bolt would be on the passenger side of the vehicle. |
||
 Removing Oil Drain Bolt |
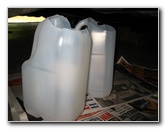 Old Oil Catch Containers |
 Old Oil Flowing Out |
| At home in the U.S., I'd use
my socket set and a proper oil catch container to perform an oil change.
But since we're leaving New Zealand very soon, I decided to just get by with an adjustable wrench and empty 3 liter milk jugs instead. If you can, avoid using an adjustable wrench as it can easily strip a bolt. I proceeded cautiously and was able to easily loosen the oil drain bolt. To loosen the 14mm oil drain bolt, turn the bolt counter clockwise. It's best to have the garage floor lined with newspapers and have your old oil catch containers in place before you start loosening the oil drain bolt. |
||
 Draining Used Motor Oil |
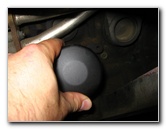
 Engine Oil Filler Cap |
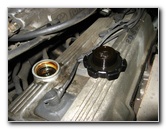 Oil Filler Cap Removed |
| To help the old oil
drain out faster, unscrew and remove the oil filler cap located on the top
of the engine.
Turn it counterclockwise to loosen it. Allow the old oil to drain out for at least a few minutes or longer if possible. |
||
 Old Oil Filter |
 Unscrewing Old Oil Filter |
 Old Oil Filter Removed |
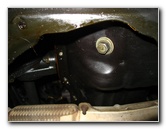
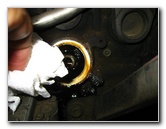
| The oil filter on
the Toyota 3S-FE engine is located at the front driver side (US passenger
side) of the engine.
It is clearly marked in the second image on this page or click here to view the image - Toyota 3S-FE Oil Filter Location. Have a few rags or paper towels ready because oil will leak out from under the oil filter when you remove it. To remove the old oil filter, turn it counter clockwise by hand or use an oil filter wrench such as the Lisle 63600. |
||
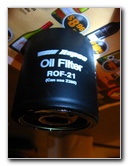 Repco ROF-21 Filter |
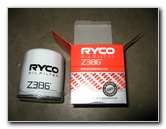 New Ryco Z386 Filter |
 Lubricating Filter O-Ring |
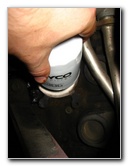
| To prepare the new
oil filter for installation, place some new engine oil on your finger and
run it around the rubber o-ring seal.
This allows the new filter to form a tight leak-proof seal with the oil filter receptacle on the engine. It's also a good idea to wipe off any grime, dirt or dust away from the oil filter receptacle with a rag or paper towel. |
||
 Cleaning Filter Receptacle |
 Screwing On New Filter |
 Re-Inserting 14mm Drain Bolt |
| To install the new
oil filter, carefully thread it onto the oil filter receptacle and turn it
clockwise by hand until it is snug.
Then turn it another 1/4 to 1/2 turn after that. Don't over tighten the filter, or you may damage it or the oil filter receptacle. Then re-install the 14mm oil drain bolt by turning it clockwise until it is snug and then tighten it about a 1/4 to 1/2 turn after that. If you would like to replace the oil drain bolt's washer or "gasket", the part number is Toyota 90430-12031. Again, don't over tighten the oil drain bolt or you could crack the oil pan. Be sure to check the gasket on the oil drain plug and replace it if necessary. |
||
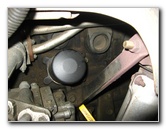
 Filling With New 15W-40 |
 Lower Car Jack |
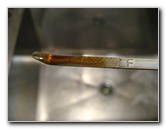 Check Oil Dipstick |
| Once we verify that
the new oil filter and the oil drain bolt are securely in place, we can
lower the car off the jack and fill the engine with the new oil.
The Repco Auto Parts store employee recommended that I use SAE 15W-40 considering the car's age and the local climate. Warmer climates may require SAE 10W-30 oil and colder climates might benefit from a SAE 20W-40 weight oil. Check your owners manual, your dealership, or with a certified mechanic if you have any doubts about which weight oil to use. The specifications of the Toyota 3S-FE engine call for 3.7 Litres (or "Liters") or 4 U.S. Quarts. Using a home made plastic funnel, I filled the engine with 3 liters of new oil out of the 5 liter bottle and checked the dipstick. It was near the "F" (Full) marker but not at it. I slowly added about another half (.5) liter until the oil level on the dipstick just reached the "F" mark. Take your time when adding the new oil. It's better to not have enough oil and add more then to over fill the engine, which can cause damage to the seals. After you think the engine oil level is at the full mark, warm up the car and take it for a short drive. Then check the oil dipstick again after the car rests for a few minutes and add more oil if necessary. Be sure to take
note of the car's odometer reading so that you'll know when it is due for
the next oil change. Cheers!
|
||
 ~1.5 Liters of 5 Left |
 Add Oil To Reach "Full" |
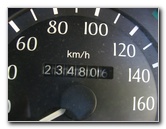 Odometer - 234,806 km |
|
For more of my automotive maintenance instructions, click on the following links: Buffing Faded Headlights, K&N Air Filter Cleaning Guide, Car Interior Carpet Replacement Guide, Toyota Corolla Cabin Air Filter Replacement, Headlight & Tail Light Condensation Repair Guide, Toyota Corolla PCV Valve Replacement Guide, and the Corroded Car Battery Terminal Replacement Guide, |
||
If you found this guide to be helpful, please consider making a small donation by clicking on the PayPal.com "Donate" button located to the right of this paragraph. Thank you! (Note: I am not a registered charity. Donations are not tax deductible.) |