
Toyota Camry Interior Door
Panel Removal Guide
How to remove the door panels of a 07-11
Camry to add soundproofing, replace the speaker or power window motor.

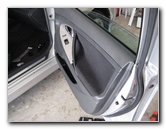
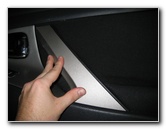
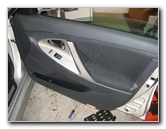
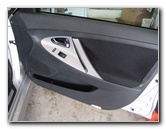 Camry Front Door Panel |
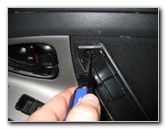
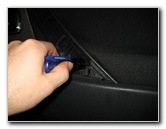
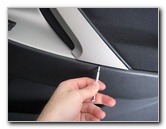 Pry Up Trim Piece |
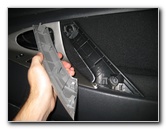 Door Pull Trim Cover |
| This
automotive maintenance "how-to" guide was specifically written to
assist owners of the XV40 6th generation (2007, 2008, 2009, 2010 & 2011) Toyota Camry sedan
in removing the interior door panels in order to add soundproofing,
upgrade the OEM door speaker or replace the power window motor. Owners of other Toyota or Lexus vehicles such as the Corolla, Matrix, Yaris, Avalon, Venza, RAV4, FJ Cruiser, Highlander, 4Runner, Sequoia, Land Cruiser, Tacoma, Sienna, IS 250, IS 350, ES 350, GS 350, LS 460, and the Aurion sedan in Australia may also find guide to be helpful. The tools needed to remove the interior door panels include a small flathead screwdriver, a standard Phillips head screwdriver and a plastic automotive panel pry bar tool. To remove the OEM door speakers requires either a Phillips head screwdriver or a 10mm socket with a 1/4" drive ratchet. |
||
|
|
||
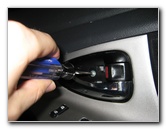
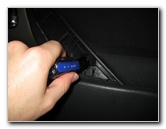
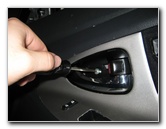
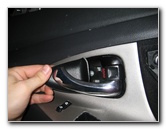
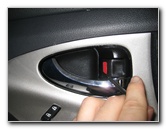 Pry Out Door Handle Trim |
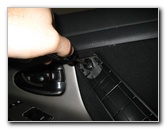
 Door Handle Trim Removed |
 Push In Pop Rivet |
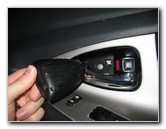
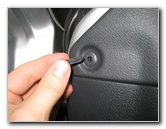
| The first step is
to use a small flathead screwdriver to pry off the silver trim piece that
covers the door pull.
Behind that trim piece there are two Phillips head screws that need to be removed. Then pry out the small black plastic bowl trim piece located behind the door handle. Remove the one Phillips head screw located behind the trim piece. |
||
 Pry Out Plastic Fastener |
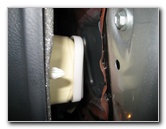
 Top Corner Panel Fastener |
 Remove Door Panel Screw |
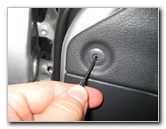
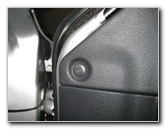
| Push in the center of the pop rivet located at the top corner of the door panel below the side view mirror and pull it out of the panel. | ||
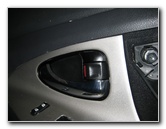
 Screw Behind Door Handle |
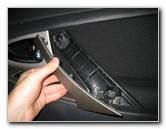
 Remove 2nd Door Pull Screw |
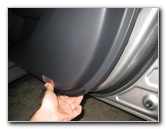 Pull Off Bottom Door Panel |
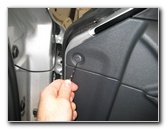
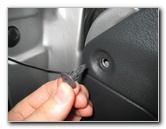
| Once the three
Phillips screws and the pop rivet fastener are removed, you can pull out the
bottom of the door panel.
If you trouble disengaging the plastic pop rivets, you might need a plastic pry bar tool or a large flathead screwdriver. Release all of the plastic friction fasteners around the sides and bottom of the door panel until it is hinged at the top. |
||
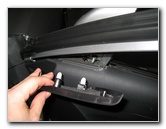
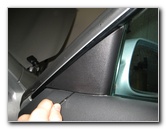 Pry Out Upper Trim Piece |
 Side View Mirror Bolts |
 Courtesy Light Connector |
| It's easier to
remove the door panel if you first pry off the trim piece at the top corner
of the door that hides the side view mirror bolts and power connector.
On some vehicles, this trim piece contains the tweeter speaker that will need to be disconnected. |
||
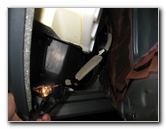
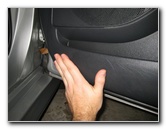
 Pull Out Courtesy/Step Light |
 Disconnect Step Light |
 Pull Out Door Handle |
| The courtesy step
light needs to be disconnected before you can swing the panel up and access
the other power connectors.
Pop out the light by pushing from the rear of the panel and then unplug the power connector. Next pop the door handle out of the rear of the panel. |
||
|
|
||
 |
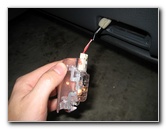
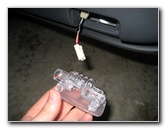
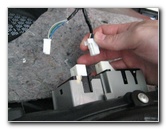
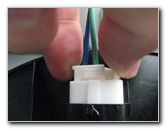
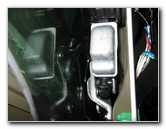
 Power Connectors |
 Pry Out Connectors |
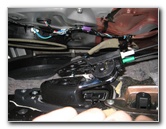
| The last items that
need to be disconnected are the power connectors for the power door lock and
power window switches.
Push down on the power connector release tabs with a small flathead screwdriver before wiggling out the connector. |
||
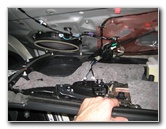
 Power Door Lock / Windows |
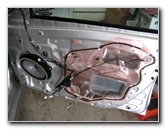 Door Panel Removed |
 Power Window Scissor Lift |
| Pull the door panel upwards off the door frame and set it aside in a safe place. | ||
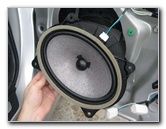
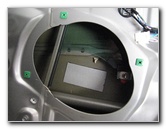
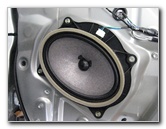 OEM Door Speaker |
 |
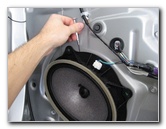
 Remove 10mm Screws |
| If you'd like to
replace the OEM speaker with an aftermarket unit, use a Phillips head
screwdriver or a 10mm socket with ratcheting wrench to remove the four
screws that hold it in place.
If the speaker sticks to the door frame, use a small flathead screwdriver to pry it off. Both 6 1/2" (6.5") and 5 1/4" (5.25") aftermarket speakers will fit into the front door panel of a 2007-2011 Toyota Camry with the use of a bracket. I'd recommend buying from Amazon since you can verify that they will fit your car and find out whether you will need mounting brackets. |
||
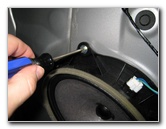
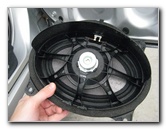
 Pry Off Speaker |
 Speaker Removed |
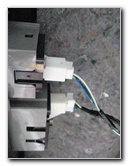
 Press Connector Release Tab |
| Remove the power
wire from the OEM speaker by pinching the release tab and wiggling the
connector out of the socket. To help reduce road noise and enhance the sound from new speakers, consider applying some Dynamat Sound Deadener to the metal door frame. It will stop vibrations and rattles when you crank up the volume. |
||
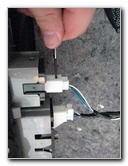
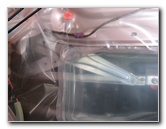
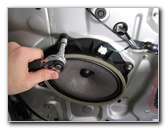
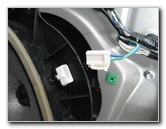 Power Connector Removed |
 Door Panel Speaker Hole |
 Rear of OEM Speaker |
| If you need to replace the power window motor, removing the speaker allows easier access. | ||
 Power Window Motor |
 Hang Door Panel |
 Line Up Fasteners & Holes |
| To replace the door
panel, lower it down on to the door frame until it rests securely.
Reach behind the panel to pass through the door handle and snap in the power connectors. Look between the door panel and the door frame to line up the white plastic friction fasteners with the holes in the metal. |
||
 Push Panel In Place |
 Insert Plastic Pop Rivet |
 |
| Gently push all
around the bottom edge and sides of the panel to secure the friction
fasteners. Then replace the outer part of the plastic pop rivet at the top corner of the door panel before inserting the small inner piece. |
||
 Install Door Handle Screw |
 Tighten Door Pull Screws |
 Install 2nd Phillips Screw |
| Tighten the Phillips head screw that goes behind the door handle and also the two screws in the door pull. | ||
 Replace Handle Trim |
 Door Handle Trim Installed |
 Replace Door Pull Trim |
| Replace the trim piece behind the door handle, the silver trim piece over the door pull and the trim piece that covers the side view mirror bolts. | ||
 Snap On Trim Piece |
 Replace Mirror Bolt Cover |
 Door Panel Replaced |
|
||
| If you found this guide to be helpful,
please consider making a small donation by clicking on the PayPal.com
"Donate" button located to the right of this paragraph. Thank you!
(Note: I am not a registered charity. Donations are not tax deductible.) |