
Toyota Carina
ED Headlight Bulb Replacement Guide
A pictures illustrated step by step
instruction guide for replacing a burnt out headlight bulb in a 1993-1998 Toyota
Carina ED.

| This vehicle maintenance guide was specifically written to assist owners of the 1993 to 1998 Toyota Carina ED third generation ST200 series sedan in swapping out a faulty headlight or "headlamp" light bulb with a new one. Owners of other similar Toyota cars from the 1990's or early 2000's may also find this guide to be useful. Some of the similar automobiles include the Toyota Carina, Corona, MR2, Celica, Corolla, Camry, and Avensis. Please proceed with caution at your own risk. | ||
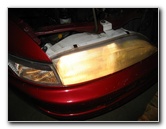
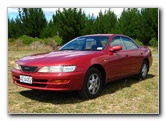 1994 Toyota Carina ED |
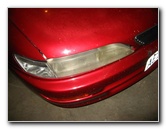 Headlamp Assembly |
 Hood Opened |
| We purchased
this 1994 Toyota Carina ED at the beginning of our trip through New
Zealand in January 2010. The car came from the dealer with a new "Warrant of Fitness" or "WOF", which ensured us that the major mechanical parts and safety features of the car were in good working order. Now, a few months later, I discovered that the driver side headlight bulb has burned out. I removed the old bulb and visited the local Repco Auto Parts store to purchase a replacement. The old part is a Narva 48881 H4 12V 60/55W combination low and high beam bulb. The new bulb is a Mech Pro H4 Halogen Globe MPH4 12V 60/55W P43T. The H4 is also known as the # 9003. No tools of any kind are necessary for this procedure. |
||
|
|
||
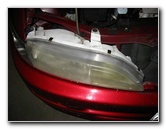
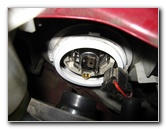
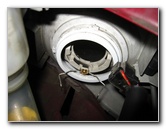
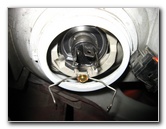
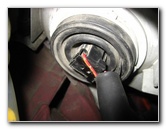
 Light Bulb Access Port |
 Unscrewing Collar Nut |
 Plastic Collar Nut Removed |
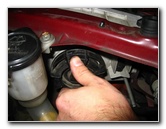
| The first step for
replacing the headlight bulb in a 1993-1998 Toyota Carina ED is to open the
hood.
Then examine the rear of the headlight assembly. There are two large black plastic collar nuts on the back of the assembly. One is for the signal light bulb near the outer edge of the assembly, and the other closer to the center of the car is for the combination low/high beam headlight bulb. |
||
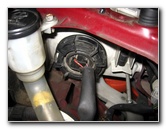
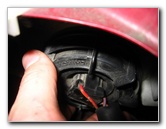
 Wiggling Out Power Plug |
 Power Connector Removed |
 Tugging Dust Boot Tab |
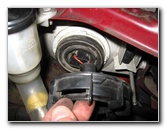
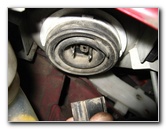
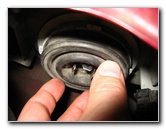
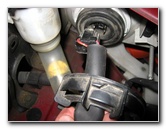
| To access the
headlight bulb, first turn the large black plastic collar nut about 1/2 turn
in the counter clockwise direction until it can be easily removed.
Next, gently jiggle and pull the power plug off the bulbs metal prongs. Then pull the small tab on the rubber dust cover and remove it. |
||
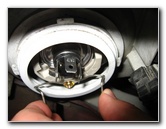
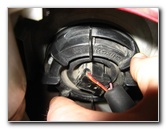
 Rubber Dust Boot Removed |
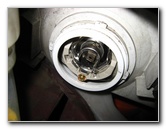 Headlight Bulb Power Prongs |
 Squeezing Retaining Clip |
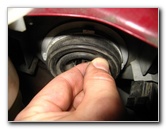
| After the dust cover is removed, pinch the two arms of the metal retaining clip towards each other and allow the arms to freely pivot towards the bottom of the assembly. | ||
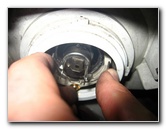
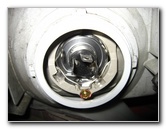
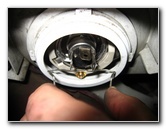 Retaining Clip Lowered |
 Removing Headlamp Bulb |
 Low Beam Burned Out |
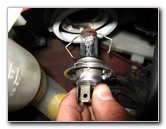
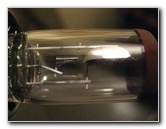
| Now that the
retaining clip has been lowered, you can gently pull out the old headlight
bulb from inside the headlamp assembly.
If you examine the picture of the old bulb closely, you can see that the metal wire connection for the low beam element is burned out and the connection is broken. |
||
 Narva 48881 H4 |
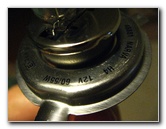 12V 60/55W Low/High Beam |
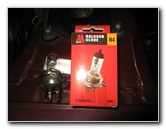 New Mech Pro Halogen H4 |
| I took the old burned out headlight bulb with me to auto parts store, to ensure that I purchased the correct replacement part. | ||
 Holding New Headlight Bulb |
 Headlight Bulb Socket |
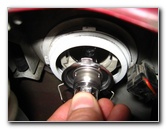 Inserting New Light Bulb |
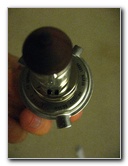
| When handling the
new headlight bulb, be sure to use a paper towel or gloves.
Any oil or grease on the glass bulb can shorten its life. The new H4 bulb has three metal tabs around the outer edge of the metal ring. It can only be inserted into the headlight assembly one way. It should slide in easily and fit securely into the headlight socket. (If necessary, the 9003 bulb should also be compatible.) |
||
 New Bulb In Place |
 Raising Retaining Clip |
 Retaining Clip Snapped In |
| When the new bulb
is in the socket, raise the metal retaining clip and pinch the two arms
towards each other.
With the arms pinched together, snap them into place against the metal ring around the headlight bulb. |
||
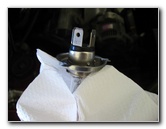
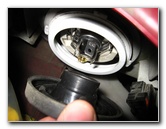 Re-Installing Dust Boot |
 Rubber Dust Cover In Place |
 Lining Up Power Plug |
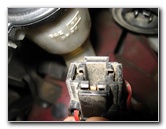
| Then push the
rubber dust cover back into place around the headlight bulb socket, push the
power plug connector onto the headlight bulb's three prong metal plugs, and
twist the black collar nut on.
The black plastic collar nut only requires a 1/4 to 1/2 turn to secure it in place on the grey plastic headlamp assembly. |
||
 Dusting Off Power Connector |
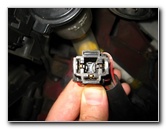 Three Prong Power Plug |
 Power Plug Pushed On |
| Double check that
the power plug and black collar nut are securely in place before testing out
the new headlight bulb.
If for some reason the new headlight bulb does not work, try cleaning the power plug, check the wires for damage, and check the fuse box. |
||
 Twisting On Collar Nut |
 Collar Nut Secured |
 New Headlight Bulb Works |
| For more of my related photo galleries, click on the following links: Buffing Old Faded Headlights, K&N Air Filter Cleaning, Fuzion ZRi Tire Review, Car Interior Carpet Replacement Guide, Toyota Carina ED Oil Change Guide, and the Falcon Ziex ZE-512 Tire Review. | ||
If you found this guide to be helpful, please consider making a small donation by clicking on the PayPal.com "Donate" button located to the right of this paragraph. Thank you! (Note: I am not a registered charity. Donations are not tax deductible.) |