
VW Tiguan
2.0L TSI Engine Oil Change Guide
How to change the motor oil and replace
the filter in a 1st generation 2009 to 2017 Volkswagen Tiguan SUV.

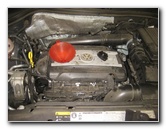
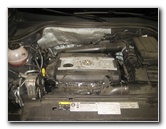
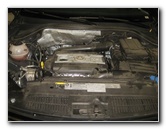 2016 Tiguan 2.0L TSI Engine |
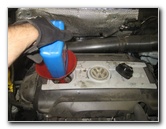
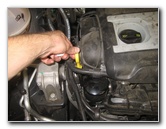
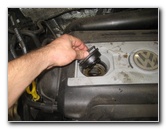 Twist Off Oil Filler Cap |
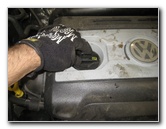
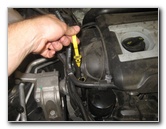 Lift Up Oil Dipstick Handle |
| This
automotive maintenance tutorial was specifically written to assist
owners of the first generation (2009, 2010, 2011, 2012, 2013, 2014,
2015, 2016 and 2017) Volkswagen Tiguan SUV in changing the motor oil
and replacing the oil filter on the 2.0 liter TSI turbocharged inline
four cylinder engine. Owners of other VW or Audi vehicles such as the Jetta, Passat, CC, Atlas, Touareg, Golf, Beetle, A3, S3, RS 3, A4, S4, A5, A6, S6, A7, S7, RS 7, A8, Q3, Q5, TT and Q7 may also find these DIY instructions to be helpful.' A few compatible replacement oil filters with their part numbers are as follows: Mann-Filter W719/45, Fram XG10600, Volkswagen 06J 115 403 Q, Wix 57561, Mobil 1 M1-404, Mahle Original OC 456 and Pentius PLB10600. The tools and other items needed to complete this procedure include a Torx T25 star bit screwdriver, a Torx T45 socket, a 3/8" drive ratchet, a used oil catch basin, an automotive funnel and 4.9 U.S. quarts (or 4.7L) of new synthetic SAE 5W-40 or SAE 5W-30 Volkswagen approved motor oil. |
||
|
|
||
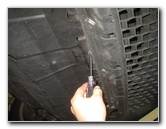 Loosen Counterclockwise |
 Torx T-25 Screws |
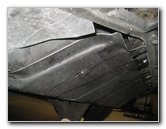
 Plastic Skid Plate |
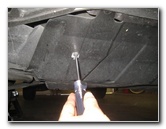
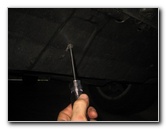
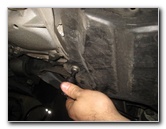
| The first step is
to warm up the engine for a few minutes to help suspend the contaminants
within the old oil and also allow it to drain out more quickly. Park the SUV on a level surface, turn off the ignition and place wheel chocks on both sides of the rear wheels to prevent the vehicle from moving. Then loosen the oil filler cap in the counterclockwise direction and partially lift up the yellow plastic dipstick handle. Removing the oil filler cap and lifting up the dipstick handle will help prevent a vacuum from forming and also allow the old oil to drain out more quickly. Slide under the engine bay with the Torx T-25 and Torx T-45 screwdrivers or sockets and a ratchet if applicable. Remove the smaller T-25 screws near the front and sides of the plastic under engine cover or "skid plate" by turning them in the counterclockwise directions. Some of the screws were missing from the skid plate on this 2016 Tiguan. I believe there should be about 10 total fasteners. Set the screws aside in a safe place. |
||
 |
 |
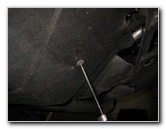
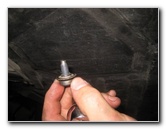
 Large T-45 Bolts |
| Then remove the larger T-45 bolts at the rear edge of the skid plate by turning them in the counterclockwise direction. | ||
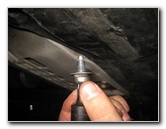 T45 Bolts - Rear Edge |
 |
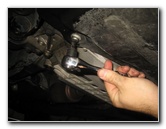
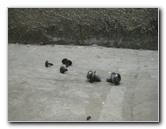
 Large Bolts Removed |
| Set the bolts aside with the smaller screws. | ||
 |
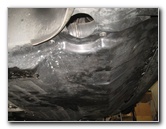
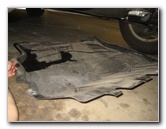 Under Engine Cover Removed |
 Bottom of 2.0L Engine |
| Carefully slide the
skid plate back to disengage the tabs at the front from the bumper cover. Move the under engine cover back towards the rear of the vehicle. |
||
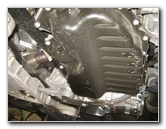
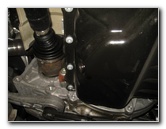 Black Metal Oil Pan |
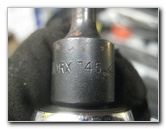 Torx T45 Socket |
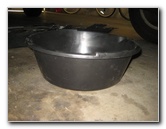
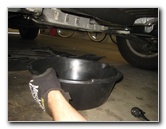 Used Oil Catch Container |
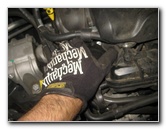
| Locate the oil
drain bolt at the rear edge of the black metal oil pan. Slide the used oil catch container to just below the oil drain bolt. Use the Torx T-45 socket with a 3/8" drive ratchet to loosen the oil drain bolt in the counterclockwise direction. |
||
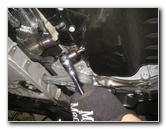 Loosen Counterclockwise |
 Drain Out Old Motor Oil |
 Tighten Drain Bolt Clockwise |
| Be careful when you
remove the oil drain bolt.
The old oil might still be hot enough to burn your fingers depending on how long you warmed up the engine. Allow the old oil to drain out for at least a few minutes or until it slows down to an occasional drip. VW recommends that the oil drain plug and washer should be replaced at every oil change. Two compatible replacement plugs with washers are the Dorman 090-182 and Dorman 65407 which are both M14 x 1.50 size. Spin in the oil drain bolt a few turns in the clockwise direction by hand to prevent it from becoming cross threaded. Tighten the oil drain bolt in the clockwise direction to just past hand tight or about 30 Nm (or 22 lb-ft) of torque. Double check that the oil drain plug is tight before moving on to the next steps. |
||
 Slide In Skid Plate |
 Replace Bolts & Screws |
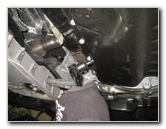
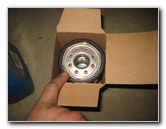
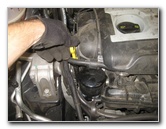
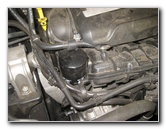 Black Canister Oil Filter |
| Raise the under
engine cover and slide the tabs on the front edge back into place. Replace the screws and bolts by tightening them in the clockwise direction until they are snug. Move to the top of the engine bay. Locate the round canister style oil filter at the front left (passenger) side of the engine. (The old filter on this 2016 Tiguan is black in the picture above.) |
||
|
|
||
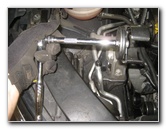 Lisle Oil Filter Wrench |
 Loosen Counterclockwise |
 Dip Finger In New Oil |
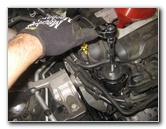
| Loosen the old oil
filter by turning it in the counterclockwise direction. If you have trouble removing the old filter, use an oil filter wrench such as the Lisle 63600 attached to a short 3/8" extension bar and a 3/8" drive ratchet. Dip your pinky finger into some new oil and lubricate the rubber o-ring gasket on the new oil filter. Lubricating the oil filter will help it form a better seal and also make it easier to remove during the next oil change. |
||
 Lubricate Rubber O-Ring |
 Twist On Clockwise |
 Insert Automotive Funnel |
| Make sure the
rubber o-ring from the old filter is not still attached to the engine. Spin on the new oil filter in the clockwise direction to about 1/4 to 1/3 turn past hand tight. Do not over tighten the filter to prevent from damaging the o-ring gasket which could lead to an oil leak. Insert an automotive funnel into the oil filler hole. |
||
 Pour In New Oil |
 Replace Oil Filler Cap |
 Push In Oil Dipstick |
| The owner's manual
states that the 2.0L TSI Turbo I4 engine's total oil capacity specification
for an oil change with a filter replacement is 4.9 U.S. quarts (or
4.7 liters). Be sure to purchase a high quality synthetic SAE 5W-40 or SAE 5W-30 oil that meets the Volkswagen 502 00, 503 00 or 504 00 specifications. (Also known as 502.00, 503.00 and 504.00). A few of the oil manufacturers that produce "Euro" (European) spec oil that meets VW's quality standards include Pennzoil, Mobil 1, Castrol, Valvoline, Mag 1 and RAVENOL. I recommend buying Pennzoil Platinum Euro SAE 5W-40 synthetic motor oil since it has excellent reviews on Amazon and meets the VW 502.00 and VW 505.00 oil quality standards. Another great option that also meets the VW 502.00 and 505.00 specifications is Castrol Edge Syntec 5W-40 full synthetic oil (part number 06249). It is far better to have slightly less oil than necessary in the engine than to overfill it. Running an engine that has been overfilled can lead to sluggish performance and possibly also damage to seals, gaskets or other components. Slowly pour in only about 4 1/4 to 4 1/2 U.S. quarts of the engine's 4.9 quart total capacity. Temporarily replace the oil filler cap by twisting it on in the clockwise direction and push down the dipstick handle. Start the engine and allow it warm up for a few minutes. Then turn off the ignition and allow the new oil to drain back down to the oil pan for at least 5 to 10 minutes. Then check the oil level by pulling out the dipstick, wiping it clean, fully re-inserting it and pulling it out again. |
||
 Check Oil Level |
 Replace Oil Dipstick |
 Oil Change Complete |
| The "Full" or
"Maximum" level is indicated by the top of the cross hatched area on the tip
of the dipstick. If necessary, slowly pour in more oil (up to the 4.9 quarts total capacity) and repeatedly check the level on the dipstick until it reaches just at or below the top of the cross hatched area. You may not need to pour in the entire 4.9 U.S. quarts (4.7 liters) in order for the level on the dipstick to reach the "Full" line. Re-insert the dipstick and tighten the oil
filler cap in the clockwise direction. To reset the oil change reminder in cars with the "Basic Display", follow these steps: 1. Turn the ignition switch to the "OFF" position. 2. Push and hold the "0.0/SET" button on the instrument cluster. 3. Turn the ignition switch to the "ON" position. 4. Release the "0.0/SET" button. 5. Push the button with the two pages and clock symbols on the instrument cluster within 20 seconds. Be sure to record the oil and filter change in your SUV's service records. For more, please check out my other
2009-2017 VW Tiguan DIY Repair & Maintenance Guides. |
||
| If you found this guide to be helpful,
please consider making a small donation by clicking on the PayPal.com
"Donate" button located to the right of this paragraph. Thank you!
(Note: I am not a registered charity. Donations are not tax deductible.) |