
Honda Pilot Cabin Air Filter
Replacement Guide
How to change the A/C system's cabin air
filter in a 1st generation 2003 to 2008 Honda Pilot with the part numbers.

|
By Paul B. Michaels Author & Photographer Auto Mechanic Since 1989 |
||
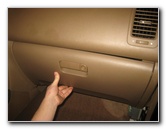
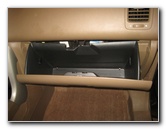
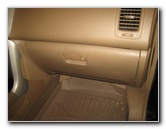 2006 Pilot Glove Box |
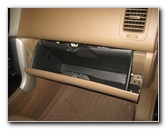 Open Glove Box - Empty Out |
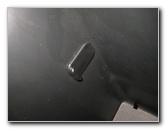 Left Glove Box Retainer |
|
This automotive maintenance tutorial was specifically written to assist owners of the first generation (2003, 2004, 2005, 2006, 2007 and 2008) Honda Pilot SUV in cleaning or changing the air conditioning system's cabin air filter element in the HVAC blower motor housing. Owners of other Honda or Acura vehicles such as the Accord, Civic, Crosstour, CR-V, CR-Z, Fit, Insight, Odyssey, Pilot, Ridgeline, ILX, TSX, TLX, TL, RLX, RDX, NSX and MDX may also find these DIY instructions to be helpful. A few compatible replacement cabin air filters with their part numbers include the following: TYC 800079P, Fram CF8813A, Honda 80290-S0X-A01, POTAUTO MAP 1032C, ATP HA-3, Bosch 6059C, Denso 453-1006, K&N VF3004, WIX 24897 and ACDelco CF3160. The tools needed to access and replace the cabin air filter include a Phillips head screwdriver and either a small hacksaw or a Dremel rotary tool. |
||
|
|
||
 Outside of Glove Box |
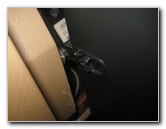
 Gently Remove Retainer |
 Stoppers Removed |
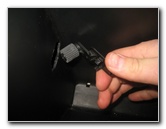
| The first two steps
are to open the glove box and then empty out the contents. Gently remove the two side wall retaining clips or "stoppers" from the interior of the glove box. You can either push the retainers towards the middle of the glove box from the outside or pull them in to the glove box from the interior. Set the two retainers aside in a safe place. |
||
 Glove Box Drops Down |
 Close Glove Box |
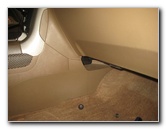
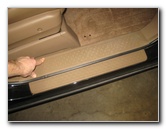
 Pull Off Step Panel |
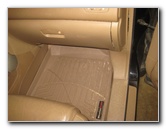
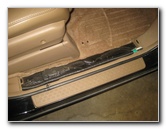
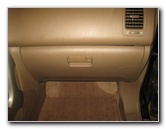
| Raise the glove box
back towards the dashboard and close it to secure the latch. Gently pull off the plastic step rail trim panel. It is held in place by three plastic pop rivet friction fasteners. |
||
 Three Pop Rivet Fasteners |
 Step Trim Panel Removed |
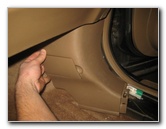
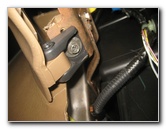
 Right Passenger Kick Panel |
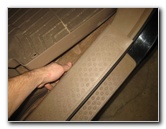
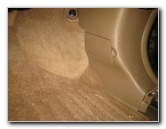
| Set the step rail
trim panel aside in a safe place. Move to the front passenger right side kick panel. |
||
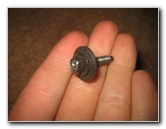
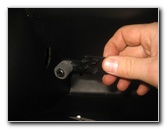
 Black Plastic Screw |
 Loosen Counterclockwise |
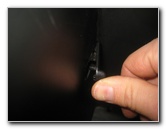
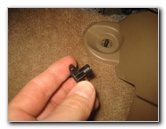 Plastic Fastener Removed |
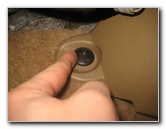
| Spin off the black
plastic fastener in the counterclockwise direction. Set the black plastic fastener aside in a safe place. |
||
 Pull Off Kick Panel |
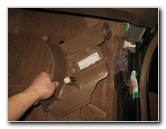 Kick Panel Removed |
 Right Glove Box Screw |
| Gently pull off the
kick panel and set it aside in a safe place. Look under the glove box and locate the two Phillips head screws. There is one screw on the left side and another on the right side. |
||
 Loosen Counterclockwise |
 Right Side Screw Removed |
 Left Side of Glove Box |
| Loosen the two screws by turning them counterclockwise with a Phillips head screwdriver. | ||
 Left Side Glove Box Screw |
 Loosen Counterclockwise |
 Removing Left Screw |
| Set the two Phillips head screws aside in a safe place. | ||
 Two Glove Box Screws |
 Open Glove Box Latch |
 Remove Glove Box |
| Carefully open the
glove box latch to release it. Allow the glove box to lower down to the floor mat. Move the glove box out of the way. |
||
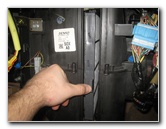
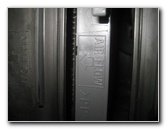
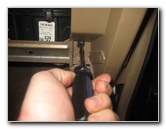
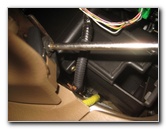
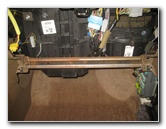 Plastic Bar Removed |
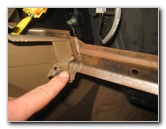 Left Side Cut Mark |
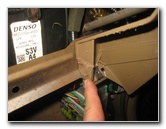 Right Side Hacksaw Mark |
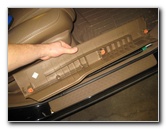
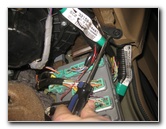
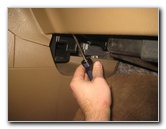
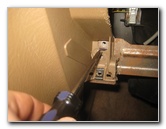
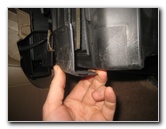
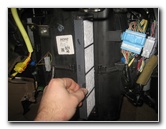
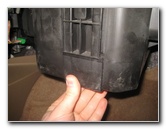
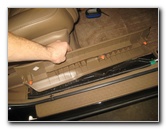
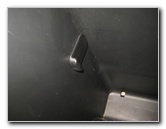
| If this is the
first time that you are servicing the cabin air filter in your Pilot, you
will need to cut away the plastic bar that covers the metal mounting bar
behind it. Use a small hacksaw or any other type of knife to carefully cut away the plastic bar. For the cleanest cut, I recommend using a Dremel rotary tool. If you don't remove the plastic bar, it will be more difficult to remove the cabin air filter access cover, remove the old filter and install the new one. The plastic bar doesn't serve much of a purpose, so you might as well just cut it out. (This 2006 Pilot already had the plastic bar removed by the previous owner.) |
||
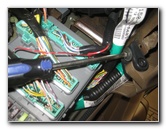
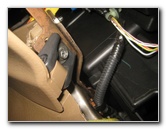
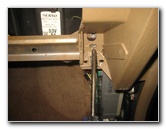 Remove Two Screws |
 Two Left Side Screws |
 Pull Out Metal Bar |
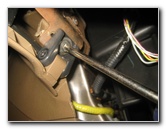
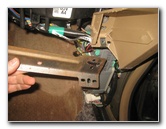
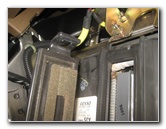
| Remove the two
Phillips head screws on the left side of the metal glove box mounting bar by
turning them counterclockwise. Then remove the other two screws on the right side of the bar. Set the four screws aside in a safe place. (The four screws were missing on this Pilot.) |
||
|
|
||
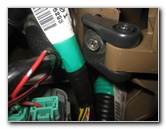
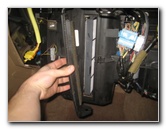
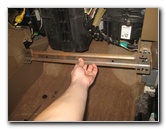
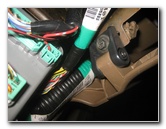
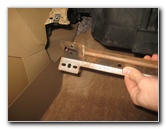 Slide Out Left Side of Bar |
 Set Metal Bar Aside |
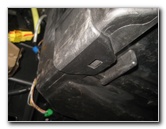
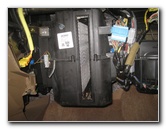
 HVAC Blower Motor |
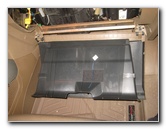
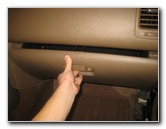
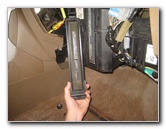
| Gently slide out
the metal glove box's lower mounting bar. Set the metal bar aside in a safe place. Once the metal bar has been removed, you'll have an obstructed view of the black plastic HVAC blower motor housing. |
||
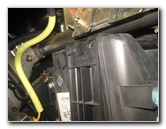
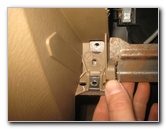
 Bottom of Filter Cover |
 Gently Release Retaining Clip |
 Pull Off Top of Filter Cover |
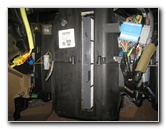
| Gently pull down on
the bottom of the filter access cover to release the retaining clip. Swing open the bottom of the filter cover and lift off the retaining clip on the top. |
||
 Access Panel Removed |
 Old Filter Exposed |
 Slide Out Old Filter |
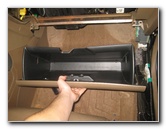
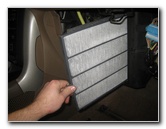
| Set the filter
access cover aside in a safe place. You'll notice that the plastic frame of the old cabin air filter is marked with an <--- "Air Flow" arrow that points to the left towards the driver side of the SUV. Slide the old air filter straight out of the slot. |
||
 |
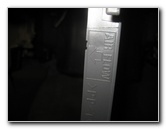 <-- Air Flow Arrow |
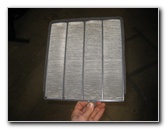 |
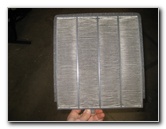
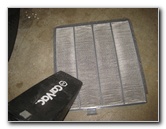
| Inspect both sides
of the old filter. If the old filter is dark grey or black and clogged with dirt, dust, leaves, hair, pollen, soot, insects, twigs, sand and other debris, it should be replaced with a new element. I recommend buying the TYC 800079P cabin air filter since it has excellent reviews on Amazon. If you are sensitive to odors, I would choose the Fram CF8813A "Fresh Breeze" filter that has activated charcoal. |
||
 Inspect Both Sides |
 Empty Filter Slot |
 Clean With Vacuum |
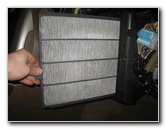
| If the old filter is relatively clean, just tap out the large debris and remove any fine dust with a vacuum cleaner. | ||
 Slide In New Air Filter |
 New Air Filter Installed |
 Air Flow Pointed Left |
| Orientate the <---
"Air Flow" arrow so that it is pointing to the left towards the driver side
of the car. Slide the new filter straight in to the slot. |
||
 Line Up Filter Cover |
 Re-Attach Top of Cover |
 Snap On Lower Clip |
| Line up the filter
access cover over the slot. First re-attach the slot on the top of the filter cover to the tab on the top of the slot. Then gently pop the bottom of the filter cover back in to place. |
||
 Line Up Metal Brace |
 Replace Left Side |
 Tighten Phillips Screws |
| Replace the metal bracket behind the remaining plastic pieces on the left and right side. | ||
 Replace Right Side Screws |
 Secure Glove Box Latch |
 Replace Left Side Screw |
| Replace the four
screws on the metal bracket by turning them in the clockwise direction with
the Phillips head screwdriver. Push the glove box back in to dashboard and secure the top latch to temporarily hold it in place. |
||
 Phillips Screw Replaced |
 Replace Left Screw |
 Left Screw Replaced |
| Replace the two screws under the bottom of the glove box by turning them clockwise with the Phillips head screwdriver. | ||
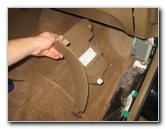 Line Up Kick Panel |
 Replace Panel & Fastener |
 Line Up Step Panel |
| Line up the kick
panel and gently push it back in to place. Spin on the black plastic fastener in the clockwise direction. Line up the three pop rivets on the underside of the step panel and push it down in to place. |
||
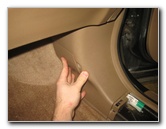
 Push On Step Trim Panel |
 Glove Box Side Stoppers |
 Replace Two Retainers |
| Open the glove box
and re-attach the two rubber and plastic retainers. (We are missing one of the side stoppers. A replacement glove box retainer piece is part number Honda 77508-SX0-000.) |
||
 Left Retaining Clip Replaced |
 Replace Contents |
 Close Glove Box |
| Replace the
contents of the glove box and close it to complete the job. Enjoy the fresh clean air from your A/C system! Be sure to record the filter change in your vehicle's service records. For more, check out all of my
2003-2008 Honda Pilot DIY Repair & Maintenance Guides. |
||
| If you found this guide to be helpful,
please consider making a small donation by clicking on the PayPal.com
"Donate" button located to the right of this paragraph. Thank you!
(Note: I am not a registered charity. Donations are not tax deductible.) |