
Dodge Grand
Caravan Cabin Air Filter Replacement Guide
How to clean or change the A/C system's
cabin air filter element in a 5th generation 2008 to 2014 Dodge Grand Caravan.

By Paul B. Michaels Author & Photographer Auto Mechanic Since 1989 |
||
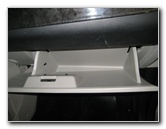
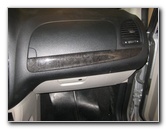 2013 Grand Caravan Glove Box |
 Open Glove Box - Empty Out |
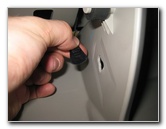
 Damper String - Left Side |
| This
automotive maintenance tutorial was specifically written to assist
owners of the 5th generation or "Generation V" (2008, 2009, 2010,
2011, 2012, 2013 & 2014) Dodge Grand Caravan in cleaning or
changing the cabin air filter element located in the HVAC system's
blower motor housing. Owners of other Chrysler, Dodge, Jeep or RAM vehicles such as the Avenger, 200, 300, Town & Country, Challenger, Charger, Dart, Durango, Journey, Patriot, Wrangler, Grand Cherokee, Compass, 1500, 2500, 3500, C/V Tradesman and ProMaster may also find these DIY instructions to be helpful. A few compatible replacement cabin air filters with their part numbers are as follows: FRAM CF10743, Purolator C25870, Wix 24479, Premium Guard PC4479, Fram CF10729, Ecogard XC25870, Mann Filter MC 1061, Mopar 6812 7809AA, TYC 800146P, Pentius PHB5870, Hastings AFC1496, Denso 453-6018, Bosch P3908WS and OEM CAF228P. No tools are needed to replace the filter. A wet/dry shop vacuum can be useful for cleaning the existing OEM filter in order to re-use it. |
||
|
|
||
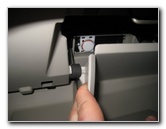
 Mounting Button Inside |
 Detach Damper String Bracket |
 Push In Side Walls |
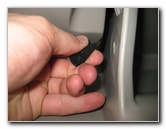
| The first few steps
are to sit in the front passenger seat, open the glove box and empty out the
contents.
Then move to the outer left side of the glove box and locate the damper string (or "rope") attached to a black plastic mounting bracket. Slide the bracket towards you to move the mounting button on the inside of the glove box from the smaller hole to the larger hole. Pull the bracket out of the side wall and allow the damper string to retract behind the glove box. |
||
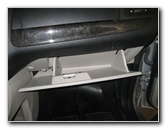
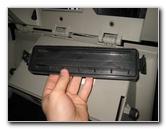
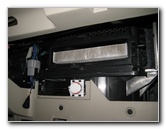
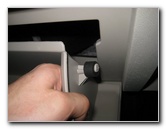
 Remove Rubber Side Stops |
 Lower Glove Box |
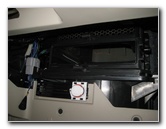
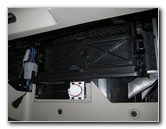 Filter Access Cover |
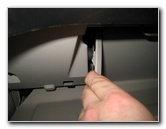
| Firmly push in the
two side walls of the glove in towards each other until the rubber side
stoppers can be removed from behind the dashboard. Lower the glove box down to the passenger floor mat. Once the glove box is out of the way, you'll be able to see the HVAC blower motor housing and the rectangular black plastic filter access panel. |
||
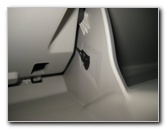
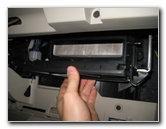
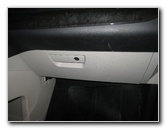
 Push In Tab - Release Clip |
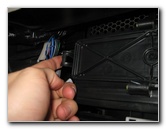 Release Left Side Clip |
 Filter Access Panel Removed |
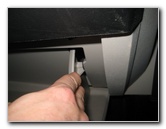
| Push in the release
tabs on the left and right sides of the filter cover to release the
retaining clips.
Pull the filter cover straight off the blower motor housing and set it aside in a safe place. |
||
|
|
||
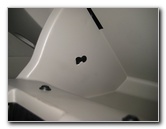
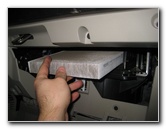
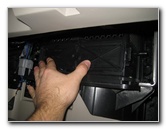
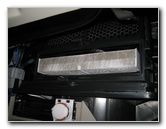 Old Cabin Filter Visible |
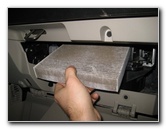 Slide Out Old Cabin Filter |
 Old Cabin Filter Removed |
| Slide the old cabin
air filter straight out of the slot in the HVAC blower motor housing. Inspect both sides of the old air filter. |
||
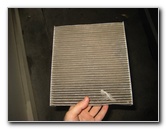
 Inspect Both Sides |
 Clean With Vacuum |
 Slot In Blower Motor Housing |
| If the old filter
is relatively clean, just tap out the large debris and remove any fine dust
with a vacuum.
If the old filter is dark grey or black and clogged with dirt, dust, pollen, hair, insects, twigs, leaves and other debris, it should be replaced with a new element. I'd recommend buying the FRAM CF10743 cabin air filter since it has the best reviews on Amazon. |
||
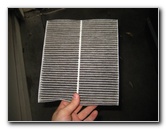
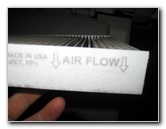 "Air Flow" Arrows |
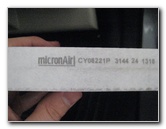 micronAir CY08221P |
 Insert New Cabin Air Filter |
| Orientate the
cleaned or new cabin air filter with the "Air Flow" arrows pointing down to
the floor mat.
Slide the new filter straight in to the slot. |
||
 Install "Air Flow" Down |
 Line Up Filter Access Panel |
 Push Panel To Secure Clips |
| Line up the filter cover and gently push on it until you feel or hear the two retaining clips click in to place. | ||
 Pull Out Damper Rope Mount |
 Large Hole - Push Forward |
 Firmly Push In Side Walls |
| Pull the damper
string mounting bracket out from the left side of the glove box. Raise the glove box towards the dashboard. Insert the mounting button on the damper string bracket in to the larger opening on the left side wall of the glove box. Push the mounting button forward from the larger opening to the small hole to secure it in place. |
||
 Re-Insert Rubber Side Stops |
 Replace Contents of Box |
 Close Glove Box |
| Firmly push in the
two side walls of the glove box towards the middle until the rubber side
stops can be re-inserted behind the dashboard.
Replace the contents of the glove box and close it to complete the job. Enjoy the fresh air! For more, check out my other
Dodge Grand Caravan DIY Maintenance Guides. |
||
| If you found this guide to be helpful,
please consider making a small donation by clicking on the PayPal.com
"Donate" button located to the right of this paragraph. Thank you!
(Note: I am not a registered charity. Donations are not tax deductible.) |