
Dodge Grand
Caravan Map Light Bulbs Replacement Guide
How to change a burnt out map light bulb in the
overhead console of a 5th generation 2008 to 2014 Dodge Grand Caravan.

By Paul B. Michaels Author & Photographer Auto Mechanic Since 1989 |
||
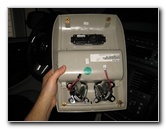
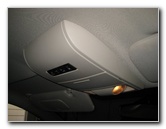
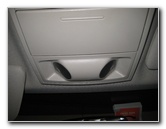 2013 Caravan Map Lights |
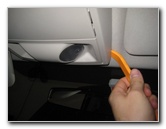 Pry Out Overhead Console |
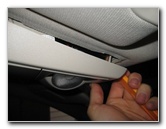 Loosening Friction Fasteners |
| This
automotive maintenance tutorial was specifically written to assist
owners of the 5th generation or "Generation V" (2008, 2009, 2010,
2011, 2012, 2013 & 2014) Dodge Grand Caravan in changing a burnt out
map light bulb in the overhead console or upgrading them both to
brighter LED units. Owners of other Chrysler, Dodge, Jeep or RAM vehicles with similar map lights such as the Avenger, 200, 300, Town & Country, Challenger, Charger, Dart, Durango, Journey, Patriot, Wrangler, Grand Cherokee, Compass, 1500, 2500, 3500, C/V Tradesman and ProMaster may also find these DIY instructions to be helpful. A replacement "festoon" or "fuse" style light bulb is part number 578 which is available from manufacturers such as Sylvania, GE, Eiko and PIAA. If you would like to have brighter map lights, install some compatible replacement 578 LED bulbs. The tools needed to replace the bulbs include a flathead screwdriver or a plastic automotive panel removal pry bar tool and some wire or string. |
||
|
|
||
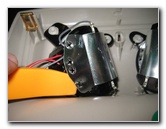
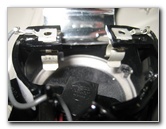
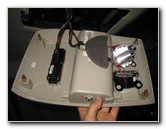 Overhead Console Removed |
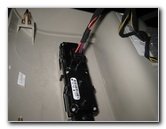
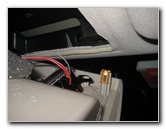
 Disconnect Power Plugs |
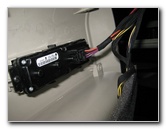 Disconnect Large Power Plug |
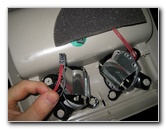
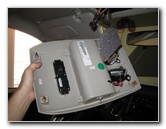
| In order to access
the map light bulbs, you'll need to remove the entire overhead console from
the headliner. Use either a large flathead screwdriver or a plastic automotive panel removal pry tool to gently disengage the friction fasteners at the four corners of the overhead console. Press the release button on the large black plastic electrical connector and pull the plug straight out of its socket. |
||
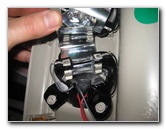
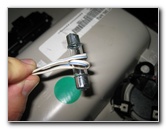
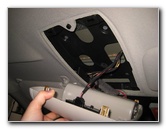
 Console Detached |
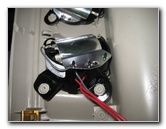 Metal Light Reflector |
 Gently Pry Up Metal |
| The bulbs are
covered by metal sheets or "plates" that act as heat shields and light
reflectors. Gently pry the edge of the metal cover off the small black plastic pegs. |
||
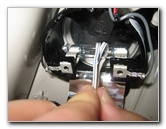
 Bulb Exposed |
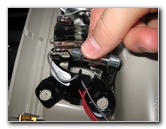 Pull Out Old Bulb |
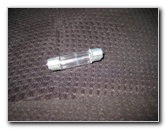 Old # 578 Bulb |
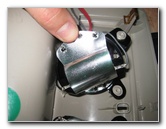
| Bend back the metal
cover until you can easily access the bulb socket. Push the old bulb down out of the socket and then lift it out of the housing. I recommend buying the Sylvania 578 light bulb. I've always had good experiences with them and they seem to last a long time. Or you can install some even longer lasting 578 LED bulbs. |
||
|
|
||
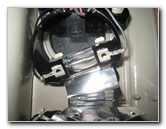
 Empty Bulb Socket |
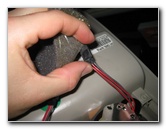
 Wrap New Bulb In Wire |
 Line Up Bulb & Socket |
| Installing the new
bulb is a bit tricky since there isn't much room for your fingers. I found that the easiest way to install a new bulb is to wrap some stiff wire around it to hold it in place. You may also be able to use some rope, fishing line or a cable ("zip") tie. Lower the bulb down in to the housing. |
||
 Pop Bulb In To Socket |
 Bend Back Metal Shield |
 Hold Up Overhead Console |
| Pull the wire up
towards you to gently pop the new 578 bulb in to the socket. Gently bend the metal cover back over the bulb housing and pop the black plastic pegs in to their corresponding holes. |
||
 Push In Power Plug |
 Re-Insert Small Plugs |
 Line Up Friction Fasteners |
| Raise the overhead
console towards the headliner. Push the larger black plastic power plug back for the electrical switch panel straight in to its socket. Re-insert the small power plugs for the map lights in to their sockets. |
||
 Push On Overhead Console |
 Console Re-Attached |
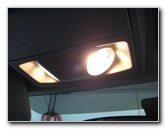 Test New Map Light Bulbs |
| Line up the four
metal friction fasteners on the top of the overhead console with their
corresponding holes in the roof. Gently push the overhead console back in to place. Make sure that the overhead console is flush with the headliner at every edge. Test the new map light bulbs by pressing in the clear lens covers to activate the "On/Off" switch. For more,
check out my other
Dodge Grand Caravan DIY Maintenance Guides. |
||
| If you found this guide to be helpful,
please consider making a small donation by clicking on the PayPal.com
"Donate" button located to the right of this paragraph. Thank you!
(Note: I am not a registered charity. Donations are not tax deductible.) |