
Nissan Versa
Key Fob Battery Replacement Guide
How to change the battery in the key fob
remote control for a 2nd generation 2012 to 2019 Nissan Versa sedan.

By Paul B. Michaels Author & Photographer Auto Mechanic Since 1989 |
||
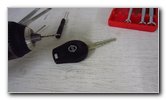
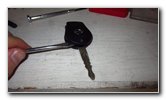
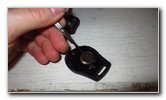
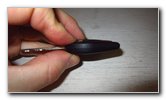
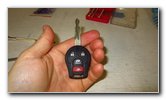
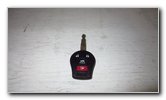 2019 Versa Key Fob |
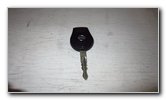 Back Side of Key Fob |
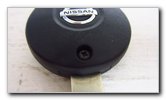 Small Phillips Head Screw |
| This automotive
maintenance tutorial was specifically written to assist owners of the second
generation 2012, 2013, 2014, 2015, 2016, 2017, 2018 and 2019 Nissan Versa
sedan in changing a weak or dead battery inside the key fob remote control
for the keyless entry system.
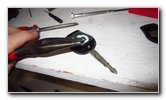
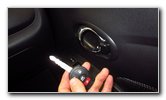
Owners of other Nissan vehicle such as the Sentra, Altima, Maxima, Murano, Rogue, Note, Leaf, Juke, Kicks, Latio, Almera, Sunny, Qashqai, NV200, Pathfinder, Frontier and X-Trail may also find these DIY instructions to be helpful. The compatible replacement coin cell battery (also known as a "button" or "watch" battery) is part number CR1620 which is available from various manufacturers such as Duracell, Energizer, Panasonic, Toshiba, Sony and Maxell. The tools needed to access and replace the key fob battery include a small Phillips head screwdriver and a small flat head screwdriver such as from a Jeweler's Screwdriver Set. The first step is to separate the key ring and your other keys from the fob. Then turn over the fob and locate the small Phillips head screw situated below the "Nissan" logo near the metal ignition key. Use a small #0, #00 or #000 sized Phillips head screwdriver to carefully loosen the screw in the counterclockwise direction (lefty loosey). Since the screw is made of relatively soft metal and it has probably been in place for several years, there is a very good chance that the Phillips head will strip when you attempt to loosen it. Nissan also usually applies a small amount of threadlocking adhesive fluid (such as Loctite Blue medium strength) to the threads which makes it even harder to remove the screw. |
||
|
|
||
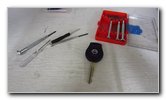 Jeweler's Screwdriver Set |
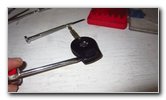
 Stripped - Electric Drill |
 Drill Out Screw Head |
| If you are able to
remove the Phillips head screw, skip ahead to the instructions for how to
open the fob housing and replace the battery.
If the screw head strips, you'll need to use an electric drill with a small drill bit to remove the head. Start with the smallest drill bit in your set. Very carefully and very slowly drill out the head of the small Phillips head screw until it is worn away. Do NOT apply excessive force. Do NOT drill at high speed! It took me at least 10 to 15 minutes of very slow drilling to carefully wear away the head of the screw. |
||
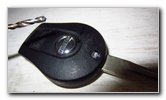
 Small Notch - Top Right |
 Flat Head Screwdriver |
 Pry Apart Two Halves |
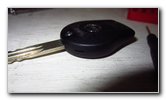
| Locate the small
notch (A.K.A. slot or cut out) at the top right corner of the fob housing
near the metal ignition key. Insert the small flat head screwdriver into the notch. Very gently twist the screwdriver to pop apart the front and rear cover of the fob assembly. Try to avoid using excessive force. If you removed the screw or drilled away enough of the screw head, the rear cover should pop off relatively easily. If the rear cover will not pop off, carefully and slowly remove more of the screw head with the small drill bit. |
||
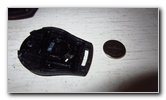
 Rear Cover Removed |
 Twist Out Old Screw |
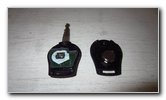 Old Battery Exposed |
| You may need to
remove and re-insert the flat head screwdriver in several areas in between
the rear cover and the fob housing to fully separate them. Set the rear cover aside in a safe place. If you'd like to replace the old screw with a new one, use a pair of needle nose pliers to twist out the threaded end of the screw by grasping it on the drilled out head. Rotate the old screw in the counterclockwise direction. |
||
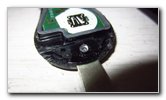
 Pry Out Old Battery |
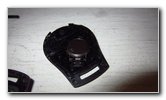
 Old Battery Removed |
 OEM Coin Cell Battery |
| Use the small flat
head screwdriver to gently pry out the old battery from its socket. Try to avoid bending, scratching or damaging the metal electrical contacts. The OEM (original equipment manufacturer) battery in the fob for this 2019 Versa SV was a Murata CR1620 3V lithium coin cell made in Japan. |
||
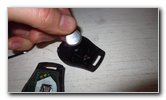 Lower In New Battery |
 New Battery Installed |
 Line Up Back Cover |
| Orientate the new
battery with the "+" positive side facing down and the "-" negative side
facing up towards you. Lower the new CR1620 battery down into the holder. Make sure the new battery "pops" securely into place. Line up the rear cover with the key fob housing. |
||
 Pop Together Housing |
 Key Fob Re-Assembled |
 Test New Fob Battery |
| Gently snap
together the two halves of the fob together. Make sure that the two halves of the fob are flush together at every edge. If you were able to remove the original screw, replace it by turning it in the clockwise direction with the Phillips head screwdriver. If you had to drill out the old screw and were able to remove it, spin in a compatible replacement Phillips head screw. Tighten it in the clockwise direction until it is snug. To test the new battery, stand near your Versa and press the "Unlock" and "Lock" buttons. If the new battery is working properly, you should hear the door locks opening and closing or see the parking lights flash. Be sure to write down the battery change in your vehicle's service records. Note - You shouldn't have to reprogram the key fob. Just changing the battery does not clear the original programming from the factory. Please
check out all of my
2012-2019 Nissan Versa DIY Repair & Maintenance Guides. |
||
| If you found this guide to be helpful,
please consider making a small donation by clicking on the PayPal.com
"Donate" button located to the right of this paragraph. Thank you!
(Note: I am not a registered charity. Donations are not tax deductible.) |