
Nissan Rogue
PCV Valve Replacement Guide
How to check or change the PCV valve in a
2nd generation 2014 to 2018 Nissan Rogue with the QR25DE engine.

By Paul B. Michaels Author & Photographer Auto Mechanic Since 1989 |
||
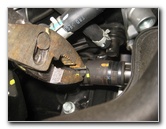
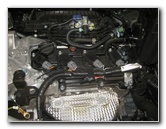
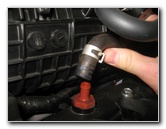
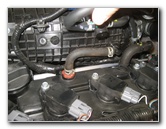
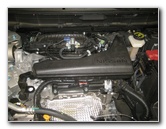
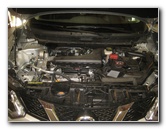 2016 Rogue 2.5L I4 Engine |
 Left Side of Air Intake |
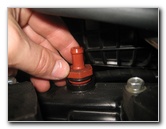
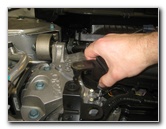 Pull Peg Out of Grommet |
| This
automotive maintenance tutorial was specifically written to assist
owners of the second generation 2014, 2015, 2016 and the updated
2017 or 2018 model year Nissan Rogue SUV in checking or changing the
PCV (positive crankcase ventilation) valve in the QR25DE 2.5 liter
inline four cylinder engine. Owners of other Nissan or Infiniti vehicles such as the Murano, Altima, Titan, Versa, Sentra, Maxima, Leaf, 370Z, GT-R, Juke, Pathfinder, Armada, Patrol, Skyline, Cube, X-Trail, Xterra, Qashqai, Rogue Sport, NV200, NV400, Teana, Q50, Q70, Q60, QX30, QX50, QX56, QX60, QX70 and QX80 may also find these DIY instructions to be helpful. The compatible replacement PCV valve part number is genuine OEM Nissan 11810-1KC0A. The tools needed to complete this procedure include a pair of pliers, a deep well 23mm socket and a 1/2" drive ratchet. |
||
|
|
||
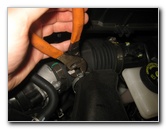
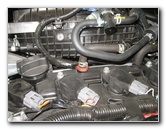
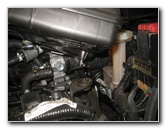
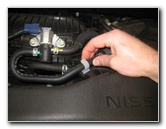 Pull Hose Out of Clip |
 Rubber Hose - Back Side |
 Release Hose Clamp |
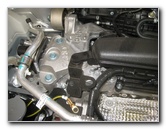
| In order to easily
access the PCV valve, you'll need to partially remove the part of the air
intake assembly on the top of the engine. Firmly pull the plastic peg on the left side of the air intake assembly out of the rubber grommet attached to the top of the engine. Gently pull the rubber hose on the back side of the air intake out of the "C" shaped plastic retaining clip. Then use a pair of pliers to squeeze the two tabs on the hose clamp on the rear of the air intake and slide it off the end of the hose. Pull the hose off the air intake. |
||
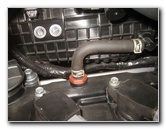
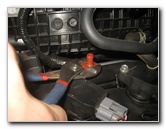
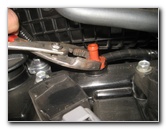
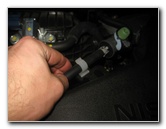
 Loosen Right Side Clamp |
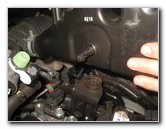 Pull Peg Out of Grommet |
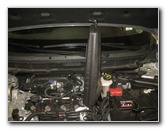 Rotate Up Air Intake |
| Loosen the hose
clamp on the right side of the air intake assembly. Rotate the air intake up and towards the right (driver) side of the engine bay. Pull the plastic peg on the right side out of its grommet. |
||
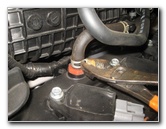
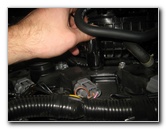
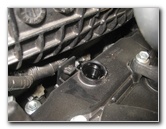
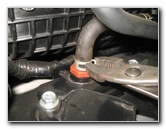
 PCV Valve Location |
 Red / Orange PCV Valve |
 Rubber Hose On Valve |
| Once the air intake is out of the way, you'll be able to spot the red or orange colored PCV valve attached to the top of the engine and covered by a black rubber hose. | ||
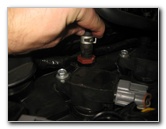
 Release Hose Clamp |
 Pull Hose Off Valve |
 Loosen Counterclockwise |
| Use the pliers to
pinch together the two tabs on the metal hose clamp.
Slide the hose clamp up and off the nipple on the top of the PCV valve. Loosen the old PCV valve by turning it counterclockwise with either a pair of pliers or a 23mm socket with a 1/2" drive ratchet. |
||
|
|
||
 Spin Out With 23mm Socket |
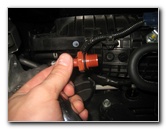 Remove Old PCV Valve |
 Empty PCV Valve Socket |
| Once the old PCV valve is loose, spin it out the rest of the way by hand to prevent from having it fall down in to the engine bay. | ||
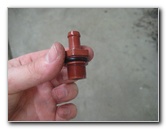 |
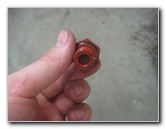 Inspect Old Valve |
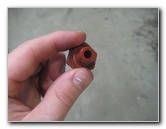 |
| Test the condition
of the old PCV valve by shaking it vigorously.
If you hear a healthy sounding rattle sound from the PCV valve, it is probably still good. But since new PCV valves are so inexpensive, I recommend replacing it at least every other 2 to 3 years. The genuine OEM replacement PCV valve part number is Nissan 11810-1KC0A. |
||
 Install New PCV Valve |
 Tighten Clockwise |
 Use 23mm Socket |
| Spin the new PCV
valve in by hand a few turns in the clockwise direction. Tighten the new valve in the clockwise direction to just past hand tight with a pair of pliers or the 23mm socket and a 1/2" drive ratchet. Try to avoid over tightening the new valve to prevent from cracking it. |
||
 Secure Hose Clamp |
 Rubber Hose Secured |
 Lower Air Intake |
| Push the rubber
hose on to the top of the new PCV valve. Pinch the two tabs on the metal hose clamp and slide it down over the new valve. Gently lower the upper part of the air intake assembly down over the top of the engine. |
||
 Secure Peg In Grommet |
 Re-Attach Rubber Hoses |
 PCV Valve Replaced |
| Push the plastic
peg down in to the rubber grommet on the left side of the air intake. Re-attach the rubber hose to the port on the back side of the air intake. Re-insert the smaller rubber tube in to the "C" shaped plastic retaining clip. Be sure to record the PCV valve change in your SUV's service records. For more, check out all of my
2014-2018 Nissan Rogue DIY Repair & Maintenance Guides. |
||
| If you found this guide to be helpful,
please consider making a small donation by clicking on the PayPal.com
"Donate" button located to the right of this paragraph. Thank you!
(Note: I am not a registered charity. Donations are not tax deductible.) |