
Toyota
Corolla Cruise Control Stalk Installation Guide
How to add a cruise control switch stalk
to an 11th generation 2014-2018 Toyota Corolla sedan with photo illustrated
steps.

By Paul B. Michaels Author & Photographer Auto Mechanic Since 1989 |
||
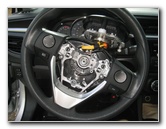
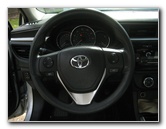 2014 Corolla Steering Wheel |
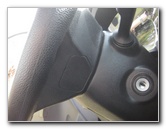 Plastic Cover - Right Side |
 Release Hood |
| This
automotive maintenance tutorial was specifically written to assist
owners of the eleventh generation (2014, 2015, 2016, 2017 and 2018)
Toyota Corolla in installing a cruise control switch stalk on the
side of the steering wheel. Owners of other Toyota, Lexus or Scion vehicles such as the Yaris, Matrix, Prius, Camry, RAV4, Sienna, Tacoma, Tundra, FJ Cruiser, Venza, Highlander, Avalon, Sequoia, Land Cruiser, IS 250, ES 350, GS 350, tC, xB, xD, iQ and FR-S may also find these DIY instructions to be helpful. The add-on cruise control switch stalk for the Toyota Corolla is part number Toyota 84632-34011 or 8463234011. (It also fits most other Toyota models past and present.) The tools needed to complete this procedure include a 10mm wrench or socket to disconnect the battery, a flathead screwdriver, a Phillips head screwdriver, a step drill bit (with 1 1/8" size) and an electric drill. |
||
|
|
||
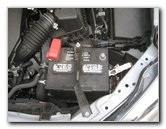
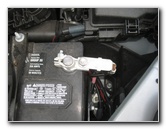
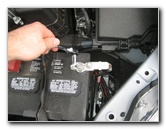
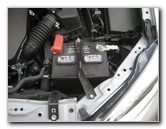 12V Automotive Battery |
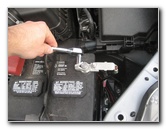 Loosen 10mm Terminal Nut |
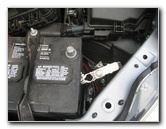 Pull Off Negative Terminal |
| The first few steps
are to pop open the hood and move to the right side of the engine bay. Since we will be removing the driver air bag module from the steering wheel, it would be best to disconnect the 12V battery. Loosen the nut on the negative "-" terminal by turning it counterclockwise with a 10mm socket and 1/4" drive ratcheting wrench or a 10mm wrench. Pull the negative terminal off the battery post and tuck it away on the side of the battery to help prevent accidental electrical contact. |
||
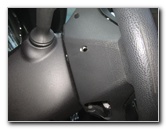
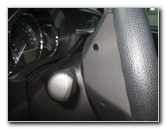
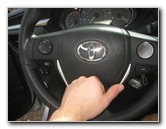
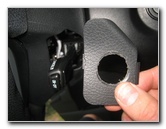
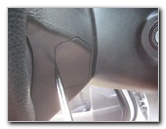 Pry Off Trim Cover |
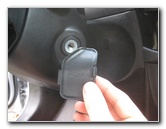 Plastic Panel Removed |
 Access To Quick Disconnect |
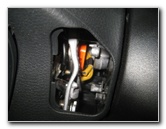
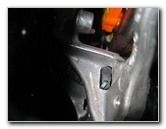
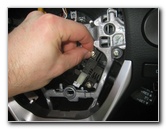
| Then locate the
small plastic trim panel on the right side of the steering wheel column. Insert a small flathead screwdriver in to the notch and gently pry out the trim cover. There are three silver metal bars that you will need to push to release the air bag module from the steering wheel. |
||
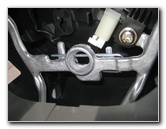
 Two Holes - Other Disconnects |
 Three Air Bag Disconnects |
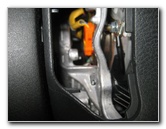 View of Quick Release Bar |
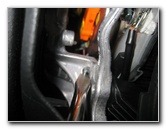
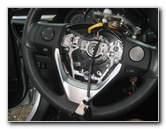
| One of the air bag
quick disconnect bars can be accessed through the hole where the trim panel
was removed. The other two quick disconnects can be reached through holes on the steering wheel. Please take a moment to study Picture # 12, Picture # 13 and Picture # 14 to understand how to release the quick disconnect bars. |
||
 Closer View of Disconnect |
 Push Bar To Release |
 Release 2nd Disconnect |
| Use the flathead
screwdriver to push the end of the quick disconnect bar in towards the
center point of the steering wheel. As you release each quick disconnect, you should see the air bag module lift slightly away from the steering wheel. Insert the screwdriver straight in to the other two holes to release the 2nd and 3rd quick disconnects. |
||
 3rd Opening On Wheel |
 Insert Flathead Screwdriver |
 Air Bag Module Popped Off |
| It might take you a
few attempts to release the 2nd and 3rd quick disconnects since you can't
see what you are doing through the small holes. Try to avoid using excessive pressure to avoid from damaging the air bag wires. |
||
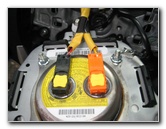
 Air Bag Raised Off Wheel |
 Pull Off Air Bag Housing |
 Rest Air Bag On Steering Column |
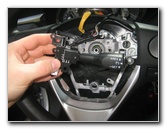
| Once you have
release all three of the quick disconnects, you should be able to easily
lift the air bag module straight out of the steering wheel. Carefully pull the air bag housing off the steering wheel and rest it on top of the steering column. There is no need to disconnect the air bag wiring harnesses, electrical connectors or the ground wire. |
||
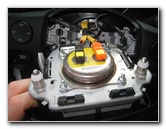
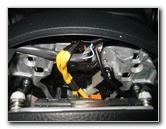
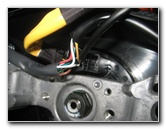 Cruise Control Socket |
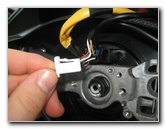 Cruise Control Plug |
 Push In Electrical Connector |
| The electrical
socket for the cruise control plug is located near the top of the steering
wheel. You'll see the small black plastic cruise control socket just to the right of the air bag module electrical connectors. Push the white plastic cruise control power plug straight in to the socket until it clicks securely in to place. |
||
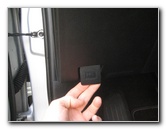
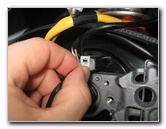
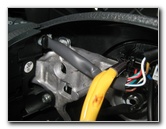
 Stalk Plugged In |
 New Cruise Control Stalk |
 Pass Through Opening |
| Pass the cruise control stalk through the opening on the lower right side of the steering wheel. | ||
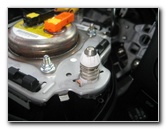
 Line Up 2 Screw Holes |
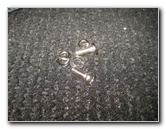 Screws & Washers |
 Spin In Two Screws |
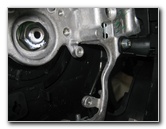
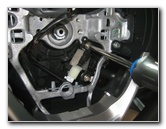
| Push the cruise
control mounting bracket in to place over the two screw holes and the silver
metal peg. Place the washers and lock washers over the Phillips head screws. Spin in the two screws in the clockwise direction by hand to prevent them from becoming cross threaded. |
||
|
|
||
 Tighten Phillips Clockwise |
 Tighten Lower Screw |
 Cruise Control Stalk Installed |
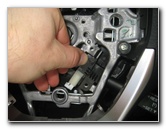
| Tighten the two
screws in the clockwise direction with the Phillips head screwdriver until
they are snug. Try to avoid over tightening the screws to prevent from cracking the plastic mounting bracket. Make sure that the electrical connector and the two screws are securely in place before moving on to the next step. |
||
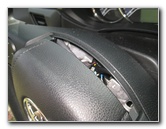
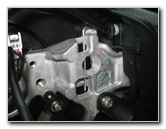 Air Bag Mounting Bracket |
 Air Bag Mounting Hole |
 3rd Air Bag Mount |
| Lift the air bag module off the top of the steering wheel. | ||
 Driver Air Bag Module |
 Spring Loaded Peg |
 Two Bottom Pegs |
 Line Up Pegs & Holes |
 Firmly Push Top |
 Pop In Lower Mounting Peg |
| Line up the three
spring loaded mounting posts or "pegs" on the back side of the air bag
housing with their corresponding holes. Firmly push the air bag module back in to place on the steering wheel. You should feel the mounting pegs click securely in to place. Double check that the air bag module is properly installed before moving on to the next steps. |
||
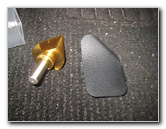 Step Drill & Trim Cover |
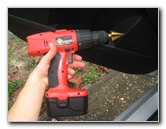 Electric Drill & Bit |
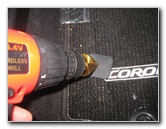 Drill 1 1/8" Hole For Stalk |
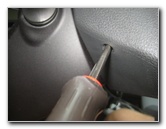
| If you'd like for
your cruise control stalk to look almost as if it was installed at the
Toyota factory, you'll need to drill a hole in the steering wheel trim
panel. Attach your step drill bit to the electric drill. Drill a 1 1/8" hole in to the center of the panel. For the cleanest and neatest hole, drill from the front of the panel and go slowly to prevent from melting the plastic. |
||
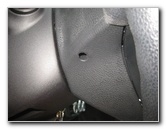
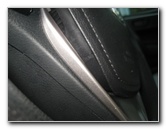
 Steering Wheel Trim Panel |
 Disconnected 12V Battery |
 Push On Negative Terminal |
| Allow the trim
cover to cool off for a minute. Push the negative battery terminal on to the "-" battery post. Tighten the negative battery terminal nut in the clockwise direction with the 10mm socket and 1/4" drive ratcheting wrench. |
||
 Tighten 10mm Clockwise |
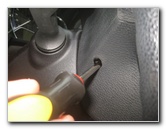
 Steering Column Trim Cover |
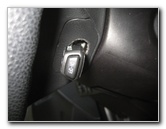
 Pass Stalk Through Hole |
| Pass the cruise control stalk through the opening in the trim panel and snap in back in to place on the steering column. | ||
 Push Panel In Place |
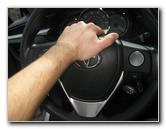
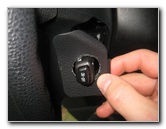
 Turn Key In Ignition |
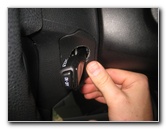
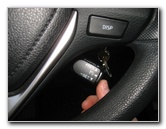 Push "On / Off" Button |
| Insert the key in
to the ignition and start the engine. Push the "On / Off" button at the end of the cruise control stalk. |
||
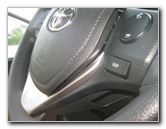
 Cruise Control Installed |
 Speedometer Gauge |
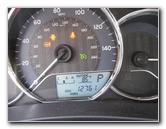 Green Cruise Control Icon |
| You should see the
green cruise control icon appear on the speedometer gauge just above the
outside temperature display and to the right of the 140 MPH line. Please be sure to adjust the time on the clock and program your favorite radio station presets before driving. To test your new cruise control stalk, drive in a safe location and press the "On / Off" button before pushing the stalk down towards the floor mat to set the speed. Most Toyota models will not engage the cruise control below speeds of about 25, 30 or 35 MPH. For more,
check out my other
2014-2018 Toyota Corolla DIY Repair & Maintenance Guides. |
||
| If you found this guide to be helpful,
please consider making a small donation by clicking on the PayPal.com
"Donate" button located to the right of this paragraph. Thank you!
(Note: I am not a registered charity. Donations are not tax deductible.) |