
Kia Optima
License Plate Light Bulbs Replacement Guide
How to change a burnt out license plate
light bulb in the trunk lid of a 4th generation 2016 to 2020 Kia Optima.

By Paul B. Michaels Author & Photographer Auto Mechanic Since 1989 |
||
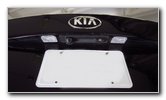 2019 - License Plate |
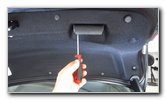
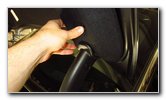
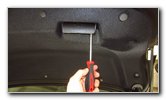
 Open Trunk Lid |
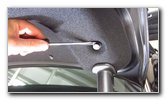
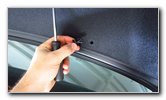
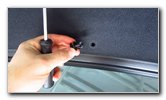
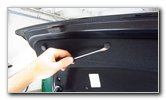
 Pry Open Handle Cover |
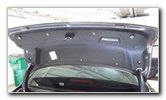
| This automotive
maintenance tutorial was specifically written to assist owners of the 4th
generation (2016, 2017, 2018, 2019 and 2020 model years) Kia Optima sedan in
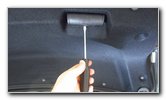
changing a burnt out license plate light bulb located in the trunk lid. Owners of other Kia, Hyundai or Genesis vehicles such as the Niro, Sportage, Sedona, Telluride, Sorento, Rio, Forte, Soul, K900, Cadenza, K5, Stinger, Tucson, Santa Fe, Kona, Palisade, Elantra, Sonata, Accent, Veloster, Ioniq, Nexo, Venue, G70, G80 and G90 may also find these DIY instructions to be helpful. The compatible replacement miniature wedge base light bulb part number is 2825 (also known as W5W) which is available from various manufacturers such as Sylvania, PIAA, Bosch and Philips. If you would like to have brighter license plate lights that will also last a lot longer before burning out, install some 2825 LED bulbs. The tools needed to access and replace the light bulbs include a flat head screwdriver or a plastic pry bar tool, a Phillips head screwdriver and possibly also a pop rivet removal tool. The first step is to open the trunk lid. Use the flat head screwdriver or a plastic pry bar tool to open the black plastic cover on the handle situated on the right (passenger) side of the trunk lid. There is a small notch on the handle just below the "UL" in the word "PULL" printed on it. |
||
|
|
||
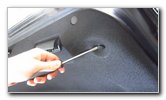
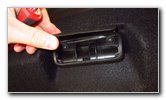
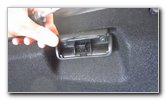 Two Phillips Screws |
 Loosen Counterclockwise |
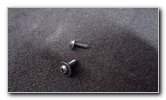 Two Screws Removed |
| Remove the two
screws by turning them in the counterclockwise direction with a Phillips
head screwdriver. Set the two screws aside in a safe place. |
||
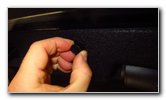
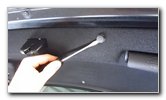 Pry Out Center Button |
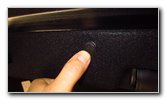
 Remove Plastic Pop Rivet |
 Other Pop Rivets |
| Then begin removing
all of the round black plastic pop rivets that secure the fabric liner to
the metal trunk lid. If you only plan on replacing one burnt out license plate light bulb, you can just remove enough pop rivets so that you can pull back the liner and access the necessary bulb socket. Gently pry out the smaller round button in the center of the pop rivet with the flat head screwdriver or a pop rivet removal tool. Then pry out the base of the fastener. |
||
 |
 |
 |
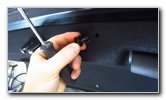
| Continue removing
the other pop rivets. Set the pop rivets aside in a safe place with the two screws. |
||
 |
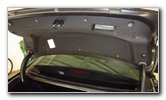
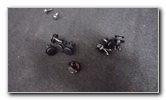 Screws & Pop Rivets |
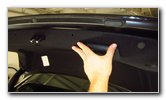
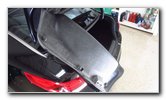 Fabric Trunk Lid Liner |
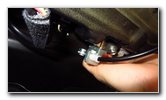
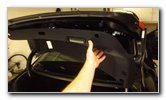
| Move the trunk
liner out of the way.
I chose to leave it still attached by a few pop rivets on the drivers side for easier re-installation later on. I was still able to easily access both the driver side and passenger side bulb sockets. |
||
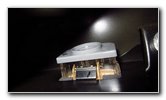
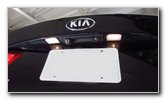
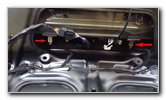 Two Light Bulb Sockets |
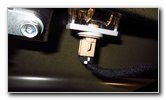 Passenger Side Light Bulb |
 1/4 Turn Counterclockwise |
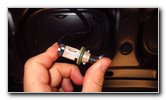
| You can see red
arrows pointing to the two bulb sockets in the first picture in the row
above. Gently rotate the bulb socket 1/4 turn in the counterclockwise direction before pulling it straight out of the housing. |
||
 Bulb Socket Removed |
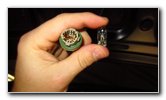 Pull Out Old Light Bulb |
 Old Light Bulb Removed |
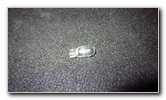
| Carefully pull the
old light bulb straight out of the socket. If you have trouble removing the old bulb due to corrosion (rust) or debris such as sand or dust, try gently wiggling the bulb back and forth while pulling it straight out. |
||
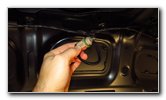
 Push In New Light Bulb |
 Empty Bulb Housing |
 1/4 Turn Clockwise - Lock |
| Push a new number
2825 miniature wedge base light
bulb straight into the socket. I recommend buying some brighter and longer lasting 2825 LED bulbs that should last for about 20,000 to 50,000 hours which is most likely longer than the useful life time of the vehicle. Make sure the new bulb is fully seated in the socket. Re-insert the bulb socket into the housing and rotate it 1/4 turn in the clockwise direction to secure it into place. |
||
 Replace Trunk Lid Liner |
 Replace Pop Rivets |
 Line Up Plastic Handle |
| Push the trunk lid
liner back into place over the power trunk lid release latch and the two
support arms. Line up the screw holes in the pull handle with their corresponding holes in the trunk lid. |
||
 Re-Insert Base of Fastener |
 Pop In Button - Center |
 Replace Two Screws |
| Replace the two
screws by turning them in the clockwise direction with the Phillips head
screwdriver until they are snug. Avoid over tightening the screws to prevent from cracking the plastic "PULL" handle. |
||
 Two Screws Secured |
 Trunk Lid Liner Replaced |
 Test New Light Bulbs |
| Make sure the small
round buttons on the pop rivets are in the up and release position. Push the base of the pop rivets back into place. Then snap in the center of the pop rivets to lock them into place. To test the new license plate light bulbs, turn on the parking lights or the headlights. Tip - If you installed LED bulbs and they don't work, try removing the bulb from the socket, rotate it 180 degrees and push it back into the socket again. Some LED bulbs are "polarized" and will only work when the "+" positive and "-" negative electrical contacts are in the correct orientation. Please check out all of my
2016-2020 Kia Optima DIY Repair & Maintenance Guides. |
||
| If you found this guide to be helpful,
please consider making a small donation by clicking on the PayPal.com
"Donate" button located to the right of this paragraph. Thank you!
(Note: I am not a registered charity. Donations are not tax deductible.) |