
Chevrolet
Malibu License Plate Light Bulbs Replacement Guide
How to change a burnt out license plate
light bulb in a ninth generation 2016 to 2023 GM Chevrolet Malibu

By Paul B. Michaels Author & Photographer Auto Mechanic Since 1989 |
||
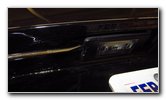
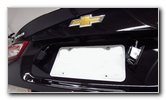
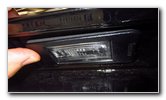
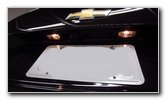
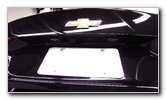 2020 Malibu Trunk Lid |
 Left License Plate Light |
 Right Side Light Housing |
| This automotive
maintenance tutorial was specifically written to assist owners of the ninth
generation 2016, 2017, 2018, 2019, 2020, 2021, 2022 and 2023 GM Chevrolet
Malibu in changing a burnt out license plate light bulb located in the
housing attached to the trunk lid or upgrading both of them to brighter LED
units. The 9th generation Malibu was supposed to undergo a "facelift" in 2022 or 2023 and the refreshed vehicle may have continued being produced into the 2024 and 2025 model years but it will now apparently be discontinued after the 2023 model year. Owners of other General Motors vehicles from Chevrolet, Buick, Cadillac, GMC and Holden such as the Impala, Corvette, Bolt, Sonic, Spark, Express, Trax, TrailBlazer, Equinox, Traverse, Blazer, Tahoe, Suburban, Colorado, Silverado, Cruze, Volt, Camaro, Encore, Envision, Enclave, Regal, LaCrosse, Canyon, Sierra, Terrain, Acadia, Yukon, Savana, XT4, XT5, XT6, Escalade, CT4, CT5, CT6 and Commodore may also find these DIY instructions to be helpful. The compatible replacement miniature wedge base light bulb part number is 2825 (also known as "W5W") which is available from various manufacturers such as Sylvania, GE, Bosch and Philips. If you'd like to have brighter license plate lights that will also last much longer before burning out, install some 2825 LED bulbs. The only tool needed to access and replace the bulbs is a small flat head screwdriver or a plastic pry bar tool. |
||
|
|
||
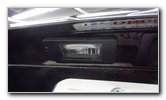
 Small Notch - Outer Edge |
 Insert Screwdriver Blade |
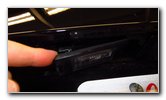 Gently Pull Out Housing |
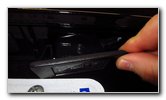
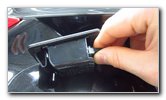
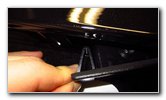
| The procedure for
changing the left (driver) side or the right (passenger) side light bulb is
the same. Locate the small notch on the outer edge of the light housing. Insert the blade of your flat head screwdriver or a plastic pry bar tool into the notch. Gently push the outer edge of the light housing towards the center line of the trunk and carefully pull it down. There is a small plastic tab on the outer edge of the light housing and a flexible plastic retaining clip on the inner edge. Try to avoid using excessive force when you pry out the light to prevent from breaking the housing or scratching the paint on underside of the trunk lid. |
||
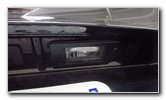
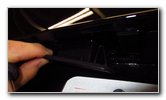 Retaining Clip, Inner Edge |
 Light Housing Removed |
 Pry Out Right Housing |
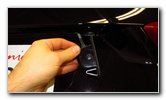
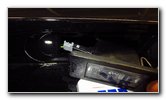
| Repeat the process
if you need to remove the other light housing. Insert the blade of your screwdriver into the notch (cut out section) on the outer edge of the light housing. Gently push in towards the center and pull down the outer edge of the housing. |
||
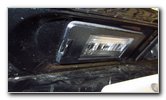
 Plastic Clip - Inner Edge |
 Right Housing Removed |
 Both Housings Removed |
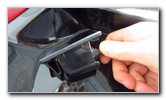
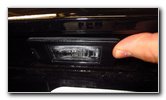
| Carefully pull the
light housing straight out of the opening in the underside of the trunk lid. Try to avoid pulling or stressing the electrical wires. |
||
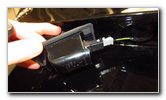
 1/4 Turn Counterclockwise |
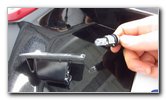 Bulb Socket Removed |
 Pull Out Old Light Bulb |
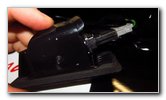
| Rotate the base of
the light bulb socket 1/4 turn in the counterclockwise direction before
pulling it straight out of the housing. If the old light bulb was recently turned on, be careful when you remove it since the bulb might still be hot enough to burn your fingers. Pull the old light bulb straight out of the socket. If you have trouble removing the old bulb due to rust or debris, try gently wiggling it back and forth while carefully pulling it straight out. Avoid placing excessive pressure on the old bulb to prevent it from breaking between your fingers. |
||
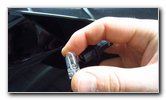
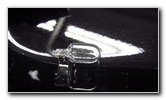 OEM # W5W Bulb |
 Push In New Light Bulb |
 New Bulb Installed |
| The OEM (original
equipment manufacturer) miniature wedge bae light bulb was marked as part
number "W5W" which is the same as the # 2825 bulb. Push a new number 2825 bulb straight into the socket. If you'd like to have brighter license plate lights, install some compatible replacement 2825 LED light bulbs. |
||
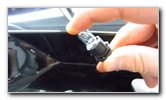
 1/4 Turn Clockwise - Lock |
 Re-Insert Tab Inner Side |
 Gently Pop In Clip, Outer |
| Re-insert the bulb
socket into the housing and rotate it 1/4 turn in the clockwise direction to
secure it into place. If you installed an LED bulb, I recommend testing it before re-installing the light housing into the trunk lid. Tip - If the LED bulb doesn't work, try pulling it out of the socket, rotating it 180 degrees and pushing it back into the socket. Some LED bulbs are polarized and will only work when the "+" positive and "-" negative electrical contacts are in the correct orientation. Carefully re-insert the wires and the tab on the inner edge of the light housing back into the opening in the underside of the trunk lid. Gently push on the outer edge of the light housing to secure the plastic retaining clip. You should hear or feel the flexible plastic retaining clip "click" securely into place. |
||
 Right Side Housing |
 Insert Tab Inner Edge First |
 Gently Pop In Clip, Outer |
| Repeat the process to replace the other bulb and re-install the light housing. | ||
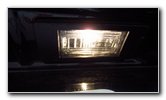 Test New Light Bulbs |
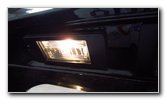 Light Housing Secured |
 Bulb Change Complete |
| To test the new
light bulbs, turn on the parking lights or the headlights. You could also
press the "Unlock" button on the key fob to re-activate the exterior lights. Be sure to record the bulb change in your car's service records. Please check out all of the
2016-2023 GM Chevrolet Malibu DIY Repair & Maintenance Guides. |
||
| If you found this guide to be helpful,
please consider making a small donation by clicking on the PayPal.com
"Donate" button located to the right of this paragraph. Thank you!
(Note: I am not a registered charity. Donations are not tax deductible.) |