
Chevrolet
Equinox Serpentine Accessory Belt Replacement Guide
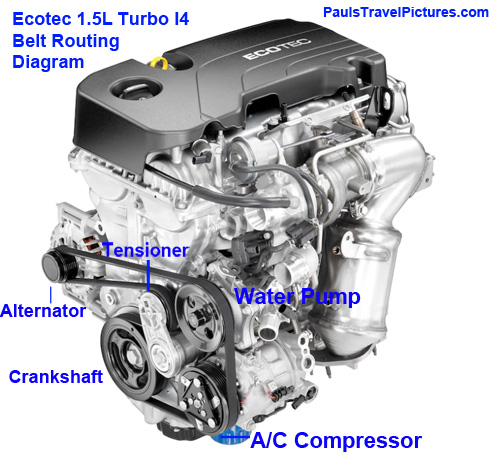
How to change the serpentine accessory
belt on the Ecotec 1.5L turbo I4 engine in a 2018 to 2022 Chevy Equinox.

By Paul B. Michaels Author & Photographer Auto Mechanic Since 1989 |
||
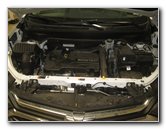 2018 Equinox 1.5L I4 |
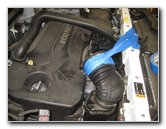
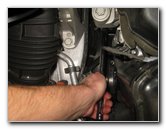
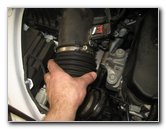
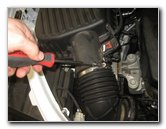
 Rubber Air Intake Hose |
 Loosen Hose Clamp |
| This automotive
maintenance tutorial was specifically written to assist owners of the third
generation (2018, 2019 and probably also the mid-cycle updated or revised 2020,
2021 and 2022 model years) GM Chevrolet Equinox SUV in checking or changing
the serpentine accessory belt on the Ecotec 1.5 liter turbocharged four cylinder engine.
The procedure may be the same or very similar for the 2.0L turbo I4 engine
or the 1.6L I4 diesel engine. Owners of other General Motors vehicles from Chevy, Buick, GMC, Cadillac and Holden such as the Trax, Blazer, Traverse, Tahoe, Suburban, Cruze, Malibu, Impala, Camaro, Cascada, LaCrosse, Encore, Envision, Enclave, Regal, Canyon, Sierra, Terrain, Acadia, Yukon, Savana, XT4, XT5, XT6, Escalade, CTS, XTS, CT6, Astra, Commodore and Trailblazer may also find these DIY instructions to be helpful. The original genuine GM serpentine belt on this 2018 Equinox Premier was part number ACDelco 12654472. Two other compatible replacement belts for the Ecotec 1.5L turbo I4 engine with their part numbers include the following: ACDelco 5K689 and Gates K050689. The tools needed to complete this procedure include a flat head screwdriver, a long 3/8" drive breaker bar, or a long 18" to 24" 1/2" drive breaker bar with a 1/2" to 3/8" adapter. You may be able to use a standard ratchet if it is long enough to provide the leverage needed to rotate the tensioner arm, release the tension on the old belt and slip it off the pulleys. The first two steps are to open the hood and then move to the left (passenger) side of the engine bay. |
||
|
|
||
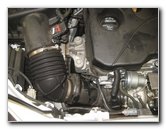
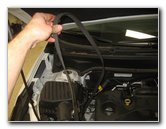
 Pull Off Rubber Hose |
 Hose Secured To Frame |
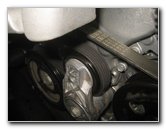
 Belt & Pulleys |
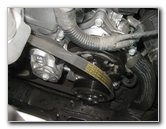
| For easier access
to the left side of the engine, you'll need to at least partially detach the
rubber air intake hose. Loosen the screw on the silver metal hose clamp attached to the engine air filter box by turning it in the counterclockwise direction with a flat head screwdriver. Gently pull the rubber hose off the plastic air intake tube on the air box. Next, you can either detach the lower part of the air intake hose or just secure it out of the way. I chose to wrap some painter's tape around the end of the hose and attach it to the engine bay frame near the radiator. You could also use a bungee cord. Once the rubber air intake hose is out of the way, you'll be able to see the old belt and the various pulleys. Take a moment to study how the old belt is routed around the pulleys including the alternator, crankshaft, tensioner, water pump (coolant) and the air conditioning system's compressor. I'll include a belt routing diagram further down on this page. |
||
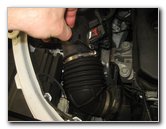
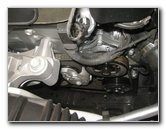
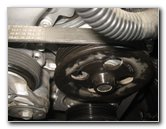
 A/C Compressor |
 Tensioner Pulley & Arm |
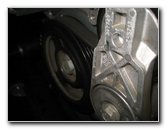 Large Crankshaft Pulley |
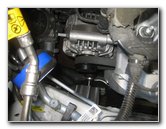
| The tensioner
assembly is located near the top center area of the engine. There is a square opening near the end of the tensioner arm for a 3/8" drive ratchet or breaker bar. |
||
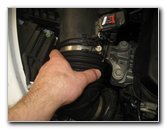
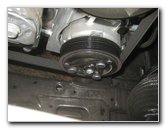
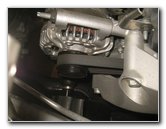 Alternator Pulley |
 Long 1/2" Breaker Bar |
 3/8" Drive - Tensioner |
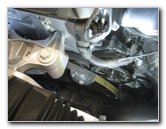
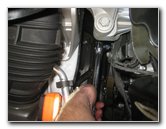
| You'll notice that
the belt extends back towards the rear of the engine and passes through a
motor mount to reach the alternator pulley. I chose to use a long 1/2" drive breaker bar with a 1/2" to 3/8" adapter. Insert the 3/8" drive square peg into the opening on the tensioner arm. |
||
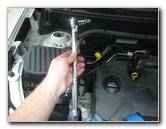
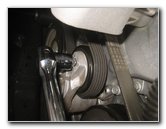
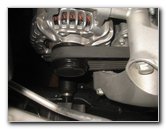
 Rotate Up & To Rear |
 Slip Old Belt Off Pulleys |
 Old Belt Removed |
| Pull the breaker
bar handle up and / or back towards the rear of the SUV to rotate the
tensioner and release the tension on the old belt.
Hold the tensioner in the released position closer to the back of the engine bay with one hand. Very carefully slip the old belt off the tensioner pulley and the other pulleys. Do not place your fingers or hand in between the old belt or any of the pulleys! Pull the old belt through the opening in the motor mount on the side of the engine. |
||
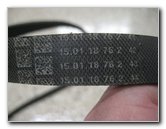 15.01.18 76 2 42 |
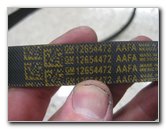 GM 12654472 |
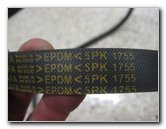 EPDM 5PK 1755 |
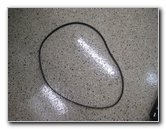
| Lift the old belt
out of the engine bay and inspect it for any signs of wear such as fraying,
chunks or rubber missing or cracks.
If the old belt is in relatively good condition, consider keeping it as an emergency backup just in case the new belt fails prematurely. The OEM (original equipment manufacturer) belt in this 2018 Equinox Premier 1.5L turbo I4 was the ACDelco 12654472. I've included a belt routing diagram below. The image is missing the motor mount on the left (passenger) side that you need to pass the belt through to reach the alternator.
|
||
 Lower In New Belt |
 Pass Through To Alternator |
 A/C Compressor Bottom |
| A good rule to
remember is that the ribbed side of the belt will be wrapped around ribbed
pulleys and the smooth (flat) side of the belt will be against the smooth
tensioner pulley. If you found that your old belt was loose and the tensioner arm was very easy to rotate, you may need to replace the entire assembly. I also recommend checking to see if the tensioner pulley spins freely. If the pulley doesn't spin easily, wobbles or makes a squeaking noise, the bearing may have failed and the pulley will need to be replaced. The OEM part number for the belt tensioner assembly is ACDelco 12638689. Carefully lower the new belt into the engine bay. Pass one loop of the new belt through the opening in the silver metal motor mount. Pull the loop over the alternator pulley at the rear of the engine. Then wrap the new belt over the A/C compressor, the water pump pulley and the large crankshaft pulley. |
||
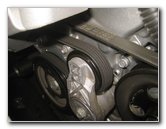
 Release Tensioner Arm |
 Slip Belt Over Water Pump |
 New Belt Installed |
| Hold the last loop
near the tensioner pulley.
Rotate the tensioner arm back by using the 3/8" drive breaker bar. Carefully slip the last loop of the new belt over the tensioner pulley. Double check that the new belt has been properly routed. To check the tension on the new belt, grasp it at the middle of the longest run in between the alternator and the water pump. |
||
 Double Check Routing |
 Crankshaft Pulley |
 Belt Through Motor Mount |
| If you can easily
twist the new belt past 90 degrees, the belt it too loose and the tensioner
may be worn out. A belt with the proper amount of tension should only be able to be rotated about 90 degrees (perpendicular) to the rest of the belt at the longest run. |
||
 Push On Rubber Air Intake |
 Tighten Hose Clamp |
 New Belt Installed |
| Push the rubber air
intake hose back into place over the plastic tube on the engine air box. Tighten the hose clamp by turning the screw in the clockwise direction with the flat head screwdriver. Start the engine and listen closely for any strange sounds. If you hear any noises, turn off the engine, double check your routing and the tensioner assembly. Be sure to record the belt change in your vehicle's service records. For more, please check out all of my
2018-2022 GM Chevrolet Equinox DIY Repair & Maintenance Guides. |
||
| If you found this guide to be helpful,
please consider making a small donation by clicking on the PayPal.com
"Donate" button located to the right of this paragraph. Thank you!
(Note: I am not a registered charity. Donations are not tax deductible.) |