
Toyota Camry
Electrical Fuse Replacement Guide
How to check or change a blown electrical
fuse in an XV70 8th generation 2018 to 2022 Toyota Camry sedan.

By Paul B. Michaels Author & Photographer Auto Mechanic Since 1989 |
||
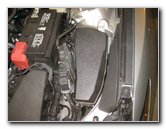
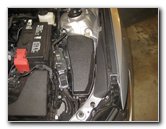 2018 Camry Engine Bay |
 Push In Front Release Tab |
 Push In Rear Release Tab |
| This automotive
maintenance tutorial was specifically written to assist owners of the XV70
eighth generation (2018, 2019 and probably also the 2020, 2021 & 2022 model
years) Toyota Camry sedan in checking or changing a blown electrical fuse in
either the engine bay or the interior passenger compartment electrical
panels. Owners of other Toyota, Scion and Lexus vehicles such as the Avalon, Corolla, Prius, Yaris, Mirai, 86, Sienna, RAV4, Highlander, 4Runner, C-HR, Land Cruiser, Sequoia, Tacoma, Tundra, Venza, Hilux, RX 350, IS 250, IS 350, CT 200H, GS 450h, GX 470, LX 470, UX 200, NX 300 and UX 250h may also find these DIY instructions to be helpful. The Camry is equipped with the relatively newer style of "low profile" mini blade electrical fuses which can be purchased at any auto parts store, at Walmart or online at Amazon. No tools are needed to access and replace any of the fuses or relays. |
||
|
|
||
 Pull Off Fuse Box Cover |
 Fuse Location Diagram |
 Engine Bay Fuse Block |
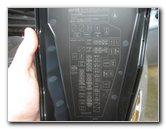
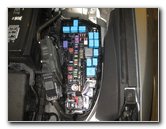
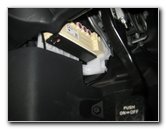
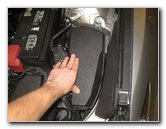
| The first two steps
are to open the hood and then move to the right (driver) side of the engine
bay. The black plastic fuse box is located just behind the driver side headlight assembly and to the right of the engine air filter box and the 12V automotive battery. Gently push in the tab on the front of the fuse box cover to release the retaining clip. Then push in the tab on the back side of the cover to release the second retaining clip. Carefully pull the cover straight off the fuse box. Turn over the cover to view the fuse location diagram. There is also another fuse location diagram in your owner's manual. |
||
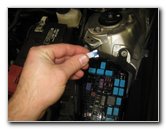
 White Fuse Puller Tool |
 Remove Plastic Fuse Puller |
 Driver Side Dashboard |
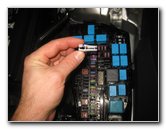
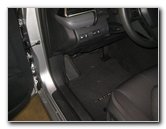
| There should be a
white plastic fuse puller tool attached to the right rear corner of the fuse
block. If the tool is missing, you could use a pair of needle nose pliers with rubber insulated handles. Pull the tool straight out of its socket. The interior passenger compartment electrical panel is located under the driver side of the dashboard. |
||
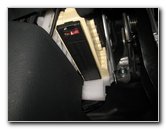
 Interior Fuse Panel |
 Black Plastic Cover |
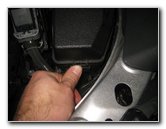
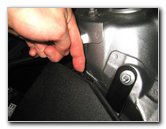
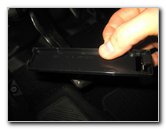
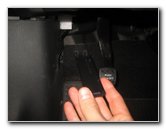
 Pull Forward Release Tab |
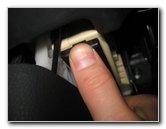
| Look under the
dashboard and above the emergency / parking brake lever near where the
driver's left knee would reside while driving. Gently pull forward the release tab on the front edge of the black plastic cover (closest to you and the driver's seat). |
||
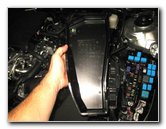
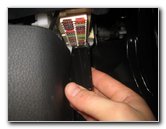
 Pull Off Cover |
 Plastic Cover Removed |
 Fuse Location Diagram |
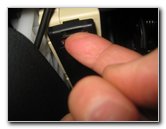
| Gently pull the
cover off the fuse panel. There is a fuse location diagram on the outside of the cover. |
||
|
|
||
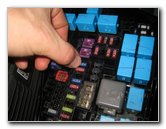
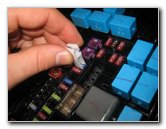 Place Jaws Over Old Fuse |
 Pull Out Old Fuse |
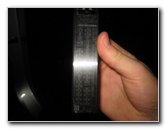
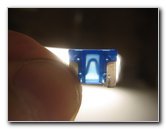 Hold Up To Light Bulb |
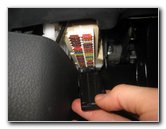
| Squeeze the end of
the fuse puller tool to open the jaws. Place the jaws over the fuse you'd like to check or change. Pull the old fuse straight out of the socket. To check the condition of the old fuse, hold it up to a light bulb. If the thin metal band or "strip" in the translucent plastic center of the old fuse appears to be burnt or broken, the old fuse is most likely blown and should be replaced. If the thin metal bar in the middle of the old fuse appears to be intact, the old fuse might still be in working condition. Since new fuses are so inexpensive, the fuse should still be replaced as part of your electrical problem troubleshooting process. |
||
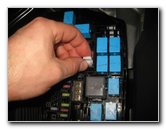
 Push In New LP Fuse |
 Replace Fuse Puller Tool |
 Lower Fuse Box Cover |
| Push a new
low profile mini blade fuse of the
same amperage rating (e.g. 5A, 10A, 15A, 20 Amps) straight into the socket. If you suspect that a faulty relay is your electrical problem, the best way to check it is to simply replace it with a new relay. You could also test the old relay with a digital multimeter tool. Replace the fuse puller tool into its socket on the engine bay electrical panel. Lower the fuse box cover over the panel. |
||
 Push To Secure 2 Clips |
 Fuse Box Cover Secured |
 Line Up Plastic Cover |
| Gently push down on
the cover to secure the two retaining clips. Double check that the cover is securely in place. Line up the black plastic rectangular shaped cover for the interior fuse panel. |
||
 Re-Insert Tabs - Rear |
 Push On Front - Secure |
 Plastic Cover Replaced |
| Re-insert the two
tabs on the far end of the cover into their slots. Push up on the close side of the cover to secure the retaining clip. Make sure the cover is securely in place. Test the electrical component that were having issues with such as the stereo, power windows, power driver's seat, horn, interior lights, headlights, tail lights, gauges, etc. If you are still having the same problem, there may be a shorted out wire or you may need to replace the faulty component. Be sure to record the fuse change in your vehicle's service records. For more,
check out all of my
2018-2022 Toyota Camry DIY Repair & Maintenance Guides. |
||
| If you found this guide to be helpful,
please consider making a small donation by clicking on the PayPal.com
"Donate" button located to the right of this paragraph. Thank you!
(Note: I am not a registered charity. Donations are not tax deductible.) |