
Ford
Expedition EcoBoost 3.5L V6 Engine Oil Change Guide
How to change the motor oil and filter on
the EcoBoost Turbo 3.5L V6 engine in a 4th generation 2018 to 2020 Ford Expedition.

By Paul B. Michaels Author & Photographer Auto Mechanic Since 1989 |
||
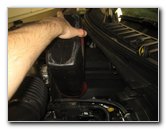
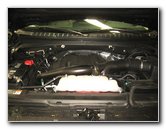 2018 Expedition 3.5L V6 |
 Right (Driver) Side |
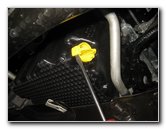
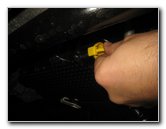
 Partially Remove Dipstick |
| This automotive
maintenance tutorial was specifically written to assist owners of the 4th
generation (2018, 2019, 2020 and most likely also the 2021, 2022 and 2023 model
years) Ford Expedition SUV in changing the motor oil and replacing the oil
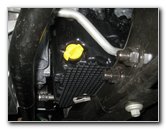
filter on the EcoBoost 3.5 liter turbocharged V6 engine. Owners of other Ford or Lincoln vehicles such as the Explorer, F-150, Escape, EcoSport, Transit, F-350, F-250, Edge, Flex, Ranger, Fiesta, Focus, Fusion, Mustang, Bronco, Super Duty, Navigator, Continental, MKZ, MKX, MKC, MKT, Aviator, Corsair and Nautilus may also find these DIY instructions to be helpful. The tools and other items needed to complete this procedure include an 8mm socket, a 1/4" drive ratchet, a small flat head screwdriver or a plastic pry bar tool, a used oil catch basin, a Lisle 63600 oil filter wrench (optional) and an automotive funnel. A few compatible replacement oil filters with their part numbers include the following: Motorcraft FL-500S, Fram TG10575, K&N HP-2011, Bosch 3502, Royal Purple 20-500, Purolator PL22500 and Mobil 1 M1-212. The oil capacity specification in the owner's manual for the EcoBoost 3.5L V6 turbo engine for an oil change with a filter replacement is 6.0 U.S. quarts (or 5.7 liters) of synthetic SAE 5W-30 oil. Warm up the engine for a few minutes to help suspend any contaminants within the old oil and also allow it to drain out more quickly. Drive the SUV on to a level surface, shift the transmission into "Park" and turn off the ignition. Engage the emergency / parking brake and place wheel chocks on both sides of the rear tires to prevent the SUV from moving. The first few steps are to open the hood and move to the right (driver) side of the engine bay. Partially remove the yellow plastic handled oil dipstick an inch or two and remove the oil fill cap by twisting it off in the counterclockwise direction. |
||
|
|
||
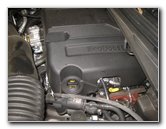
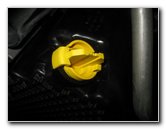
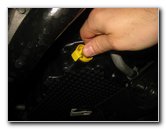
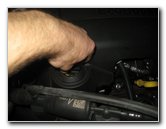
 Remove Oil Fill Cap |
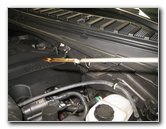
 Under Front of Engine |
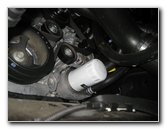 Oil Filter Location |
| Set the oil fill
cap aside in a safe place. Removing the oil fill cap and pulling out the dipstick an inch or two will help prevent a vacuum from forming and allow the old oil to drain out more quickly. If you look under the front bumper, you'll see the two serpentine accessory belts and the oil filter situated to the right of the large crankshaft pulley on the right (driver) side of the engine. |
||
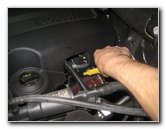
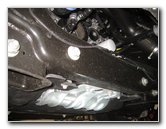
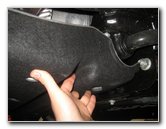
 Fabric Under Engine Cover |
 Loosen Counterclockwise |
 Removing Bolts |
| Slide under the
engine bay with the 8mm socket with a short extension bar and the 1/4" drive
ratchet. Remove the silver / grey metal bolts that secure the fabric under engine cover (or "skid plate") by turning them in the counterclockwise direction. |
||
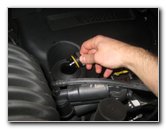
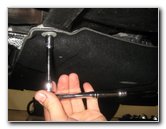
 Removing Other Bolts |
 |
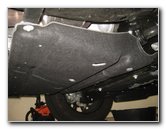
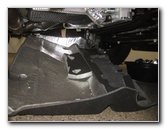 Lower Under Engine Cover |
| Set the bolts aside
in a safe place. Lower the under engine cover and slide it out of the way. |
||
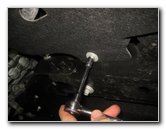
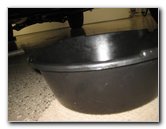
 Oil Pan & Drain "Bolt" |
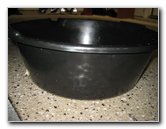
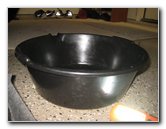 Used Oil Catch Container |
 Plastic Oil Drain Plug |
| Locate the black
plastic oil pan and the bright yellow oil drain plug. Slide the used oil catch container to just below the drain plug. I highly recommend having a spare plastic drain plug on hand just in case the original plug is damaged during the oil change or becomes brittle from extremely hot or cold conditions. You may also find that the old rubber o-ring gasket wears out and leads to an oil leak. The genuine OEM (original equipment manufacturer) part number for the plastic oil drain plug is Ford KX6Z-6730-B (also known as KX6Z6730B). This replaces part number KX6Z-6730-A (or KX6Z6730A). There are also aftermarket drain plug options that include a handy 3/8" drive square opening for easier removal using a ratchet to loosen the drain plug. |
||
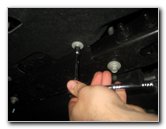
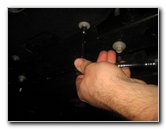
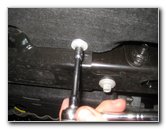
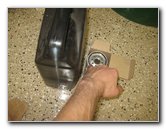
 Gently Pry Up Two Tabs |
 Twist Counterclockwise |
 Drain Out Old Oil |
| Very gently pry out
the two plastic tabs on the oil drain plug before rotating it in the
counterclockwise direction. Do not use excessive force to pry back the plastic tabs to prevent from cracking them. Be careful when you remove the drain plug. The old oil may spray out with some force and it also might still be hot enough to burn your fingers. Allow the old oil to drain out for at least a few minutes or until the flow slows down to just an occasional drip. |
||
|
|
||
 Replace Oil Drain Plug |
 Replace Skid Plate |
 Tighten Bolts Clockwise |
| Replace the oil
drain plug by turning it in the clockwise direction until it is snug. The two plastic retaining tabs should "click" securely into place. Try to avoid over tightening the plug to prevent from damaging the rubber o-ring gasket or breaking the plastic which could lead to an oil leak. Double check that the plug is tight and properly installed before moving on to the next steps. Raise the under engine cover back into place and tighten the bolts in the clockwise direction with the 8mm socket and a 1/4" drive ratchet until they are snug. |
||
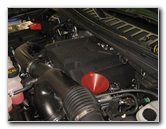
 Cover Secured |
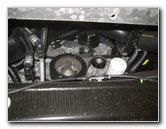 Front of Engine - Belt |
 Filter Below Pulleys |
| Double check that
all of the bolts for the under engine cover are secured. Move to the front of the engine below the bumper cover and behind the radiator. Locate the old oil filter at the bottom right (driver) side of the engine. |
||
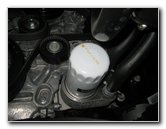
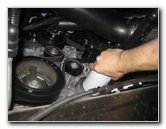
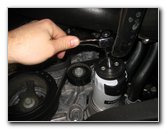 Loosen Counterclockwise |
 Drain Oil From Oil Filter |
 Lubricate New Oil Filter |
| Slide the used oil
catch container to just below the old oil filter. Loosen the old oil filter by twisting it in the counterclockwise direction. If you have trouble loosening an old oil filter that was over tightened at the factory or a quick lube oil change shop, I recommend using the Lisle 63600 oil filter wrench. It makes taking off even extremely stubborn and stuck oil filters much easier. Attach the oil filter wrench to a short extension bar and a 3/8" drive ratchet. Rotate the ratchet and Lisle filter wrench in the counterclockwise direction to loosen the old oil filter. Allow the old oil to drain out from the filter receptacle for at least a minute or two. I recommend buying the genuine OEM Ford oil filter which is part number Motorcraft FL-500S. Dip your finger into some new oil and lubricate the rubber o-ring gasket on the new oil filter. Lubricating the rubber o-ring on the new filter will help it to form a better seal, prevent oil leaks and also make it easier to remove during the next oil change. |
||
 Twist On New Oil Filter |
 Funnel In Oil Filler Hole |
 Pour In New Oil |
| Make sure that the
old rubber o-ring gasket from the old oil filter is not still attached to
the engine. Twist on the new oil filter in the clockwise direction to about 1/4 to 1/3 of a turn past finger tight. Try to avoid over tightening the new filter to prevent from damaging the rubber o-ring gasket which could lead to an oil leak. Double check that the new filter is tight before moving on to the next steps. Lower the automotive funnel into the oil fill port on the right side of the engine. Since it is much better to have slightly less oil than necessary in an engine than to overfill it, I recommend only pouring in about 5 to 5.5 U.S. quarts of new synthetic SAE 5W-30 oil at first. Running an engine that has been overfilled may lead to sluggish performance and possibly cause damage to seals, gaskets or other components. The EcoBoost 3.5L twin-turbo V6 engine's oil capacity specification for an oil change with a filter replacement is 6 U.S. quarts (or 5.7L). Temporarily replace the oil filler cap by twisting it on in the clockwise direction and push down the dipstick. Start the engine and let it warm up to near operating temperature for a few minutes. Then turn off the ignition and allow the new oil to drain back down to the pan or at least 10 to 15 minutes. Check the oil level on the dipstick. If necessary, slowly pour in more oil and repeatedly check the level on the dipstick. You may not need to pour in the entire 6 U.S. quarts total oil capacity in order for the level to reach the "MAX" (maximum) level on the dipstick which is indicated by the upper hole on the tip of the dipstick. |
||
 Replace Oil Fill Cap |
 Check Oil Dipstick Level |
 Oil Change Complete |
| Once the oil level
is correct, replace the dipstick and twist on the oil fill cap in the
clockwise direction until it is snug. To reset the engine oil life meter and dismiss the "oil change required" or "change engine oil soon" warning message, follow these steps: 1. Use the information display controls on the steering wheel to navigate to the "Settings" menu on the LCD screen. 2. Use the right arrow to find the "Vehicle" menu option and press "OK". 3. Select the "Oil Life" menu option and press "OK". 4. Press and hold down the "OK" button until you see the "Reset Successful" message. 5. Check to see if the oil life system is now at 100% and the oil change indicator message has been cleared. Be sure to write down the oil change in your vehicle's service records. It would be a good idea to check your driveway, garage or parking spot for drops of fresh oil during the next few days to make sure there isn't an oil leak from the new oil filter or the plastic drain plug. The service interval specification in the owner's manual is to change the motor oil and replace the oil filter every 10,000 miles or at least once a year. Please
check out all of my
2018-2020 Ford Expedition DIY Repair & Maintenance Guides. |
||
| If you found this guide to be helpful,
please consider making a small donation by clicking on the PayPal.com
"Donate" button located to the right of this paragraph. Thank you!
(Note: I am not a registered charity. Donations are not tax deductible.) |