
Acer Aspire
One Netbook Hard Drive & RAM Upgrade Guide
How to upgrade the hard disk drive (HDD)
and/or RAM system memory in an Acer Aspire One 8.9", 10.1" or 11.6" netbook.

By Paul B. Michaels Author & Photographer Auto Mechanic Since 1989 |
||
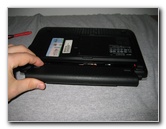
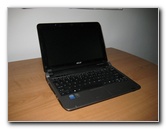 Acer Aspire One AOD150 |
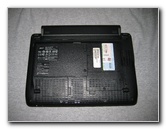 Flip Netbook Upside |
 Unlock Battery Pack |
| This
computer "how-to" guide was specifically written to assist owners of
the Acer Aspire One 10.1" AOD150-1577 netbook in removing and
upgrading the 2.5" hard disk drive or the RAM system memory. Owners of other similar Acer Aspire One 11.6", 10.1" or 8.9 inch netbooks such as the AOD255E, AOD255, AOD532h, D255E, AOA150, AOD260, AO521, AO721, AO751, and AO533 may also find this guide to be helpful. This Acer Aspire One netbook came equipped with a 160 GB 5400 RPM hard drive and just 1 GB of RAM. I'd like to upgrade the HDD to a larger 320 or 500 GB unit spinning at a faster 7200 RPM or an SSD and increase the RAM from 1 GB to at least 2 GB. The only tools needed to complete this procedure are a small Phillips head screwdriver and an anti-static wrist strap. |
||
|
|
||
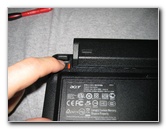
 Remove Battery Pack |
 Battery Pack Removed |
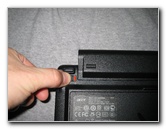
 Unscrew Hard Drive Cover |
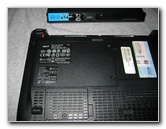
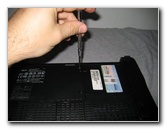
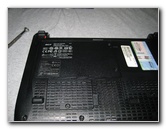
| The first steps are to power down the netbook, flip it upside down on to a soft towel or t-shirt, unlock and remove the battery pack. | ||
 2nd Phillips Head Screw |
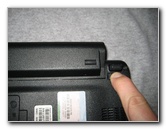
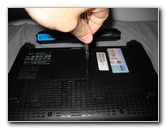
 Pop Up HDD Cover |
 Hard Drive Caddy |
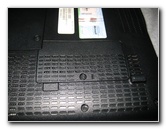
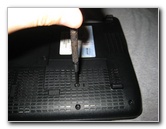
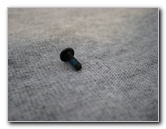
| Then unscrew the
two Phillips head screws that hold the black plastic hard drive cover in
place and lift it out of the way.
The two screws will remain attached to the hard drive cover, so don't try to forcibly remove them. Be sure to discharge your static electricity by touching something metal or put on an anti-static wrist strap before touching the hard drive. |
||
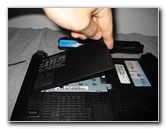
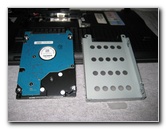
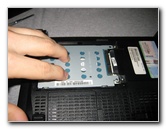 Pull HDD Off SATA |
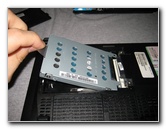 Lift Out Hard Drive |
 Toshiba 160 GB 5400 RPM |
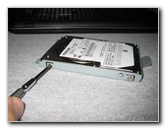
| This netbook's hard
drive wasn't held in place with an additional screw.
Check to see if yours needs to have another screw removed. If not, slide the hard drive towards the outer edge of the computer to disconnect the SATA connector plug from the socket on the motherboard. Then lift the HDD and metal drive caddy out of the bay using the clear plastic tab attached to the bottom of it. The drive should lift out easily from the bay without using excessive force. |
||
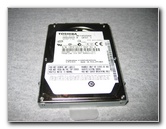
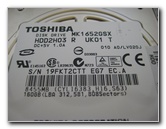 Toshiba MK1652GSX |
 HDD SATA Plug |
 Remove Tray Screws |
| Remove the four Phillips head screws on the sides of the hard drive to separate it from the metal hard drive caddy. | ||
 Four Screws Removed |
 Lift HD Off Tray |
 Hard Drive & Caddy |
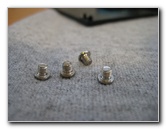
| Set aside the old
hard drive and insert the new hard drive into the metal HDD caddy.
If you don't mind the extra cost, I highly recommend buying an SSD hard drive (solid state disk) since they are so much faster than traditional hard drives. Re-attach the four Phillips head screws and tighten until they are just barely snug but will not vibrate out. Do not over tighten the screws or you may damage the new hard drive. |
||
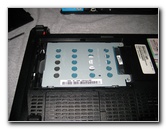
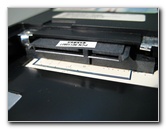 Netbook SATA Socket |
 Install New Drive |
 Slide SATA Plug In |
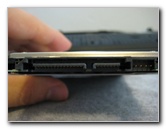
| Look at the SATA
socket in the hard drive bay and the plug on the hard drive before
attempting to install the new hard drive.
It will only go in one way so don't try to force it in. Once the new hard drive is in place, slide it towards the center of the computer to plug in the SATA connector. |
||
 SATA Connection Secure |
 Lower Hard Drive Cover |
 Tighten Two Screws |
| Check that the two
screw holes on the metal hard drive caddy line up with the screw holes on
the computer's case. Then lower the hard drive cover over the bay and
tighten the two Phillips head screws.
Acer Aspire One RAM Upgrade Guide |
||
 Hard Drive Installed |
 Ventilated RAM Cover |
 Unscrew Phillips Head |
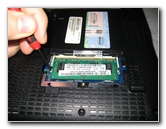
| Two of the
compatible 2 GB RAM memory modules for this
Acer Aspire One 10.1" netbook
include the Crucial CT934030 (2 GB DDR2 PC2-5300 667 MHz) for about $33, and
the Kingston 2GB KAC-MEME/2G (DDR2 PC2-4200 533 MHz) for $40. The single 1 GB RAM stick is located under a small ventilated cover near one corner of the netbook's underside. Remove the single Phillips head screw and set it aside somewhere safe. |
||
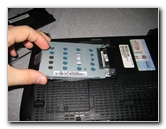
 Single Screw Removed |
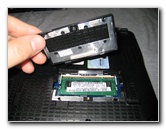 Remove RAM Cover |
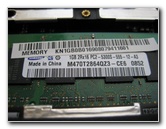 Samsung 1GB RAM |
| Pry up the RAM cover with your finger or a flathead screwdriver. This netbook was equipped with a Samsung 1GB 2Rx16 PC2-5300S-555-12-A3 RAM module. | ||
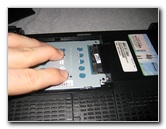
 Release RAM Clips |
 2nd RAM Clip |
 RAM Springs Up |
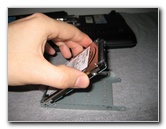
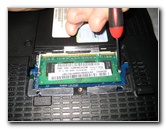
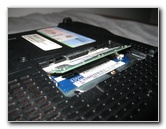
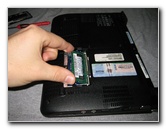
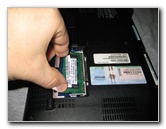
| Discharge your
static electricity again by touching something metal or wear an
anti-static wrist strap before touching the RAM.
The single stick of RAM is held in place by two clips that rest in notches on either side of the module. Use your fingernail or a small screwdriver to carefully release the two RAM clips. The RAM module will spring up at a 30 degree angle once the two clips have been released. Gently grasp the RAM with your thumb and forefinger and lift it out of the socket. It shouldn't require any significant force to pull out the RAM chip. |
||
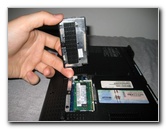
 Pull Out RAM Module |
 RAM Removed |
 Insert New RAM |
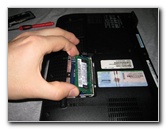
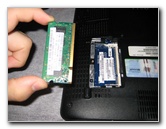
| Insert the new 2 GB
RAM stick at a 30 degree angle into the RAM socket.
It will only go in one way, so do not force it. Secure the RAM in place by pushing it down until the two clips click into place into the notches on either side of the module. |
||
 Push Down To Clips |
 Replace RAM Cover |
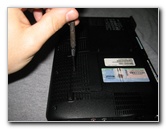 Tighten RAM Cover Screw |
| Replace the RAM
cover and tighten the one Phillips head screw until it is just barely snug
and won't vibrate out.
Then insert the battery pack and secure it in place using the lock switch. |
||
 Insert Battery Pack |
 Lock Battery Pack |
 Windows Booting Up |
| Flip the netbook
back over and turn it on. It should start booting up your operating system
right away.
If it does not, make a note of any beep codes that the computer might emit and remove the battery pack again. Then try re-installing the hard drive and/or re-seating the RAM module(s) before trying to boot the computer again. If it still won't boot up, try re-installing the old hard drive and/or old RAM stick. If the computer boots up with the old hardware, you may have a faulty or incompatible HDD or RAM. For more of my related technology guides or
reviews, click on the following links:
Acer Aspire AS1410 ZIF Hard Drive Replacement Guide,
Acer Aspire AS1410 RAM Upgrade Guide,
Canon Underwater Camera Case Review,
Samsung Captivate i897 Smartphone Review,
Toshiba A505 i7 Laptop Review,
Laptop To HDTV HDMI Via CAT6 Extender Guide,
Acer Aspire AS1410-2285 11.6" Laptop Review,
Sony Pocket Reader Review, and
Toshiba A105 RAM & Hard Drive Upgrade Guide. |
||
| If you found this guide to be helpful,
please consider making a small donation by clicking on the PayPal.com
"Donate" button located to the right of this paragraph. Thank you!
(Note: I am not a registered charity. Donations are not tax deductible.) |