
Acura MDX
Bose Twiddler Speaker Replacement Guide
How to change a blown Bose Twiddler
speaker in the ceiling headliner of a 1st generation 2001-2006 Acura MDX.

By Paul B. Michaels Author & Photographer Auto Mechanic Since 1989 |
||
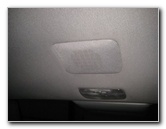
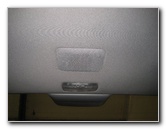 2006 MDX Rear Headliner |
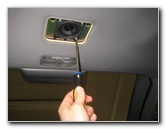
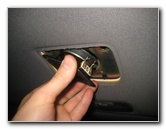
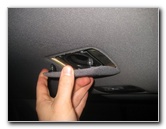
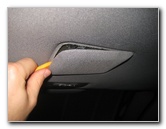 Pry Off Speaker Cover |
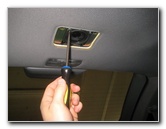
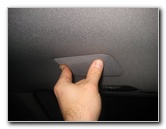
 3 Hooks - Rear Edge |
| This
automotive maintenance tutorial was specifically created to assist
owners of the first generation (2001, 2002, 2003, 2004, 2005 & 2006)
Acura MDX in changing a blown OEM Bose Twiddler speaker located on
the ceiling (roof) attached to the headliner above the 3rd row of
seats and the cargo area. Owners of other Acura or Honda vehicles such as the RDX, ILX, TLX, RLX, TL, CL, RSX, RL, TSX, ZDX, NSX, Integra, Pilot, Accord, Civic, Fit, Clarity, CR-V, CR-Z, HR-V, Odyssey, Element and Ridgeline may also find these DIY instructions to be helpful. The OEM speaker is part number Bose 39120-S3V-A51 (265261-001). It is a "Twiddler" full range 2.5" speaker. It can be replaced with another 2.5" full range speaker or instead a 2.5" tweeter speaker. The tools needed to access and replace the ceiling speaker include a plastic pry bar tool and a Phillips head screwdriver. |
||
|
|
||
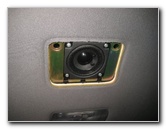 Old Speaker Exposed |
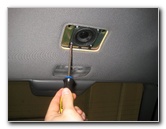 Loosen Counterclockwise |
 Phillips Head Screws |
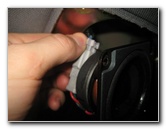
| The first two steps
are to open the tailgate door and then climb into the cargo area.
If you have the third row of passenger seats raised, you should lower them for easier access to the speaker. Locate the rear center speaker housing just in front of the cargo area light bulb housing and near the high mount third brake light housing. Use a plastic automotive trim panel removal tool to gently pry off the front edge (located closest to the front of the SUV) of the Twiddler speaker cover. There are two black plastic pop rivet friction fasteners on the front edge (closer to the front of the SUV) and three plastic hooks on the rear edge (closest to the rear of the vehicle). Set the speaker grille aside in a safe place. |
||
 |
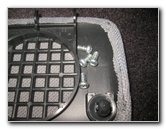 Four Screws Removed |
 Pull Out Old Speaker |
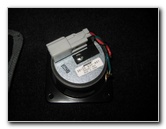
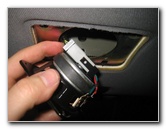
| Remove the four
screws by turning them counterclockwise with a Phillips head screwdriver. Set the screws aside in a safe place. Carefully pull the old speaker out of the ceiling. |
||
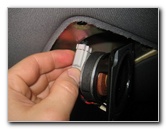 Push In Release Tab |
 Pull Out Power Plug |
 View of Release Tab |
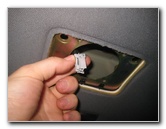
| Push in the release
tab on the grey plastic electrical connector and pull it straight out. If you would like to install a new speaker without cutting the wiring, buy some Honda speaker connector adapters. The adapters will allow you to install the new speaker without damaging the original wiring harness and OEM power plug. If you do decided to cut the original wiring, you may need to use a multimeter tool to determine which wire is the positive "+" 12V power supply and which is the "-" negative ground. |
||
|
|
||
 Bose 39120-S3V-A51 |
 Bose Twiddler Speaker |
 Push In Power Plug |
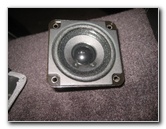
| If you would like
to buy another OEM Bose Twiddler speaker, there are some used ones for sale.
These speakers are also installed in other luxury vehicles such as Ferrari
and Maserati cars. Install a new 2.5" full range speaker or you can also use a 2.5" tweeter speaker into the ceiling. You may need to drill holes for the new speaker. Be sure to use a short drill bit so that you don't accidentally dent the roof or drill a hole through it. To help reduce rattles and vibrations, apply some sound deadener such as Dynamat to the metal roof panel and the metal mount that surrounds the speaker. |
||
 Install New Speaker |
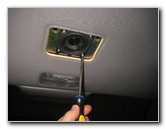 Replace Four Bolts |
 Line Up Plastic Hooks |
| Tighten the four
screws by turning them in the clockwise direction until they are snug. Line up the three plastic hooks on the rear edge of the speaker cover. |
||
 Re-Insert Rear Edge First |
 Push In Front Edge Pegs |
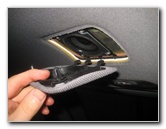
 Speaker Grille Replaced |
| Re-insert the
plastic hooks into their slots. Push on the front edge of the speaker cover to secure the two black plastic pop rivet friction fasteners. Be sure to record the speaker change in your vehicle's service records. For more,
please check out all of my
2001-2006 Acura MDX DIY Repair & Maintenance Guides. |
||
| If you found this guide to be helpful,
please consider making a small donation by clicking on the PayPal.com
"Donate" button located to the right of this paragraph. Thank you!
(Note: I am not a registered charity. Donations are not tax deductible.) |