
Chrysler 300 Headlight Bulbs
Replacement Guide
How to change a burnt out low / high beam
or front turn signal light bulb in a 2nd generation 2011 to 2017 Chrysler 300.

By Paul B. Michaels Author & Photographer Auto Mechanic Since 1989 |
||
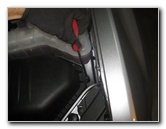
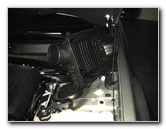
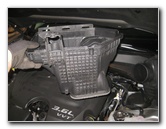
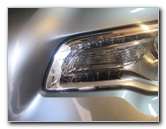
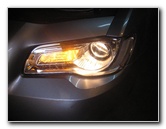
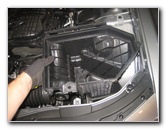
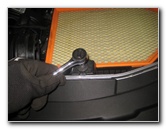
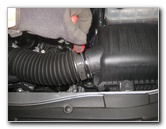
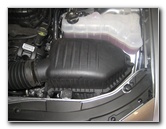
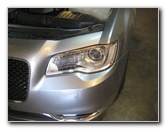 2016 Chrysler 300 Headlight |
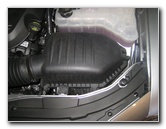 Driver Side - Engine Air Box |
 Loosen Counterclockwise |
| This
automotive maintenance tutorial was specifically written to assist
owners of the second generation (2011, 2012, 2013, 2014, 2015, 2016
& 2017) Chrysler 300, 300C or 300S sedan in changing a burnt out
dual filament combination low / high beam headlight bulb or the
front turn signal light bulb. Owners of other Chrysler, Dodge, Jeep and RAM vehicles such as the Town & Country, 200, Pacifica, Avenger, Charger, Journey, Challenger, Dart, Durango, Magnum, Grand Caravan, Grand Cherokee, Renegade, Wrangler, Compass, Liberty, Patriot, ProMaster, 1500 and C/V Tradesman minivan may also find these DIY instructions to be helpful. Replacement light bulbs with their part numbers are as follows: Low/High Beam # 9012 (2011-2015 model years), or # 9005 (2016-2017 model years) and Front Turn Signal Light # PSY24WSV (also known as # 12180). To access the headlight bulbs on the driver side, you'll need to remove the engine air filter box with a Phillips head screwdriver or an 8mm socket with a 1/4" drive ratcheting wrench. |
||
|
|
||
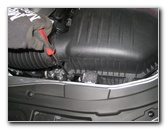
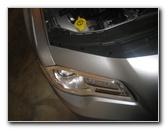
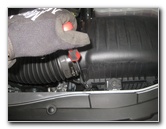
 Front Middle Screw |
 Remove Right Corner Screw |
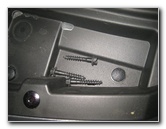 3 Screws Removed |
| If you are
replacing a burnt out light bulb on the passenger side of the car, you can
skip ahead to past the engine air box removal procedure. Both the low/high
beam and front turn signal on the passenger side can easily be accessed. To change a burnt out headlight bulb on the driver side, start by loosening the three screws along the front of the air box cover. Use either a Phillips head screwdriver, a flathead screwdriver or an 8mm socket with an extension bar and a 1/4" drive ratcheting wrench to loosen the screws in the counterclockwise direction. Set the three screws aside in a safe place. |
||
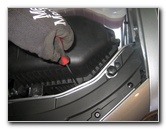
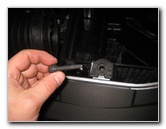
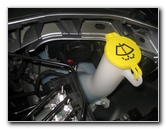
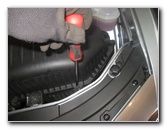
 Slide Tabs Out of Slots |
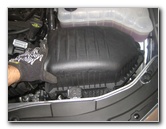
 Loosen Air Intake Hose Clamp |
 Lift Off Air Box Cover |
| Slide the top half
of the air box forward to disengage the three plastic tabs from their slots
on the bottom half of the box. Loosen the clamp that secures the air intake hose in place by turning it counterclockwise with a flathead screwdriver. Pull the air intake hose off the top half of the air box and set the air box cover aside in a safe place. |
||
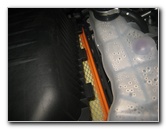
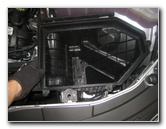
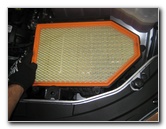
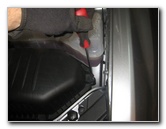
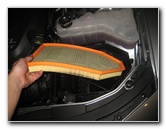 Remove Engine Air Filter |
 Front 8mm Bolt |
 Air Box Bolt Removed |
| Lift out the engine
air filter and set it aside in a safe place.
Loosen the single bolt at the front edge of the lower air box cover by turning it counterclockwise with an 8mm socket and a 1/4" drive ratcheting wrench. Set the 8mm bolt aside in a safe place. |
||
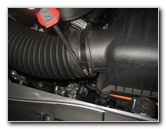
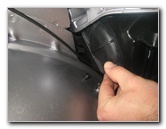
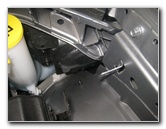
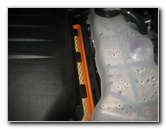
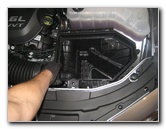 Pull Out Lower Half |
 Bottom Air Box Removed |
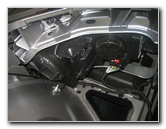 Easy Access To Bulbs |
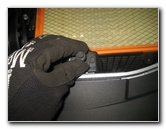
| Firmly pull the
bottom half of the air box out of the engine bay.
Set the lower air box aside in a safe place. With the air box out of the way, you'll have easy access to the driver side headlight bulbs. |
||
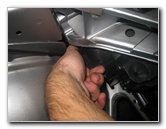
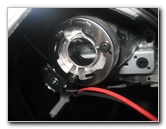
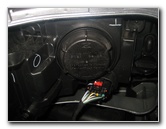
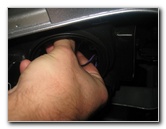
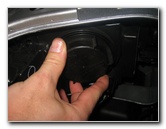
 Turn Signal - Low / High |
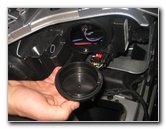
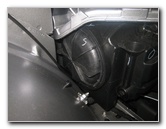 Plastic Dust Cover |
 1/4 Turn Counterclockwise |
| The Low / High
Beam headlight bulb is located near the outer edge of the housing. Reach in behind the headlight housing and rotate the round black plastic dust cap 1/4 turn counterclockwise before removing it. |
||
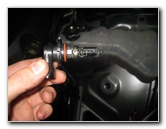
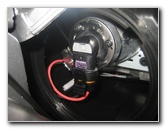
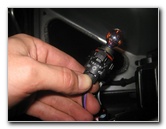
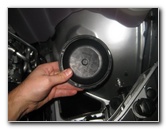 Dust Cap Removed |
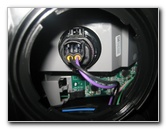
 Low / High Beam Bulb |
 1/4 Turn Counterclockwise |
| Set the dust cover
aside in a safe place. Rotate the base of the old low / high beam bulb 1/4 turn counterclockwise before pulling it straight out of the housing. |
||
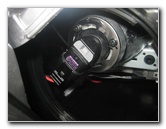
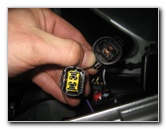
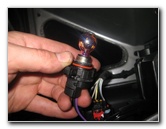
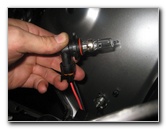 Remove Old Bulb |
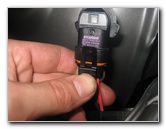 Press Release Tab |
 Pull Off Power Plug |
| Firmly push the
release tab on the electrical connector before sliding the power plug
straight off the base of the old bulb. Try to avoid touching the glass part of the new halogen bulb with your fingers or anything greasy in the engine bay. The 2011, 2012, 2013, 2014 and 2015 Chrysler 300 model years are equipped with a # 9012 low / high beam headlight bulb. If you have a 2016 or 2017 Chrysler 300, you'll need a # 9005 low / high beam bulb. |
||
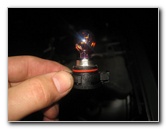
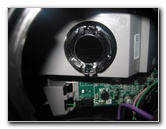
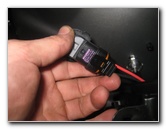 Push On Electrical Connector |
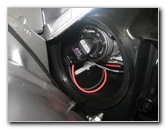
 Empty Bulb Housing |
 Insert New Headlight Bulb |
| Push the power plug
on to the new headlight bulb until it clicks securely in to place. Insert the new headlight bulb in to the housing and rotate it 1/4 turn clockwise to secure it in place. |
||
|
|
||
 1/4 Turn Clockwise - Lock |
 Replace Dust Cover |
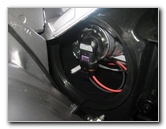
 Inner Corner - Turn Signal |
| Replace the dust
cover by twisting it on 1/4 turn in the clockwise direction. The Front Turn Signal light bulb is located closer to the inner edge of the housing. |
||
 Plastic Dust Cap |
 1/4 Turn Counterclockwise |
 Dust Cover Removed |
| Remove the round
black plastic dust cover by twisting it 1/4 turn counterclockwise. Set the cover aside in a safe place. |
||
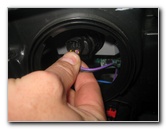
 Turn Signal Bulb Socket |
 1/4 Turn Counterclockwise |
 Remove Old Turn Signal |
| Rotate the base of the old turn signal light bulb 1/4 turn counterclockwise before pulling it straight out of the housing. | ||
 Press Release Tab |
 Disconnect Power Plug |
 Old # PSY24WSV |
| Press the release tab on the electrical connector before sliding the power plug straight off the base of the old turn signal bulb. | ||
 Push On New Turn Signal |
 Empty Bulb Housing |
 1/4 Turn Clockwise - Lock |
| Push the power plug
on to the base of a new amber colored number
PSY24WSV or
12180 turn signal light bulb. Insert the new turn signal light bulb in to the housing and rotate it 1/4 turn clockwise to secure it in place. |
||
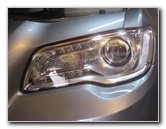
 Replace Dust Cover |
 Test New Headlight Bulbs |
 Passenger Side Headlight |
| Spin on the dust
cover 1/4 turn in the clockwise direction. Test the new light bulbs by turning on the headlights, flashing the high beams and activating the hazard signals. If you need to change a burnt out bulb on the passenger side, there are no extra steps or parts to remove. |
||
 Passenger Turn Signal |
 Passenger Side Low/High |
 Replace Lower Air Box |
| Push the lower half of the air box down in to the engine bay. | ||
 Push Down In Place |
 Replace Engine Air Filter |
 Spin In 8mm Bolt |
| Lower the engine
air filter down in to place. Spin in the 8mm bolt at the front edge of the lower air box. |
||
 Tighten 8mm Clockwise |
 Slide Tabs In To Slots |
 Replace Air Box Cover |
| Tighten the 8mm
bolt in the clockwise direction until it is snug. Lower the top half of the air box down in to place and slide the three tabs in to their slots. |
||
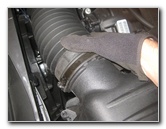 Push On Air Intake Tube |
 Tighten Hose Clamp |
 Replace Front Left Screw |
| Push the air intake
hose back in to place on the top half of the air box. Tighten the hose clamp by turning it clockwise with the flathead screwdriver. |
||
 Front Middle Screw |
 Right Corner Screw |
 Engine Air Box Replaced |
| Replace the three
screws along the front edge of the air box cover and tighten them in the
clockwise direction.
Try to avoid over tightening the air box screws to prevent from cracking the plastic housing. For more, check out all of my
2011-2017 Chrysler 300 DIY Repair & Maintenance Guides. |
||
| If you found this guide to be helpful,
please consider making a small donation by clicking on the PayPal.com
"Donate" button located to the right of this paragraph. Thank you!
(Note: I am not a registered charity. Donations are not tax deductible.) |