
Chrysler 300 Serpentine Belt
Replacement Guide
How to change the Pentastar 3.6L V6
engine's serpentine accessory belt in a 2nd generation 2011 to 2017 Chrysler 300.

By Paul B. Michaels Author & Photographer Auto Mechanic Since 1989 |
||
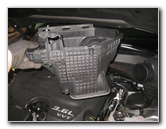
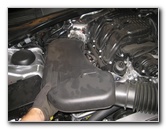
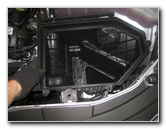
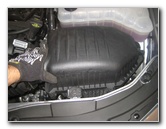
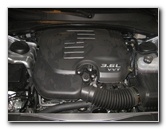 2016 Chrysler 300 3.6L V6 |
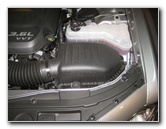 Engine Air Filter Box |
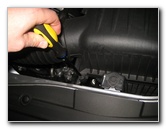 Loosen Counterclockwise |
| This
automotive maintenance tutorial was specifically written to assist
owners of the second generation (2011, 2012, 2013, 2014, 2015, 2016
& 2017) Chrysler 300, 300C or 300S sedan in changing the
serpentine accessory belt on the Pentastar 3.6L V6 engine. Owners of other Chrysler, Dodge, Jeep and RAM vehicles such as the Town & Country, 200, Pacifica, Avenger, Charger, Journey, Challenger, Dart, Durango, Magnum, Grand Caravan, Grand Cherokee, Renegade, Wrangler, Compass, Liberty, Patriot, ProMaster, 1500 and C/V Tradesman minivan may also find these DIY instructions to be helpful. A few compatible replacement serpentine accessory belts with their part numbers include the following: Dayco 5060665, Gates K060663, Bando 6PK1685, Roadmax 6K663AP, Mopar 05184647AB and Chrysler 5184647AB. The tools needed to complete this procedure include a flathead screwdriver, an 8mm socket with a 1/4" drive ratcheting wrench and a 3/8" drive ratcheting wrench with a short extension bar. |
||
|
|
||
Please verify the correct replacement part numbers for your Chrysler 300 by using the Amazon Part Finder website before purchasing a new serpentine belt. The compatible parts may vary depending on the model year, trim level, engine type (flex fuel or gasoline) and whether the vehicle has electric steering or hydraulic steering. |
||
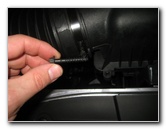 Air Box Screw Removed |
 Middle Air Box Screw |
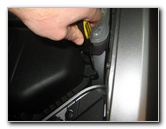 Right Side Screw |
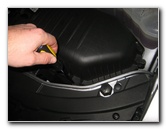
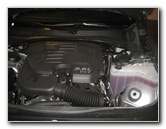
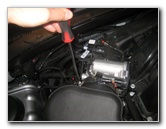
| For better access
to the serpentine belt and the pulleys on the front side of the engine,
you'll need to remove the engine air box and the air intake assembly.
Begin by removing the three screws located along the front edge of the engine air box cover by turning them counterclockwise. You can use either a Phillips head screwdriver, a flathead screwdriver or an 8mm socket with an extension bar and a 1/4" drive ratcheting wrench. Set the three screws aside in a safe place. Loosen the metal hose clamp on the left side of the air box cover by turning it counterclockwise with a flathead screwdriver. |
||
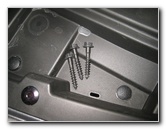 3 Engine Air Box Screws |
 Lift Air Box Cover |
 Engine Air Filter Element |
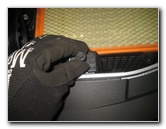
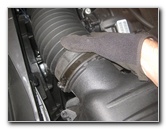
| Pull the rubber air
intake hose off the left side of the air box cover. Lift the air box cover out of the engine bay and set it aside in a safe place. |
||
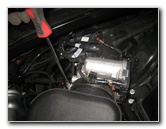
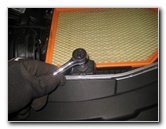
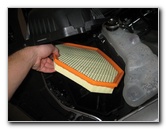 Remove Old Air Filter |
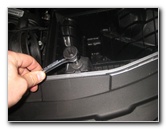 8mm Bolt - Front Edge |
 Lower Air Box Bolt |
| Remove the old
engine air filter and set it aside with the air box cover. Remove the single bolt at the front edge of the lower air box housing by turning it counterclockwise with the 8mm socket and a 1/4" drive ratcheting wrench. Set the 8mm bolt aside in a safe place. |
||
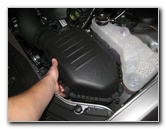
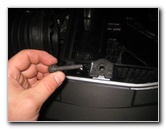
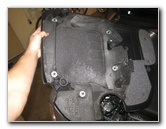
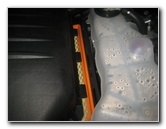
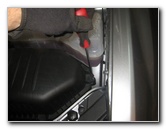
 Firmly Pull Out Air Box |
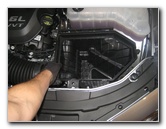
 Engine Air Box Removed |
 Plastic Engine Cover |
| Firmly pull the lower half of the air box out of the engine bay and set it aside in a safe place. | ||
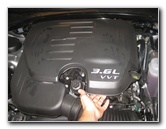 Lift Off Engine Cover |
 Engine Cover Removed |
 Loosen Metal Hose Clamp |
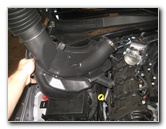
| Gently pull the
plastic engine cover off and set it aside in a safe place. Loosen the metal hose clamp on the rear of the air intake housing by the air intake manifold by turning it counterclockwise with the flathead screwdriver. |
||
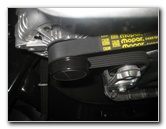
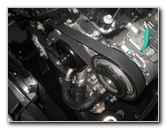
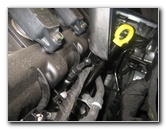
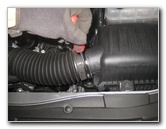
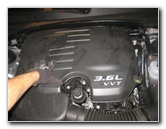
 Plastic Air Intake Removed |
 Belt - Front of Engine |
 |
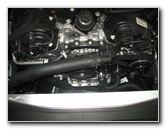
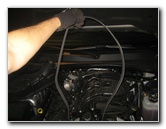
| Remove the air
intake assembly and set it aside in a safe place. Take a moment to study how the OEM serpentine belt is routed around the alternator, idler, water pump, power steering, A/C (air conditioning) compressor, crankshaft and tensioner pulleys. |
||
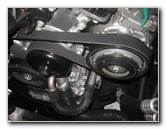
 Study Belt Routing |
 Alternator & Tensioner |
 |
| There may be a belt routing diagram in your owner's manual or you may want to sketch out a quick diagram. | ||
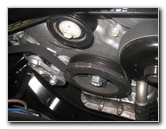
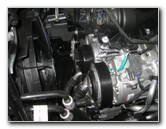
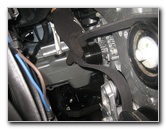
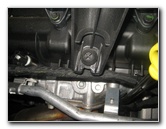
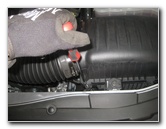
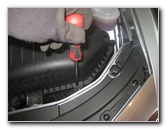
 Belt Tensioner Assembly |
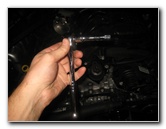 3/8" Drive Wrench |
 Rotate Counterclockwise |
| The belt tensioner
is located on the left (passenger) side of the engine near the alternator.
Attach the short extension bar to the 3/8" drive ratcheting wrench. Insert the end of the 3/8" drive extension bar in to the square shaped opening near the end of the tensioner assembly arm. Firmly rotate the ratcheting wrench in the counterclockwise direction (to the left) in order to release the tension on the old belt. |
||
|
|
||
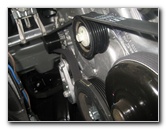
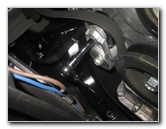
 Pull Old Belt Off Alternator |
 Removing Old Belt |
 Lift Out of Engine Bay |
| Hold the tensioner
arm down with one hand while carefully slipping the old belt off the
alternator pulley with your other hand. Continue removing the old belt from the various pulleys and remove it from the engine bay. |
||
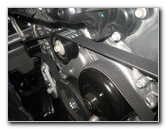
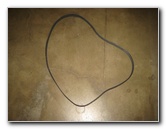 Inspect Old OEM Belt |
 Check Pulleys |
 New Belt Around Pulley |
| Inspect the old
belt for any cracks, missing chunks of rubber or fraying. If the old belt is
in relatively good condition, consider keeping it as an emergency backup
belt in your trunk or garage. Check the idler and tensioner pulleys to make sure that they spin freely and do not wobble or make strange noises. A replacement idler pulley is the ACDelco 38082 and a replacement tensioner pulley is the Gates 38082. If the tensioner arm was very easy to rotate or the old belt was very loose, consider replacing the tensioner assembly. Two compatible replacement tensioner assemblies with their part numbers are as follows: ACDelco 39282 and Gates 39282. Lower the new serpentine belt in to the engine bay. A good rule to remember is that the ribbed side of the new belt gets wrapped around ribbed pulleys and the smooth part of the pulley goes against the smooth pulleys. |
||
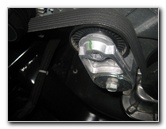
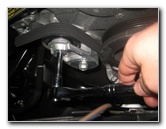
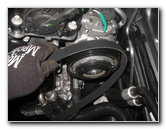
 Pull Belt Towards Alternator |
 Rotate Tensioner Left |
 Pull Belt Over Alternator |
| Pull the final loop
of the new belt towards the alternator. Insert the 3/8" drive extension bar in to the tensioner assembly and rotate it counterclockwise (to the left). Hold the tensioner down with the wrench with one hand and carefully slip the last belt loop over the ribbed alternator pulley. |
||
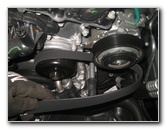
 New Belt Installed |
 Double Check Routing |
 Lower Air Intake Assembly |
| Double check that
the new belt is correctly routed around the various pulleys. Check the tension on the new belt by twisting the longest run. You should only be able to twist the belt to about 90 degrees or perpendicular to the rest of the belt. Lower the air intake assembly back in to place. |
||
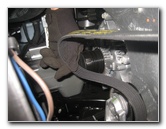
 Re-Attach Plastic Bracket |
 Rubber Mounting Peg |
 Tighten Hose Clamp |
| Re-attach the air
intake assembly's plastic bracket and the rubber friction fastener to the
top of the engine. Tighten the air intake hose clamp in the clockwise direction with the flathead screwdriver. |
||
 Re-Install Lower Air Box |
 Re-Insert Engine Filter |
 Spin In 8mm Bolt |
| Push the lower half
of the air box down in to the engine bay. Lower the engine air filter down in to the lower half of the air box. |
||
 Tighten 8mm Clockwise |
 Line Up Tabs & Slots |
 Slide Cover Back |
| Replace the 8mm
bolt at the front edge of the lower air box and tighten it in the clockwise
direction until it is snug. Line up the three plastic tabs on the rear of the air box cover with the slots on the bottom half of the air box. Slide the air box cover back in to place. |
||
 Push On Air Intake Hose |
 Tighten Hose Clamp |
 Replace Air Box Screws |
| Push the rubber air
intake hose on to the left side of the air box cover. Tighten the hose clamp in the clockwise direction by turning it clockwise with the flathead screwdriver. |
||
 Tighten Clockwise |
 3rd Screw - Right Side |
 Push On Engine Cover |
|
Replace the three screws along the front edge of the air box cover and tighten them in the clockwise direction with the flathead screwdriver or an 8mm socket with an extension bar and a 1/4" drive ratcheting wrench. Push the plastic engine cover down in to place. Start the engine and listen closely for any strange sounds that might indicate a problem such as a worn out pulley or a faulty tensioner assembly. If you hear any odd noises, turn off the engine immediately and check the belt routing. For more, check out all of my
2011-2017 Chrysler 300 DIY Repair & Maintenance Guides. |
||
| If you found this guide to be helpful,
please consider making a small donation by clicking on the PayPal.com
"Donate" button located to the right of this paragraph. Thank you!
(Note: I am not a registered charity. Donations are not tax deductible.) |