
Chrysler
Pacifica MAP Sensor Replacement Guide
How to change a faulty manifold absolute
pressure sensor in a 2017, 2018 and 2019 Chrysler Pacifica minivan.

By Paul B. Michaels Author & Photographer Auto Mechanic Since 1989 |
||
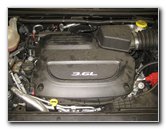
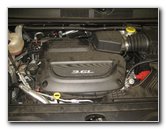 2017 Pacifica Pentastar 3.6L |
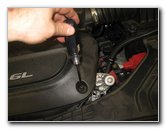
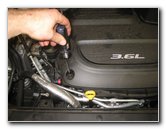 Loosen Counterclockwise |
 Remove 2nd Bolt |
|
This automotive maintenance tutorial was specifically written to assist owners of the first generation (2017, 2018, 2019 and perhaps also the 2020 and 2021 model years) Chrysler Pacifica minivan in checking or changing a faulty MAP (manifold absolute pressure) sensor on the Pentastar 3.6 liter V6 engine. Owners of other FCA (Fiat Chrysler America) vehicles from Chrysler, Dodge, Jeep, RAM or Fiat such as the Town & Country, 300, 200, Charger, Challenger, Durango, Journey, Grand Caravan, Wrangler, Grand Cherokee, Compass, Renegade, Patriot, RAM 1500, RAM ProMaster City, Fiat 500 and Fiat 124 may also find these DIY instructions to be helpful. Some of the symptoms of a faulty MAP sensor include difficulty starting the engine, poor fuel economy (low MPG), sputtering, misfiring, rough idling, hesitation, jerking, stalling and black smoke from the exhaust pipe. If you see a SES or CEL (service engine soon or check engine light) on the gauge cluster of your Pacifica, you can use an OBDII scan tool (or "OBD2") to read the relevant DTC (diagnostic trouble codes). A few of the codes that indicate a failing or faulty MAP sensor include the following: P0105, P0106, P0107 and P0108. The OEM sensor part number is Mopar 05149174AB (also known as "05149174 AB"). If you would like to try cleaning the old sensor before purchasing a new one, use a cleaner that is safe for electronics and plastics such as CRC Electronic Cleaner spray. |
||
|
|
||
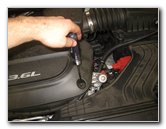
 Two Bolts Removed |
 Pull Off Engine Cover |
 Engine Cover Removed |
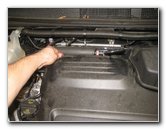
| In order to access
the MAP sensor, you'll first need to remove the plastic engine cover. There are two bolts located on the front corners of the engine cover. Use a Torx T30 star bit screwdriver to loosen the two bolts in the counterclockwise direction. Set the two bolts aside in a safe place. Lift the plastic cover off the top of the engine and set it aside in a safe place. |
||
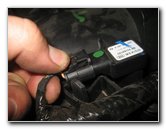
 Air Intake & Throttle Body |
 MAP Sensor Location |
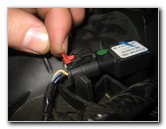 Slide Out Red Lock Tab |
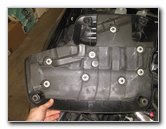
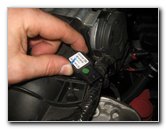
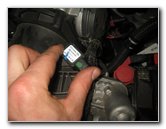
| The MAP sensor has
a small black rectangular plastic case with a white plastic label on the top
of the housing. Pull back the red plastic lock tab to release the electrical connector. |
||
 Push Down Release Tab |
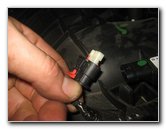 Slide Off Power Plug |
 1/4 Turn Counterclockwise |
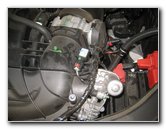
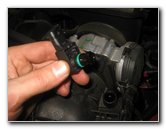
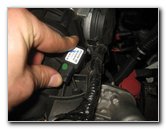
| Push in the release
tab before sliding the power plug straight off the base of the sensor. Rotate the sensor 1/4 turn in the counterclockwise direction before pulling it straight out of the air intake assembly. |
||
|
|
||
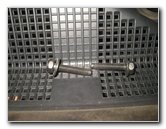
 Pull Out Old Sensor |
 Old Sensor Removed |
 Mopar 05149174 AB |
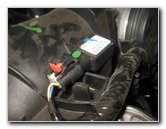
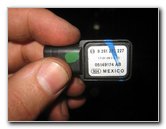
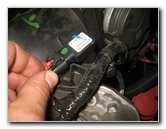
| Inspect the old
sensor and look for any built up oil sludge or a bent or damaged sensor
wire. The OEM MAP sensor is part number Mopar 05149174AB (also known as "05149174 AB"). |
||
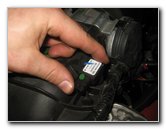
 Sensor Housing / Port |
 Install New Sensor |
 1/4 Turn Clockwise - Lock |
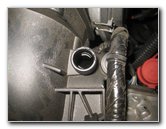
| Insert the new
sensor into the port (opening) in the air intake assembly. Rotate the new sensor 1/4 turn in the clockwise direction to secure it into place. |
||
 Push On Electrical Connector |
 Slide In Red Locking Tab |
 Replace Engine Cover |
| Push the electrical
connector straight on to the base of the new sensor. The plug should "click" securely into the socket. Slide the red lock tab in towards the sensor to secure the power plug. Lower the plastic cover over the top of the engine. |
||
 Replace Two Bolts |
 Tighten Clockwise |
 MAP Sensor Replaced |
| Replace the two
bolts by turning them in the clockwise direction with the Torx T-30 star bit
screwdriver until they are snug. Be sure to record the sensor change in your vehicle's service records. For more,
check out all of my
Chrysler Pacifica Minivan DIY
Repair & Maintenance Guides. |
||
| If you found this guide to be helpful,
please consider making a small donation by clicking on the PayPal.com
"Donate" button located to the right of this paragraph. Thank you!
(Note: I am not a registered charity. Donations are not tax deductible.) |