
Chrysler Town
& Country Cargo Light Bulb Replacement Guide
How to change a burnt out cargo area
light bulb in the tail gate of a 2011 to 2014 Chrysler Town & Country minivan.

By Paul B. Michaels Author & Photographer Auto Mechanic Since 1989 |
||
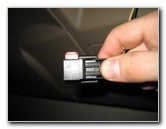
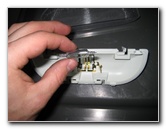
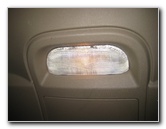
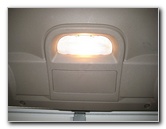 Cargo Area Light |
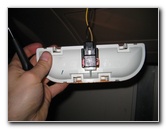
 Pry Out Light Housing |
 Remove Housing |
| This
automotive tutorial was specifically written to assist owners of the
revised 5th generation (2011, 2012, 2013, 2014, 2015 & 2016) Chrysler Town &
Country in changing a burnt out cargo area light bulb in the
tailgate. Owners of related Chrysler Group minivan vehicles such as the Dodge Grand Caravan, Chrysler Grand Voyager, Lancia Grand Voyager, Ram C/V Tradesman Cargo Van and the Volkswagen Routan may also find these DIY instructions to be helpful. A replacement cargo area "rigid loop" light bulb is part number 561 available from manufacturers such as Sylvania, GE, PIAA, Eiko, Wagner and Philips. You may be able to use the similar number 562 and 563 "rigid loop" base light bulbs. If you would like to have a brighter cargo area light, install a compatible replacement 561 LED Rigid Loop bulb. Please make sure the bulb you buy has the "rigid loops" on the ends as shown in the pictures below. The only tool needed to access the old bulb is a small flathead screwdriver or a plastic pry bar tool used to pry out the housing and pop off the lens cover. |
||
|
|
||
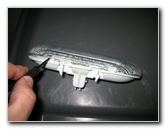
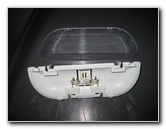
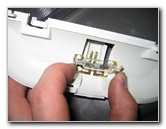
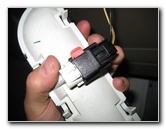
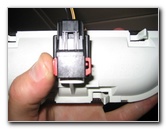
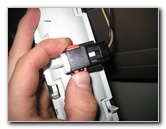 Red Locking Tab |
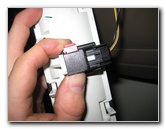 Slide Out Locking Tab |
 Release Tab - Plug Removed |
| The first step is
to open the rear cargo tailgate. Then insert the blade of the small flathead screwdriver in between the top edge of the cargo light housing and the plastic panel. Gently pry out the light bulb housing. Slide the red tab on the power connector out to unlock it. Press the release button on the power plug and slide it straight of. |
||
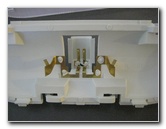
 Pry Off Lens Cover |
 Lens Cover Removed |
 Squeeze Metal Contacts |
| Use the small
flathead screwdriver to gently pry off the lens cover. Squeeze together the two metal spring electrical contacts and remove the old bulb. |
||
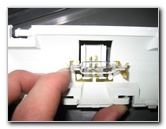
 Old Bulb Removed |
 Spring Electrical Contacts |
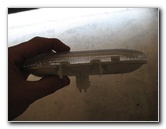
 561 Bulb "Rigid Loops" |
| Sylvania
incorrectly lists the
replacement light bulb as part # 578. The 578 bulbs sold on Amazon have
metal caps on the ends so that appears to be the wrong part number. The OEM cargo bulb
in this 2012 Town & Country didn't have the metal caps on the ends but
instead had "rigid loops". The OEM light bulb was a number 561. If you would like to have a brighter cargo area light, install a compatible replacement 561 LED Rigid Loop light bulb. |
||
|
|
||
 Slide Contacts In Loops |
 Line Up Lens Cover |
 Snap Lens Cover In Place |
| Install the new
light bulb by sliding the metal spring contacts in to the wire loops at the
ends of the bulb. Line up the lens cover and gently snap it in place on the front of the housing. |
||
 Push In Power Plug |
 Slide In Locking Tab |
 Test Bulb "Unlock" Button |
| Push on the power
plug and slide the red locking tab over to secure it in place. Test the new bulb by pressing the "Unlock" button on the key fob. All of the interior lights should turn on. Tip - If you installed an LED bulb and it doesn't work, try pulling it out of the socket, rotate it 180 degrees and push it back into the socket. Some LED bulbs are polarized and will only work when the "+" positive and "-" negative electrical contacts are in the correct orientation. |
||
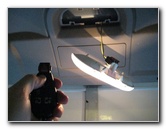
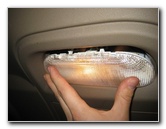 Re-Insert Light Housing |
 Snap In To Place |
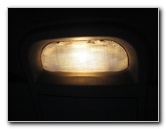 Testing New Cargo Bulb |
| Re-insert the light
housing in to the underside of the tailgate and gently snap it back in to
place. For more,
check out my other
Chrysler Town & Country Repair & Maintenance Guides. |
||
| If you found this guide to be helpful,
please consider making a small donation by clicking on the PayPal.com
"Donate" button located to the right of this paragraph. Thank you!
(Note: I am not a registered charity. Donations are not tax deductible.) |