
Dodge
Challenger Serpentine Belt Replacement Guide
How to change the serpentine accessory
belt on the Pentastar 3.6L V6 engine in a 3rd generation 2011 to 2015 Dodge
Challenger.
By Paul B. Michaels Author & Photographer Auto Mechanic Since 1989 |
||
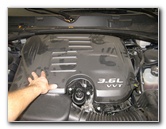
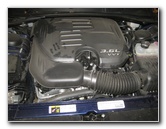 2015 Challenger 3.6L V6 |
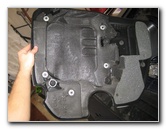
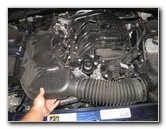
 Pull Off Plastic Engine Cover |
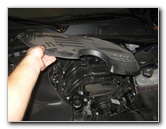
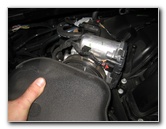
 Rubber Friction Fasteners |
| This
automotive maintenance tutorial was specifically written to assist
owners of the third generation (2011, 2012, 2013, 2014, 2015 and
probably also the 2016 model year) Dodge Challenger in changing the
serpentine accessory belt on the Pentastar 3.6 liter V6 engine. Owners of other Chrysler, Dodge, Jeep, Volkswagen, Lancia, Fiat and RAM vehicles equipped with the Pentastar 3.6L V6 engine such as the Avenger, Grand Caravan, Journey, Town & Country, Routan, Wrangler, Grand Cherokee, Durango, Charger, Cherokee, Voyager, Thema, ProMaster, 200, 300, Freemont and 1500 may also find these DIY instructions to be helpful. The tools needed to complete this procedure include a flathead screwdriver, a 3/8" drive ratchet and an extension bar. A few compatible replacement belts with their part numbers are as follows: Gates K060663 Multi V-Groove, Dayco 5060665, ACDelco 39282, Roadmax 6K663AP, Bando 6PK1685, Prestone 663K6 and Continental Elite 4060665. |
||
|
|
||
 Loosen Air Intake Clamp |
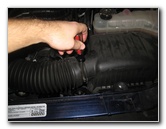 Loosen Air Box Hose Clamp |
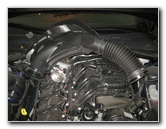 Pull Off Air Intake Assembly |
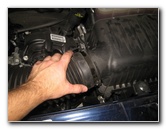
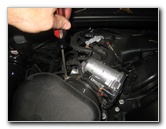
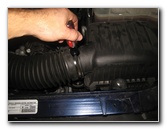
| The first two steps
are to open the hood and then gently pull off the black plastic engine
cover. Set the engine cover aside in a safe place. Loosen the metal hose clamp that secure the air intake assembly to the engine by turning the screw counterclockwise with a flathead screwdriver. Then loosen the metal hose clamp that attaches the air intake hose to the engine air filter box by turning it counterclockwise with the flathead screwdriver. Gently pull off the air intake assembly and set it aside in a safe place. |
||
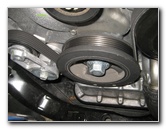
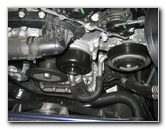
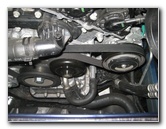
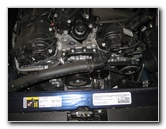 Front of Pentastar Engine |
 Power Steering Pump Pulley |
 Water Pump Pulley (Smooth) |
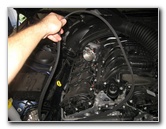
| Take a moment to
examine how the OEM serpentine belt is routed around the various pulleys
such as the alternator, idler pulley, water pump, power steering pump, A/C
(air conditioning) compressor, crankshaft pulley and tensioner. If you are worried about not remembering how to route the new belt, I'd recommend sketching out a quick belt routing diagram for yourself, snap a few pictures, or just refer to the images on this page. |
||
 Crankshaft Pulley (Ribbed) |
 Alternator Pulley (Ribbed) |
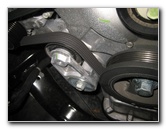 Tensioner Pulley (Smooth) |
|
A good tip to remember is that the smooth side of the belt goes against smooth pulleys and the ribbed side of the belt goes around the ribbed pulleys. |
||
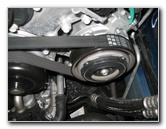
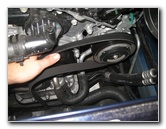
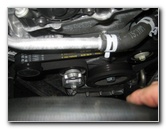
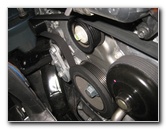 View of Belt Routing |
 3/8" Wrench & Extension |
 3/8" In Belt Tensioner |
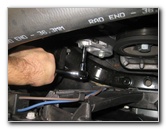
| Attach a short 2"
or 3 inch extension bar to a 3/8" drive ratcheting wrench. Insert the end of the extension bar in to the square opening on the front side of the tensioner pulley assembly. |
||
|
|
||
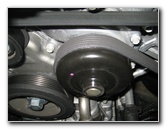
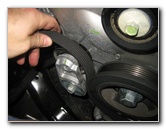
 Rotate Counterclockwise |
 Pull Off Old Belt |
 Old Belt Removed |
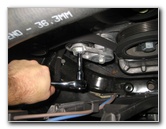
| Rotate the
ratcheting wrench counterclockwise (towards the left passenger side of the
vehicle) to release the tension on the old belt. Hold the tensioner to the left while you slip the old belt off the pulleys. |
||
 Inspect Pulleys |
 Route New Belt Over Pulleys |
 Smooth Side Over Tensioner |
| Inspect the pulleys
for any wobbling, unusual wear or damage. I recommend buying the Dayco 5060665 serpentine belt since it has great reviews on Amazon. If the belt tensioner pulley was really easy to rotate and the old belt was loose, you probably need to change the tensioner pulley assembly. If you plan on replacing the belt tensioner assembly, you should also replace the tensioner pulley. A replacement tensioner pulley is Dayco 89070. Two replacement tensioner assemblies with their part numbers include the following: Dayco # 89632 and ACDelco 39282 (the ACDelco tensioner includes a new pulley). Route the new belt over the various pulleys. I started at the top right (driver side) with the power steering pump. Remember that the flat side of the new belt should be in contact with the smooth pulleys and the ribbed side of the new belt should be wrapped around the ribbed pulleys. |
||
 Belt Taut By Alternator |
 New Belt Installed |
 Double Checking Routing |
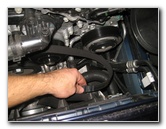
| Pull the left end
of the new belt taut near the alternator pulley and hold it with your left
hand. Rotate the tensioner pulley to the left (passenger side) until you can slip the end of the belt over the alternator pulley. Gently release the tension pulley to secure the new belt in place. Double check that the new belt is routed properly and rests evenly on or around all of the pulleys. |
||
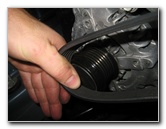
 Line Up Air Intake Assembly |
 Push On Air Intake |
 Push On Air Box Hose |
| Line up the two
ends of the air intake assembly. Push the air intake in to the manifold opening. Push the rubber air intake hose in to the engine air filter box. |
||
 Tighten Hose Clamp |
 Flathead - Turn Clockwise |
 Push On Plastic Engine Cover |
| Tighten the two
hose clamps by turning the screws clockwise until they are snug.
Double check that the air intake assembly is securely attached to the manifold and the air box. Line up the rubber friction fasteners on the underside of the plastic engine cover with the metal pegs or "spikes" on the top of the engine. Gently push the engine cover back in to place. Start the engine and listen carefully for any strange noises or sounds that may indicate a problem such as a fault tensioner assembly or an incorrectly routed belt. For more,
check out my other
2008-2015 Dodge Challenger DIY Repair & Maintenance Guides. |
||
| If you found this guide to be helpful,
please consider making a small donation by clicking on the PayPal.com
"Donate" button located to the right of this paragraph. Thank you!
(Note: I am not a registered charity. Donations are not tax deductible.) |

|