
Dodge Challenger Vanity
Mirror Light Bulbs Replacement Guide
How to change a burnt out vanity mirror
light bulb in the sun visors of a 3rd generation 2008-2015 Dodge Challenger.

By Paul B. Michaels Author & Photographer Auto Mechanic Since 1989 |
||
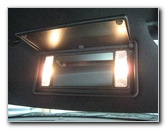
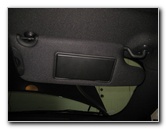 2015 Challenger Sun Visor |
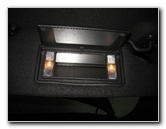 Flip Open Mirror Cover |
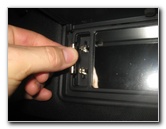
 Gently Pry Out Lens Cover |
| This
automotive maintenance tutorial was specifically written to assist
owners of the third generation (2008, 2009, 2010, 2011, 2012, 2013,
2014, 2015 & possibly also the 2016 model year) Dodge Challenger in
changing a burnt out vanity mirror light bulb in the sun visor. Owners of other Chrysler, Dodge and RAM vehicles such as the Town & Country, 300, 200, Avenger, Charger, Journey, Dart, Durango, Grand Caravan, and Ram C/V Tradesman minivan may also find these DIY instructions to be helpful. The OEM vanity mirror bulb is part number TS-14V1.5CP44. Other compatible miniature "fuse" type vanity light bulbs include the TS-14V1CP, 6614F, TS-14V1CP34, ACDelco 13502343 and Eiko 40842 - 6614F. The only tool needed to change the bulbs is a small flathead screwdriver used to pry out the lens cover. |
||
|
|
||
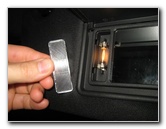 Lens Cover Removed |
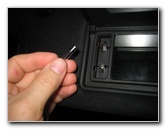
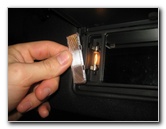
 Gently Pry Out Old Bulb |
 Old Bulb Removed |
| Flip open the
plastic mirror cover to expose the two vanity lights. To prevent from scratching the plastic surfaces, you may choose to cover the tip of your screwdriver with a thin micro fiber cloth. Gently pry out the plastic lens cover and set it aside in a safe place.
Very carefully push the bottom metal end cap out of the socket and then remove the old bulb. Avoid prying on the glass part of the old bulb to prevent from having it shatter and send glass shards in to your face. |
||
 Old TS-14V1.5CP44 Bulb |
 Push In New TS-14V1CP |
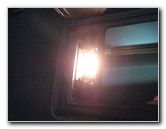 New Bulb Working |
| Push a new
ACDelco 13502343, TS-14V1.5CP44,
TS-14V1CP or
6614F bulb in to the socket. If the new bulb is working properly, it should light up immediately. (Tip - If you are installing an LED bulb and it doesn't work at first, try pulling it out and flipping it around in the socket.) |
||
 Line Up Lens Cover |
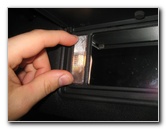 Gently Pop In Lens Cover |
 Test New Vanity Light Bulbs |
| Line up the lens
cover over the bulb housing and gently pop it back in to place. Close the mirror cover to complete the job. For more,
check out my other
2008-2015 Dodge Challenger DIY Repair & Maintenance Guides. |
||
| If you found this guide to be helpful,
please consider making a small donation by clicking on the PayPal.com
"Donate" button located to the right of this paragraph. Thank you!
(Note: I am not a registered charity. Donations are not tax deductible.) |