
Fiat 500 A/C
Cabin Air Filter Replacement Guide
How to clean or change the HVAC system's
cabin air filter element in a "Type 312" 2008 to 2015 Fiat 500 with photos.

By Paul B. Michaels Author & Photographer Auto Mechanic Since 1989 |
||
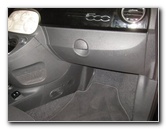 Glove Box & Footwell |
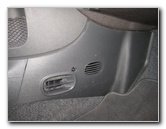 Front Passenger Kick Panel |
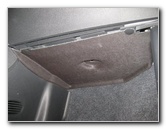 Under Glove Box Panel |
| This
automotive maintenance tutorial was specifically written to assist
owners of the "new" Type 312 (2008, 2009, 2010, 2011, 2012, 2013,
2014 and 2015) Fiat 500 compact car in cleaning or changing the air
conditioning system's cabin air filter element located in the HVAC
blower motor housing. Owners of other Fiat, Alfa Romeo, Chrysler, Dodge, Jeep and RAM vehicles such as the 4C, Giulia, 200, 300, Town & Country, Challenger, Charger, Dart, Durango, Journey, Grand Caravan, Compass, Grand Cherokee, Wrangler, Renegade, Cherokee, Patriot, 1500, C/V Tradesman and ProMaster may also find these DIY instructions to be helpful. A few compatible replacement filters with their part numbers are as follows: Ecogard XC26185, Beck Arnley 042-2186, GKI CF1249, Hastings AFC1580, Wix 24053, Premium Guard PC6185 and Mahle Original LA241/3. The tools needed to access and replace the cabin air filter include a Torx T25 screwdriver, a flathead screwdriver or a pop rivet removal tool, a 5.5mm socket and a ratcheting wrench. |
||
|
|
||
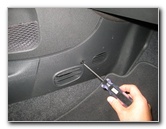 Loosen Counterclockwise |
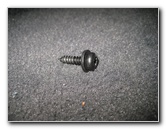 Torx T-25 Screw Removed |
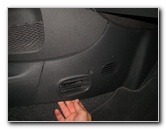 Gently Pull Off Panel |
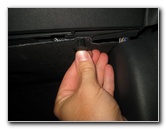
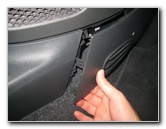
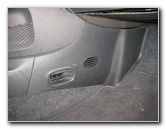
| To access the HVAC
blower motor housing and the A/C cabin air filter, you'll need to remove the
front passenger left side kick panel and the fabric cover under the glove
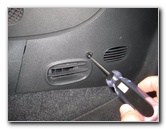
box. Loosen the single screw near the center of the kick panel by turning it counterclockwise with a Torx T-25 star bit screwdriver. Set the T25 screw aside in a safe place. Gently pull out the kick panel to release the metal retaining clips. |
||
 Metal Clips Released |
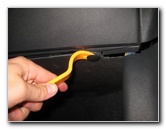 Pry Out Plastic Pop Rivet |
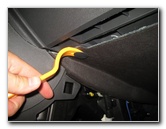 Remove Left Side Fastener |
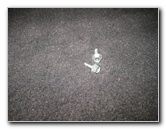
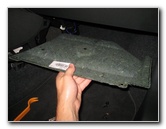
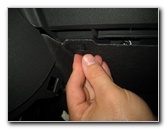
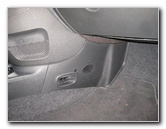
| Set the kick panel
aside in a safe place. Then gently pry out the two round black plastic pop rivet fasteners that secure the fabric panel to the underside of the glove box. |
||
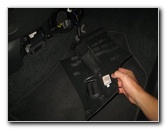
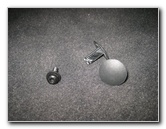 1 Screw & 2 Pop Rivets |
 Remove Fabric Panel |
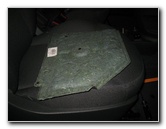 Under Glove Box Cover |
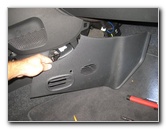
| Pull the fabric panel out from underneath the glove box and set it aside. | ||
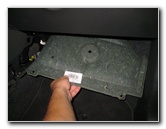
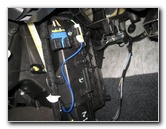
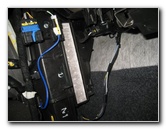
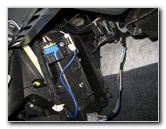
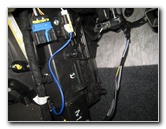
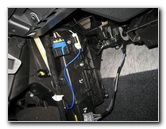
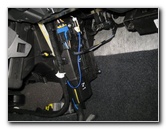 Blower Motor Housing |
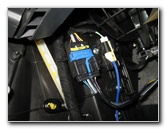 Electrical Connector |
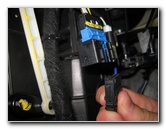 Disconnect Power Plug |
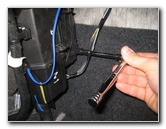
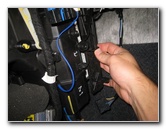
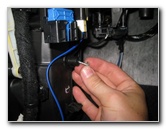
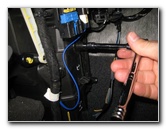
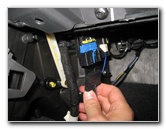
| Disconnect the blue
and black plastic electrical connector by pressing the release tab on the
left (inner) side of the plug. Pull the power plug straight out of its socket. |
||
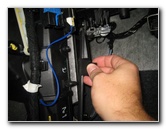
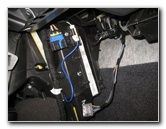
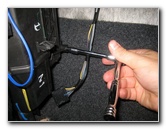
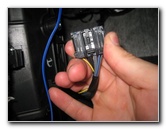 Release Tab - Inner Side |
 Loosen 5.5mm Screws |
 Loosen 2nd 5.5mm Screw |
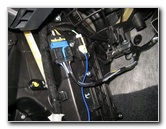
| Loosen the two
screws that secure the rectangular black plastic filter access panel to the
blower motor housing by turning them counterclockwise with the
5.5mm socket
and 1/4" ratcheting wrench. Set the two screws aside in a safe place. |
||
 2 Screws Removed |
 Rectangular Filter Cover |
 Pull Off Access Cover |
| Carefully pull the filter access cover straight off the blower motor housing. | ||
 Filter Access Panel Removed |
 Old Filter Visible |
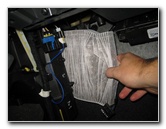 Slide Out Old Filter |
| Slide the old filter straight out of the slot. | ||
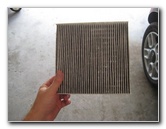 Inspect Both Sides |
 Denso - Air Flow Arrows |
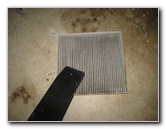 Clean With Vacuum |
| Inspect both sides
of the old cabin air filter. If the old filter is relatively clean, just tap out the large debris and remove any fine dust with a vacuum. If the old filter is dark grey or black and clogged with dirt, dust, hair, pollen, insects, leaves, twigs and other debris, it should be replaced with a new element. I recommend buying the Mahle Original LA241/3 cabin air filter since it has great reviews on Amazon. |
||
|
|
||
 Empty Filter Slot |
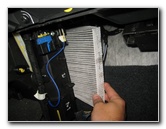 Slide In New Air Filter |
 New Filter Installed |
| If the new filter
has an "Air Flow" arrow, make sure it is pointing towards the rear of the
vehicle. Slide the new filter in to the slot with the "Air Flow" arrow or arrows pointing in the correct direction towards the back of the car. |
||
 Re-Attach Filter Cover |
 Filter Cover Re-Installed |
 Spin In Two Screws |
| Line up the plastic
filter cover and gently push it back in to place over the slot. Replace the two screws and spin them in by hand a turn or two to prevent them from becoming cross threaded. |
||
 Replace Lower Screw |
 Tighten 5.5mm Clockwise |
 Two Screws Tightened |
| Tighten the two
screws in the clockwise direction with the 5.5mm socket and ratcheting
wrench until they are snug. Try to avoid over tightening the two screws to prevent from cracking the plastic filter cover. |
||
 Filter Cover Replaced |
 Push In Electrical Connector |
 Power Plug Replaced |
| Push the electrical connector back in to its socket. | ||
 Line Up Fabric Cover |
 Footwell Panel Replaced |
 Push In Pop Rivets |
| Replace the fabric panel under the glove box and push in the two pop rivets to secure it in place. | ||
 Two Fasteners Secured |
 Line Up Plastic Kick Panel |
 Push In Metal Clips |
| Line up the metal clips on the back side of the kick panel with their corresponding slots and firmly push them back in to place. | ||
 Kick Panel Replaced |
 Tighten T25 Clockwise |
 Cabin Air Filter Replaced |
| Re-insert the
Torx T25 screw in to the center of the kick panel and tighten it in the clockwise
direction until it is snug. Enjoy the
fresh clean air from your A/C system!
For more,
check out my other
2008-2015 Fiat 500 DIY Repair & Maintenance Guides. |
||
| If you found this guide to be helpful,
please consider making a small donation by clicking on the PayPal.com
"Donate" button located to the right of this paragraph. Thank you!
(Note: I am not a registered charity. Donations are not tax deductible.) |