
Ford Escape
Vanity Mirror Light Bulb Replacement Guide
How to replace a burnt out vanity mirror
light bulb in a second generation 2008 to 2012 Ford Escape SUV with pictures.

By Paul B. Michaels Author & Photographer Auto Mechanic Since 1989 |
||
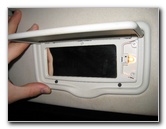
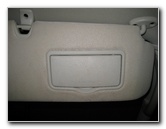 Sun Visor - Mirror Cover |
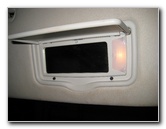 Flip Open Mirror Cover |
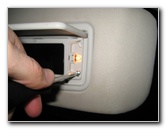
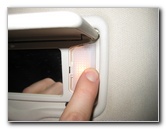
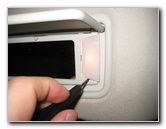 Gently Pry Out Lens Cover |
| This
automotive "how-to" guide was specifically written to assist owners
of the 2nd generation (2008, 2009, 2010, 2011, and 2012) Ford
Escape SUV in replacing a burnt out vanity mirror light bulb, or
upgrading them both to brighter LED units. Owners of other Ford, Lincoln, Mercury or related Mazda vehicles such as the Fiesta, Focus, Fusion, Taurus, Mustang, Edge, Explorer, C-Max, Expedition, F-150, E-150, E-350 Wagon, Flex, Transit Connect, MKZ, MKX, MKS, MKT, Milan, Grand Marquis, Mariner, Mountaineer, Navigator, and Mazda Tribute may also find these DIY instructions to be helpful. Update - The tiny miniature wedge base light bulb part number is 61431. A replacement vanity mirror light bulb "should" be either a miniature wedge base type bulb such as the # 168, 175 or 194 or it may be a cartridge (fuse / festoon) style bulb such as the TS-14V1.5CP or # 6614F. The only tool needed to access the vanity mirror light bulb is a small flathead screwdriver or a plastic pry bar tool. UPDATE - Use a straightened paper clip inserted into the rear of the socket to push the old light bulb out of the socket. |
||
|
|
||
 |
 |
 |
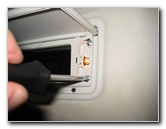
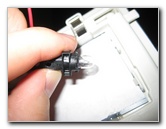
| Insert the blade of
the small flathead screwdriver and gently pry out the translucent plastic
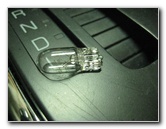
lens cover. Once I removed the lens cover, I was expecting to see a small fuse type bulb or a miniature wedge base bulb (part # 168, 175, or 194). Instead I saw the very small round light bulb shown above in Picture # 4. Update 7-31-2023 - I received an email from another Ford Escape owner. Apparently the tiny light bulbs can be pushed out by using a paper clip. (Similar to the tool you would use to manually eject a computer CD or DVD drive tray.) Insert the straightened paper clip through the back of the light bulb socket in between the red and black wires to push the old light bulb out of the socket. The bulb part number is 61431 which is shaped similar to the common # 194 bulb but much smaller. This should be the same procedure and part number for Mercury Mariner and Mazda Tribute SUVs around the same model years. Check out the guides for changing the vanity mirror light bulbs in a Ford Fusion and the Ford Edge below.
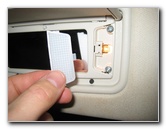
If your Ford Escape has a standard vanity mirror bulb such as the fuse type shown above, gently pull out the old one and push in a new # 6614F, ACDelco 13502343 or TS-14V1CP bulb into the socket. Then snap the lens cover back in to place.
If your Escape has a standard miniature wedge base bulb such as the one shown in the thumbnail image above, gently pull the old one straight out of the socket and push in a new # 168, 175 or 194 bulb. Then snap the lens cover back in to place.
UPDATE - Use a straightened paper clip to push the old light bulb out of the socket. |
||
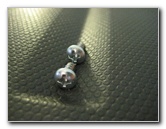
 Remove Two Screws |
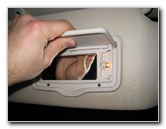
 Pull Out Vanity Mirror |
 Bulb Attached To Rear |
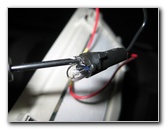
| To replace this
burnt out bulb or upgrade it to a brighter LED unit, you'll first need to
remove the two Phillips head screws. Then pull the vanity mirror assembly out of the sun visor. UPDATE - Use a straightened paper clip to push the old light bulb out of the socket. |
||
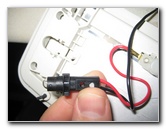 Pull Light Off Mirror Housing |
 |
 |
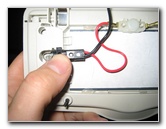
| As far as I know,
the old bulb can not be pulled out of the socket and it seems to be
hardwired in place. UPDATE - Use a straightened paper clip to push the old light bulb out of the socket. I'd recommend first disconnecting the vehicle's 12V battery so that you don't give yourself a shock of electricity. UPDATE - Use a straightened paper clip inserted into the rear of the socket to push the old light bulb out of the socket. Then you'll have to cut the red "+" and black "-" power wires that connect to the black plastic light bulb housing. |
||
 |
 |
 |
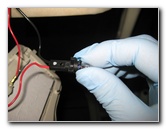
| Choose a new bulb
type that fits in the existing light housing or modify the vanity mirror
assembly to accept whatever conventional incandescent or LED bulb you have
chosen. Attach the black and red power wires. Secure the wires in place either by soldering them or with electrical heat shrink tubing. (Please note, I chose to not replace the original OEM bulb since it was working properly.) |
||
 |
 |
 |
| Test that the new
bulb works by flipping open the vanity mirror cover.
Leave it on for at least 10-15 minutes to be sure that it will not heat up and melt the plastic housing or ignite a fire. Re-insert the vanity mirror assembly, tighten the two Phillips head screws and snap the lens cover in to place. For more, please check out my
other
Ford Escape Repair & Maintenance Guides. |
||
| If you found this guide to be helpful,
please consider making a small donation by clicking on the PayPal.com
"Donate" button located to the right of this paragraph. Thank you!
(Note: I am not a registered charity. Donations are not tax deductible.) |