
Ford F-150
Third Brake Light Bulb Replacement Guide
How to replace a burnt out 3rd brake or
truck cargo bed light bulbs in a twelfth generation 2009 to 2014 Ford F-150.

By Paul B. Michaels Author & Photographer Auto Mechanic Since 1989 |
||
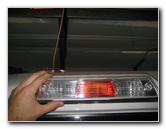
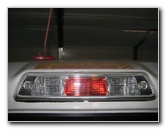
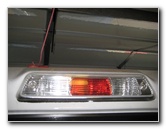 3rd Brake / Cargo Lights |
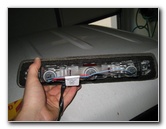
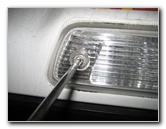 Remove First Screw |
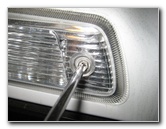 2nd Phillips Head Screw |
| This
automotive "how-to" guide was specifically written to assist owners
of the twelfth generation (2009-2014) Ford F-150 truck in changing a
burnt out high mount third brake light bulb or the two cargo area
light bulbs. Owners of other F-Series trucks or other Ford, Lincoln and Mercury vehicles such as the Super Duty F-250, F-350, F-450, Expedition, Explorer, Edge, Escape, E-150, E-250, E-350, Transit Connect, Flex, MKX, MKT, Navigator and Mountaineer may also find these DIY instructions to be helpful. Replacement 3rd brake or cargo area light bulbs for the '09-'14 F150 are part # 912 from manufacturers such as Sylvania, GE and Eiko. If you would like to have brighter lights, install some compatible 912 LED bulbs. The only tool needed to replace the one 3rd brake and two cargo area light bulbs is a standard Phillips head screwdriver. |
||
|
|
||
 2 Phillips Screws Removed |
 Pull Out Light Housing |
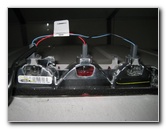
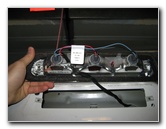 3 Light Bulb Sockets |
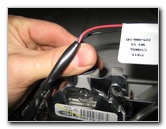
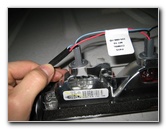
| The first step is
to climb in to the cargo bed with a standard sized Phillips head
screwdriver.
Then remove the two Phillips head screws located on the sides of the 3rd brake / cargo light housing by turning them in the counter clockwise direction. Set the two screws aside in a safe place. Gently pull the light assembly off the top of the truck's passenger compartment. |
||
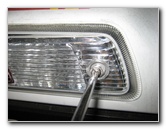
 1/4 Turn Counter Clockwise |
 Remove Light Bulb Socket |
 Pull Old Bulb Straight Out |
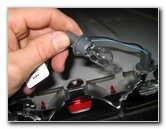
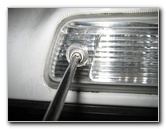
| To access either of
the two cargo area bulbs on the sides of the housing, rotate the socket 1/4
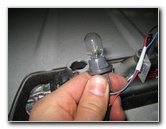
turn counter clockwise and pull it straight out of the assembly. Pull the old bulb straight out of the socket and push in a new # 912 bulb. (The # 921 light bulb will also fit but it is a higher wattage bulb, so the extra heat may cause damage to the plastic housing.) |
||
|
|
||
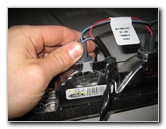
 Re-Insert Bulb & Socket |
 Pull Off Wire Harness |
 Remove 3rd Brake Light |
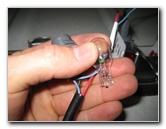
| The third brake
light is located at the center of the housing.
To remove the socket, you may first need to unhook the wiring harness. Then rotate the socket 1/4 turn counter clockwise and pull it straight out. Pull the old 3rd brake light bulb straight out of the socket and push in a new # 912 bulb. Re-insert the socket in to the assembly and rotate it 1/4 turn clockwise to secure it in place. Secure the wires back in place on the hook at the center of the housing. |
||
 Bulbs Replaced |
 Re-Insert Light Housing |
 Tighten Phillips Head Screw |
| Gently push the
light housing back in place and thread in the two Phillips head screws by
hand a few turns to prevent them from becoming cross threaded. Tighten the two screws with the Phillips head screwdriver until they are snug. Do not over tighten the screws or you may crack the plastic lens on the light housing. |
||
 Replace 2nd Phillips Screw |
 Light Housing Replaced |
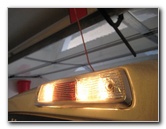 Test New Light Bulbs |
| Test the new light
bulbs by turning on the parking lights and having someone step on the brake
pedal. For more,
check out my other
Ford F-150 Repair & Maintenance Guides. |
||
| If you found this guide to be helpful,
please consider making a small donation by clicking on the PayPal.com
"Donate" button located to the right of this paragraph. Thank you!
(Note: I am not a registered charity. Donations are not tax deductible.) |