
Ford Fiesta
Cabin Air Filter Replacement Guide
How to clean or change the A/C system's
cabin air filter element in a 6th generation 2009 to 2015 Ford Fiesta with
photos.

By Paul B. Michaels Author & Photographer Auto Mechanic Since 1989 |
||
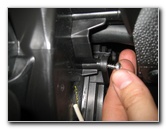
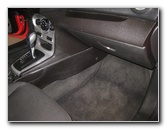 2013 Ford Fiesta |
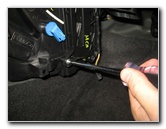
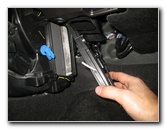
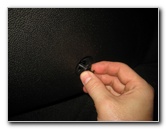
 Passenger Left Kick Panel |
 Loosen Plastic Screw |
| This
automotive maintenance tutorial was specifically written to assist
owners of the sixth generation (2009, 2010, 2011, 2012, 2013, 2014,
2015 and possibly also the 2016 model year) Ford Fiesta sedan or
hatchback in cleaning or changing the A/C system's cabin air filter
element located under the dashboard in the HVAC blower motor
housing. Owners of other Ford or Lincoln vehicles such as the Focus, Fusion, C-Max, Mustang, Escape, Transit Connect, Edge, Flex, Explorer, Expedition, Taurus, F-150, EcoSport, MKC, MKZ, MKS, MKX, MKT and the Navigator may also find these DIY instructions to be helpful. The tools needed to complete this procedure include a Phillips head screwdriver, a flathead screwdriver and a Torx T20 star bit screwdriver. A few compatible replacement cabin filters with their part numbers are as follows: TYC 800163P, Fram CF11670, Motorcraft FP-69, ATP FA-19 or CF-242, Pentius PHB6175, OEM CAF271P, Ford BE8Z-19N619-A, Ecogard XC26175, Hastings AFC1533 and Wix # 24619. |
||
|
|
||
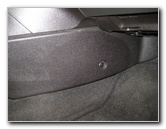
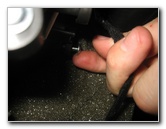
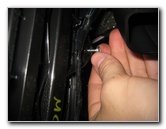
 Plastic Fastener Removed |
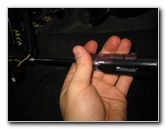
 Plastic Phillips Head Screw |
 Gently Pull Out Kick Panel |
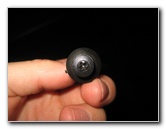
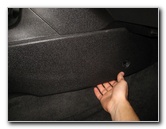
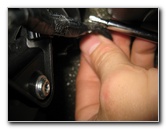
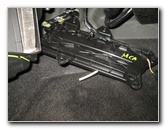
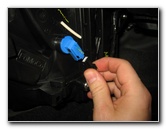
| The cabin air
filter is located under the dashboard and can be accessed from the front
passenger seat foot well. Locate the round black plastic fastener near the front of the passenger's left kick panel. Loosen the plastic screw by turning it counterclockwise with a Phillips head screwdriver. You may need to apply pressure under the fastener with a flathead screwdriver to get the screw to come out. Once the plastic screw has been loosened, pry out the plastic fastener and set it aside in a safe place. Gently pull the plastic kick panel off the center console. |
||
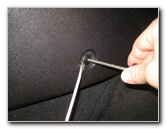
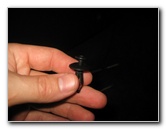
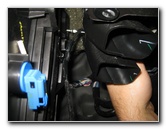
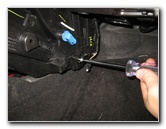
 Pop Out Friction Fasteners |
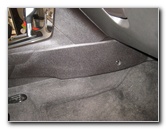
 Kick Panel Removed |
 HVAC Blower Motor |
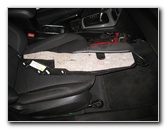
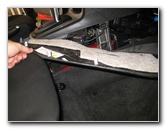
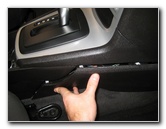
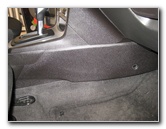
| It is held in place
by several metal friction fastener retaining clips. Set the kick panel aside in a safe place. Once the panel has been removed, you'll see the HVAC blower motor housing and the rectangular filter access cover. |
||
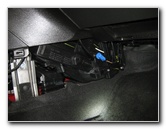
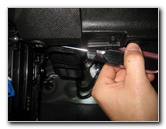
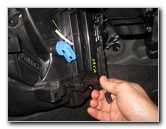
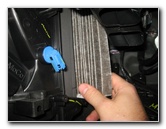
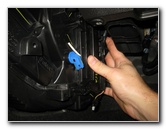
 Sensor Electrical Connector |
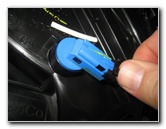 Press Release Tab |
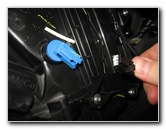 Disconnect Power Plug |
| Press the release
tab on the black plastic electrical connector attached to the blue sensor. Pull the plug straight out of its socket and tuck it away on the right side of the filter cover. |
||
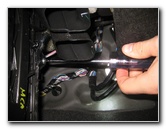
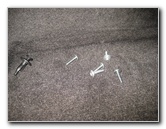
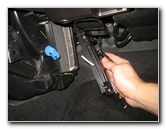
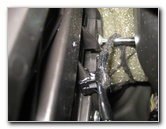 Torx T20 Screws |
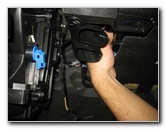 Top Back Screw - Tough |
 Spin Out Screws |
| The rectangular
plastic filter access panel is held in place by five Torx T20 screws.
Some of the screws are difficult to reach with a long Torx screwdriver. If you have Torx sockets, you may have better luck using one of those with a ratcheting wrench. Loosen the screws by turning them counterclockwise with the T-20 screwdriver. Once the screw has been loosened a few turns, you can spin it out the rest of the way by hand. |
||
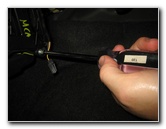
 Top Closest Screw |
 Screw Removed |
 Back Middle Screw |
| There are two screws at the top, one in the middle and another two at the bottom of the filter cover. | ||
 Bottom Screw |
 Bottom Forward Screw |
 5 Screws Removed |
| Set the five screws aside in a safe place with the plastic fastener. | ||
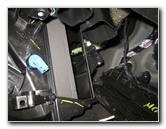
 Pull Off Plastic Cover |
 Slide Out Top Edge |
 Filter Cover Removed |
| Pull out the bottom
edge of the filter cover before removing the tab on the top edge from it's
slot. Tuck the filter cover out of the way against the firewall. |
||
|
|
||
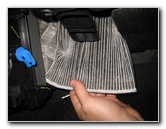
 Slide Out Old Filter |
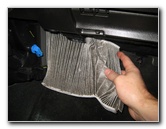 Compress & Pull Down |
 Old Filter Removed |
| Slide the old
filter out of the slot. You will need to compress the old filter and pull it down to get it past the air intake tubes and the other obstructions. |
||
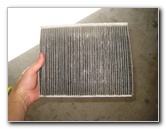
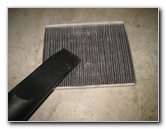 Clean With Vacuum |
 Empty Filter Slot |
 Air Flow Arrow - Towards You |
| Inspect both sides
of the old filter. If the old filter is relatively clean, just tap out the large debris and remove any fine dust with a vacuum. If the old filter is dark grey or black and clogged with dust, dirt, pollen, hair, insects, twigs, leaves and other debris, it should be replaced with a new element. I recommend buying the TYC 800163P cabin air filter since it has excellent reviews on Amazon. If you have trouble with your A/C system smelling musty or moldy, try the Fram CF11670 filter instead. It has Arm & Hammer baking soda and carbon to help keep your air conditioning smelling fresh. Orientate the new filter with the "Air Flow" arrow pointing towards the rear of the vehicle. Compress the new filter a bit and gently slide it in to the slot. |
||
 Slide In New Cabin Filter |
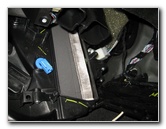 New Filter Installed |
 Re-Insert Tab At Top |
| Make sure the
filter is fully seated inside the slot. Line up the filter cover and re-insert the tab at the top in to its slot. |
||
 Push On Filter Access Panel |
 Spin In Screws Clockwise |
 Tighten Top Rear Screw |
| Push the bottom
edge of the filter cover in to place. Spin in the five screws by hand a turn or two in the clockwise direction. |
||
 |
 Replace Other T20 Screws |
 |
| Tighten the five screws in the clockwise direction with the Torx T20 screwdriver until they are snug. | ||
 Tighten T-20 Clockwise |
 Push In Power Plug |
 Filter Cover Secured |
| Push the power plug for the sensor straight in to its socket. | ||
 Plastic Kick Panel |
 Pop In Retaining Clips |
 Kick Panel Replaced |
| Line up the plastic kick panel and pop in the metal retaining clips. | ||
 Re-Insert Plastic Fastener |
 Push In Plastic Screw |
 Cabin Filter - Done! |
| Re-insert the black
plastic fastener and pop in the plastic screw to secure it in place. Enjoy the fresh clean air from your A/C system! For more,
check out my other
2009-2015 Ford Fiesta DIY Repair & Maintenance Guides. |
||
| If you found this guide to be helpful,
please consider making a small donation by clicking on the PayPal.com
"Donate" button located to the right of this paragraph. Thank you!
(Note: I am not a registered charity. Donations are not tax deductible.) |