
Ford Taurus
Dome Light Bulbs Replacement Guide
How to change a burnt out overhead dome
light bulb or rear passenger reading light bulb in a 2010-2014 Ford Taurus.

By Paul B. Michaels Author & Photographer Auto Mechanic Since 1989 |
||
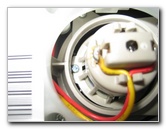
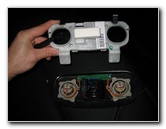
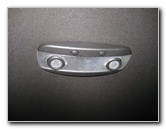 2013 Taurus Dome Lights |
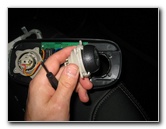
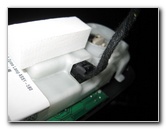
 Pull Down Dome Light Housing |
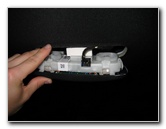
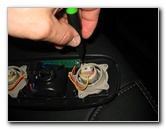
 Disconnect Power Plug |
| This
automotive maintenance tutorial was specifically written to assist
owners of the 6th generation (2010, 2011, 2012, 2013 & 2014) Ford
Taurus sedan in changing a burnt out overhead dome light bulb or
rear passenger reading light. Owners of other Ford, Lincoln and Mercury vehicles with similar map light housings such as the Fiesta, Fusion, Focus, Mustang, C-Max, Escape, Transit Connect, Explorer, Edge, Expedition, Flex, MKS, MKZ, MKT, MKX, Navigator, Milan, Grand Marquis, Mariner and Mountaineer may also find these DIY instructions to be helpful. A replacement dome light bulb for the 2010, 2011 and 2012 Taurus models is part # 64111. The refreshed 2013 and 2014 Taurus use the # 2825 miniature wedge base bulb for the dome light and rear passenger reading light bulbs. The tools needed to change the bulbs include a small flathead screwdriver and a small Phillips head screwdriver. |
||
|
|
||
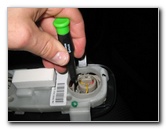
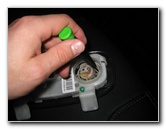
| The pictures on
this page show how to change the two rear passenger reading light bulbs (the
round light housings) over the rear passengers in an updated 2013 Taurus. To change the "dome" light bulb at the center of the housing, I believe that you just have to use the small flathead screwdriver to gently pry off the rectangular translucent lens cover that goes across the entire length of the housing. Pull the old # 2825 miniature wedge base bulb out of the socket and push in a new one. You may also use any other compatible bulb such as the W5W, 168, 175, 194 or a brighter LED unit. If you have trouble pulling out the bulb from the front, you may need to remove the white plastic cover on the rear and push out the old bulb with the tip of the small flathead screwdriver. |
||
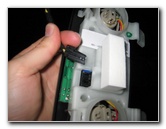
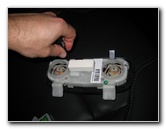
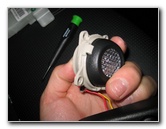
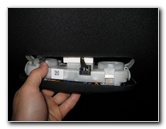
 Dome Light Bulb Housing |
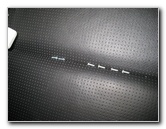
 Small Phillips Screws |
 Remove Reading Light Screws |
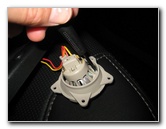
| Pull down the dome
light housing with either your finger tips or pry it down with a small
flathead screwdriver. Press the release tab on the power plug and slide it straight out of the socket. Remove the small Phillips head screws on the back side of the housing. |
||
 |
 |
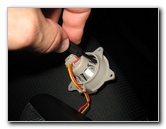
 Remove Phillips Screws |
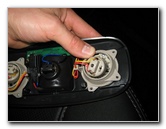
| I mistakenly
removed the screws on the back of the round bulb housing first.
You should first remove the screws on the rectangular white plastic cover on the rear of the assembly. |
||
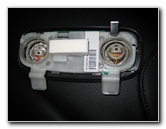
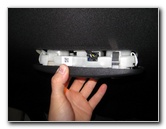
 Plastic Cover Removed |
 Remove More Phillips Screws |
 Six Screws Removed |
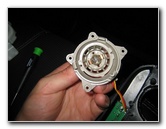
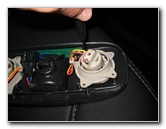
| Once the cover is off, remove the other Phillips head screws on the back of the round bulb housing. | ||
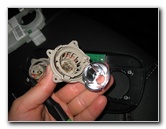
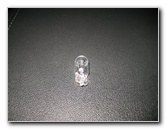
 Pull Out Bulb Housing |
 |
 Pull Off Front Cover |
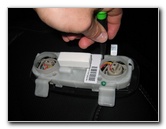
| Pull the bulb
housing out of the assembly. Pop out the front lens cover attached to the black plastic piece. |
||
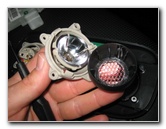
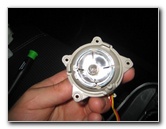
 Pull Out Reflector |
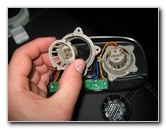 |
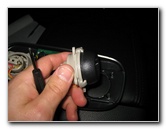
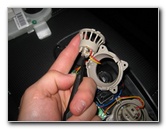 Insert Screwdriver |
| Pull out the silver
reflector that surrounds the reading light bulb. Gently insert the small flathead screwdriver in to the rear of the housing. |
||
|
|
||
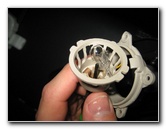 Push Out Old Bulb |
 Old # 2825 Bulb |
 Push In New Bulb |
| Push the old bulb
straight out of the socket. Push a new miniature wedge base # 2825 bulb straight in to the socket. |
||
 |
 Re-Insert Reflector |
 Pop On Lens Cover |
| Re-insert the
silver reflector back in to the housing. Pop the black plastic piece with the translucent lens cover back over the bulb housing. |
||
 Replace Phillips Screws |
 |
 Re-Insert Housing |
| Tighten the
Phillips head screws on the rear of the bulb housing. Re-insert the housing in to the rear of the assembly. |
||
 Replace Screws |
 |
 Replace Plastic Cover |
| Replace the screws
that hold the bulb housing to the rear of the assembly. Lower the white plastic cover on to the rear of the assembly. Tighten the Phillips screws to secure the rear cover in place. |
||
 Push In Power Plug |
 Re-Insert Dome Housing |
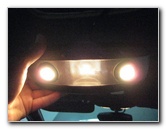 Test New Bulbs |
| Push the black
plastic power plug in to the socket. Line up the friction fasteners on the rear of the assembly with the corresponding holes in the roof of the car. |
||
 Pop In Metal Clips |
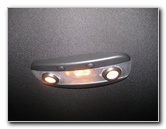 |
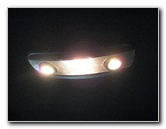 Test New Light Bulbs |
| Push
the overhead housing back in to place. Test the new rear passenger reading light bulbs by pressing the "On/Off" buttons. For more, please check out my other
Ford Taurus DIY Repair Guides. |
||
| If you found this guide to be helpful,
please consider making a small donation by clicking on the PayPal.com
"Donate" button located to the right of this paragraph. Thank you!
(Note: I am not a registered charity. Donations are not tax deductible.) |