
Chevrolet
Equinox Headlight Bulbs Replacement Guide
How to change a burnt out low beam, high
beam, turn signal or side marker light bulb in a 2010 to 2016 Chevy Equinox.

By Paul B. Michaels Author & Photographer Auto Mechanic Since 1989 |
||
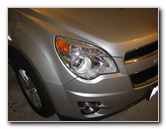 2012 Equinox Headlight |
 Turn Wheels |
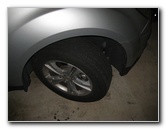
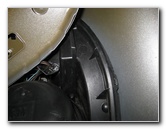
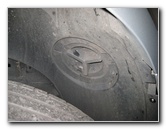 Headlight Access Panel |
| This
automotive "how-to" guide was specifically written to assist owners
of the second generation (2010, 2011, 2012, 2013, 2014, 2015 & 2016) GM Chevy Equinox
in replacing a burnt out low beam, high beam, front turn signal or
side marker light bulb in the headlight assemblies. Owners of other GM vehicles such as the Spark, Sonic, Cruze, Volt, Malibu, Impala, Camaro, Corvette, Traverse, Tahoe, Suburban, Colorado, Avalanche, Silverado, Verano, Encore, Regal, LaCrosse, Encore, Enclave, Canyon, Sierra, Terrain, Acadia, Yukon, Savana, ATS, XTS, CTS, SRX and Escalade may also find these DIY instructions to be helpful. Replacement bulbs with their part numbers are as follows: Low Beam # H11, High Beam 9005, Turn Signal 7444NA and Sidemarker 194. The only tool needed to access the bulbs is a Torx T-20 star bit screwdriver used to remove the plastic wheel well liner access cover. |
||
|
|
||
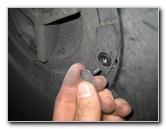
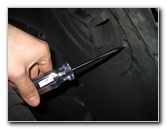
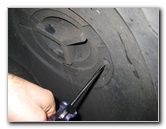 Remove T20 Torx Screw |
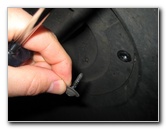 T-20 Screw Removed |
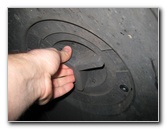 Rotate Counter Clockwise |
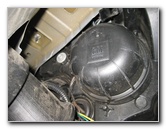
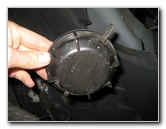
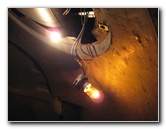
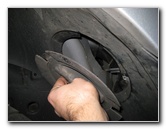
| The first step is
to turn the wheels all the way to the direction of the burnt out headlight
bulb to give yourself more room to work in the wheel well. Put the vehicle in park, engage the emergency brake and chock the rear wheels to prevent the vehicle from moving. All of the headlight bulbs can be reached through the circular access panel built in to the wheel well liner. Remove the single screw on the access panel with a Torx T20 star bit screwdriver by turning it counter clockwise. Then grab the "Y" shaped handle on the panel and rotate it 1/4 turn counter clockwise before pulling it straight out of the wheel well liner. |
||
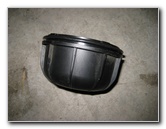
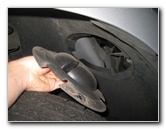 Access Disc Removed |
 Low Beam Dust Cap |
 Turn Counter Clockwise |
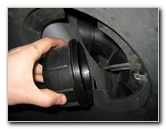
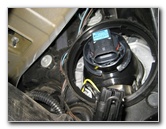
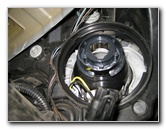
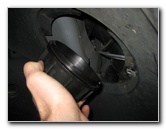
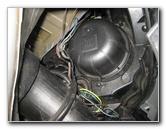
| The
black plastic dust cap over the low beam headlight bulb is located right
behind the access panel. Rotate the dust cap 1/4 turn counter clockwise and pull it straight out. |
||
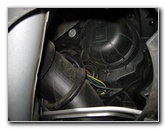
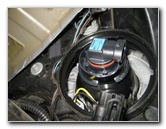
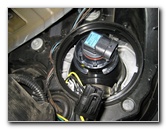
 Dust Cap Removed |
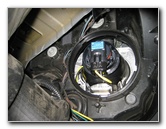 Base of Low Beam Bulb |
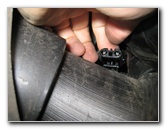
 Pry Up Clip - Remove Power |
| Pull back on the black plastic power connector release tab and pull the plug straight off the base of the low beam bulb. | ||
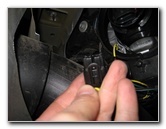
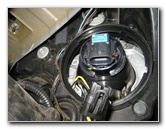
 Power Connector Removed |
 1/4 Turn Counter Clockwise |
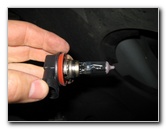 Old Low Beam Bulb |
| Rotate the base of the low beam bulb 1/4 turn counter clockwise and pull it straight out of the headlight housing. | ||
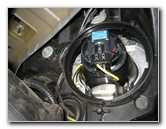
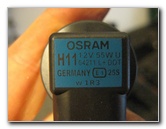 Osram H11 12V 55W |
 Low Beam Socket |
 Insert New H11 Bulb |
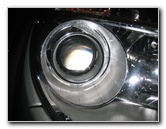
| Insert a new #
H11 12 volt 55 watt low beam bulb straight in to the headlight housing. Rotate
it 1/4 turn clockwise to lock it in place. Try to avoid touching the glass part of the new halogen bulb with your fingers or anything greasy in the engine bay. If you do get the new bulb dirty, wipe it clean with an alcohol moistened paper towel. |
||
 1/4 Turn Clockwise |
 Push On Power Connector |
 Replace Dust Cover |
| Push the power
connector straight on to the base of the new low beam bulb until it clicks
in to place. If you plan on replacing any other headlight bulb, leave the low beam dust cap off to give yourself more room to work. If you only wanted to replace the low beam bulb, twist on the dust cap 1/4 turn in the clockwise direction. |
||
|
|
||
 1/4 Turn Clockwise |
 Low Beam Bulb Replaced |
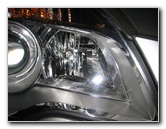 High Beam Headlight |
| The high beam bulb is located just past the low beam bulb closer to the center line of the vehicle. | ||
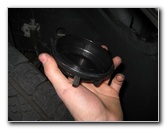
 Reach In - Twist Off Cap |
 High Beam Dust Cap |
 Disconnect Power Plug |
| Reach in past the
low beam bulb and feel for the plastic dust cap over the high beam bulb. Rotate the dust cap 1/4 turn counter clockwise and pull it straight off. Pull back the retaining clip on the high beam bulb power connector and slide it off the base of the bulb. |
||
 1/4 Turn Counter Clockwise |
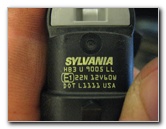 Sylvania 9005 HB3 |
 Replace High Beam Dust Cap |
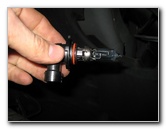
| Rotate the base of
the high beam bulb 1/4 turn counter clockwise and pull it straight out of
the headlight assembly. Insert a new 9005 high beam bulb straight in to the headlight housing and rotate it 1/4 turn clockwise to lock it in place. Try to avoid touching the glass part of the new halogen bulb with your fingers or anything greasy in the engine bay. If you do get the new bulb dirty, wipe it clean with an alcohol moistened paper towel. |
||
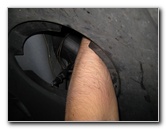
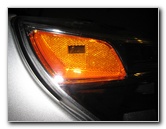 Front Sidemarker Light |
 2" Black Plastic Grip Tab |
 1/4 Turn Counter Clockwise |
| The front side
marker bulb socket is located at the outer corner of the headlight assembly
and just above the low beam bulb's dust cap. Reach in and grab the 2" black plastic grip tab before twisting it 1/4 turn counter clockwise to remove the socket. |
||
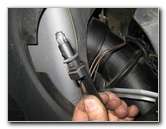
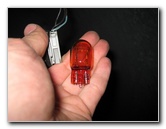
 Pull Old Bulb Straight Out |
 Low Beam Dust Cap In Way |
 Reach In - Turn Signal |
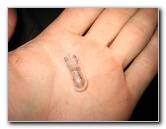
| Pull the old side
marker bulb straight out of the socket and insert a new #
194 bulb.
Re-insert the socket back in to the headlight and rotate it 1/4 turn clockwise to secure it in place. |
||
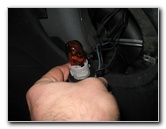 1/4 Turn Counter Clockwise |
 Pull Old Bulb Straight Out |
 Test Sidemarker & Signal |
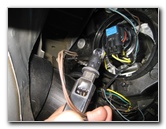
| The turn signal
light bulb socket is located just above the low beam.
If you haven't already, remove the low beam dust cap for easier access to the turn signal socket. Reach in and rotate the turn signal bulb socket 1/4 turn counter clockwise before pulling it straight out. Pull the old turn signal bulb straight out of the socket and push in a new 7444NA bulb. |
||
 Install Turn Signal Bulb |
 Install Sidemarker Bulb |
 Replace Low Beam Cap |
| Insert the new turn
signal bulb and socket back in to the headlight before turning it 1/4 turn
clockwise to secure it in place. Replace the low beam bulb's black plastic dust cap by rotating it 1/4 turn clockwise. |
||
 Headlight Bulbs Replaced |
 Replace Access Panel |
 1/4 Turn Clockwise |
| Replace the
circular access panel and rotate it 1/4 turn clockwise to line up the screw
holes. Insert the single screw in to the access panel and tighten it with the Torx T20 star bit screwdriver. |
||
 Tighten Torx T20 Screw |
 Test New Bulbs |
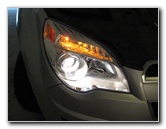
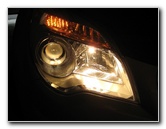 High Beam On |
| Test the new bulbs
by turning on the headlights, flashing the high beams, and activating the
hazard signals. For more,
check out my other
GM
Chevrolet Equinox DIY Repair Guides. |
||
| If you found this guide to be helpful,
please consider making a small donation by clicking on the PayPal.com
"Donate" button located to the right of this paragraph. Thank you!
(Note: I am not a registered charity. Donations are not tax deductible.) |