
Chevrolet
Silverado 3rd Brake Light Bulbs Replacement Guide
How to change a burnt out high mount
third brake light bulb on a 2nd generation 2007 to 2013 Chevy Silverado 1500.

By Paul B. Michaels Author & Photographer Auto Mechanic Since 1989 |
||
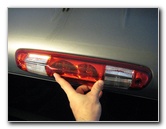
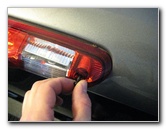
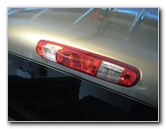 3rd Brake & Cargo Lights |
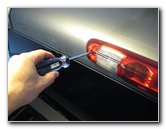 Remove Torx Screw |
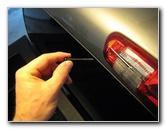 Torx Screw Removed |
| This
automotive "how-to" guide was specifically written to assist owners
of the 2nd generation (2007, 2008, 2009, 2010, 2011, 2012 & 2013)
Chevrolet Silverado 1500 in replacing a burnt out high mount stop
light or cargo bed light bulb. Owners of other General Motors vehicles such as the GMC Sierra, Terrain, Acadia, Yukon, Savana, Chevy Colorado, Avalanche, Express, Equinox, Traverse, Tahoe, Suburban, Spark, Sonic, Cruze, Volt, Malibu, Impala, SS, Camaro, Corvette, Verano, Regal, LaCrosse, Encore, and Enclave may also find these DIY instructions to be helpful. A replacement bulb is part # 912 from manufacturers such as Sylvania, Eiko and GE. You may also choose to install brighter LED units. The only tool needed to change any of the four bulbs in the housing is a Torx T20 screwdriver. |
||
|
|
||
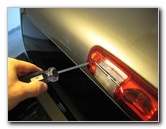
 Remove 2nd Torx Screw |
 Two Screws Removed |
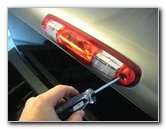
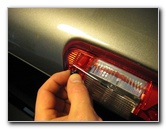
 Pull Out Light Housing |
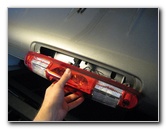
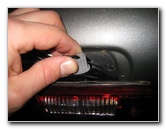
| The first step is
to climb in to the cargo bed of your truck with a
Torx T20 screwdriver. Then remove the two Torx T-20 screws holding the 3rd brake light and cargo area light bulbs housing in place by turning them counter clockwise. Set the two screws aside in a safe place. Gently pull the light housing away from the top of the passenger cabin. |
||
 Turn Over Assembly |
 1/4 Turn Counter Clockwise |
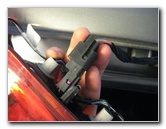
 Pull Socket Out |
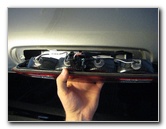
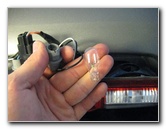
| Turn the light
housing over. The two outer sockets contain the cargo area light bulbs and
the two inner sockets contain the high mount 3rd brake light bulbs. Grasp the socket that contains the burnt out bulb with your thumb and forefinger before rotating it 1/4 turn counter clockwise. Pull the socket straight out of the housing. |
||
|
|
||
 Pull Out Old # 912 Bulb |
 1/4 Turn Clockwise |
 Unplug Power Connector |
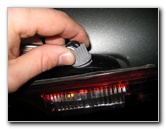
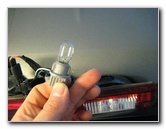
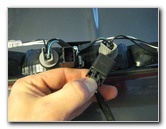
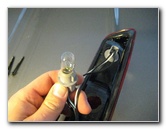
| Pull the old light
bulb straight out of the socket and push in a new #
912 miniature wedge base
bulb. If you have trouble removing a bulb socket, give yourself more room to work by disconnecting the power plug. |
||
 |
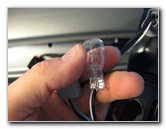 HT 912 Bulb |
 Re-Connect Power Plug |
| Repeat the steps to
replace any of the other bulbs or if you are upgrading all of them to
brighter LED units. Re-connect the power plug by sliding it straight in to the socket. |
||
 Push On Light Housing |
 |
 Insert Phillips Screws |
| Gently push the
light housing back in place at the top of the passenger cabin. Reinsert the two Torx T20 head screws. |
||
 Tighten Two Screws |
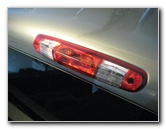 Light Housing Secured |
 Test New Brake Lights |
| Tighten the two
screws with the Torx T-20 head screwdriver until they are snug.
Do not over tighten the screws to avoid cracking the plastic housing. Test the new third brake light bulbs by having someone step on the brake pedal. For more,
check out my other
2007-2013 Chevy Silverado Repair & Maintenance Guides. |
||
| If you found this guide to be helpful,
please consider making a small donation by clicking on the PayPal.com
"Donate" button located to the right of this paragraph. Thank you!
(Note: I am not a registered charity. Donations are not tax deductible.) |