
Chevrolet
Tahoe 12V Automotive Battery Replacement Guide
How to change a dead 12 volt car battery
in the engine bay of a 3rd generation 2007-2014 GM Chevy Tahoe SUV.

By Paul B. Michaels Author & Photographer Auto Mechanic Since 1989 |
||
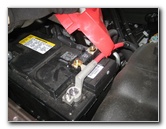
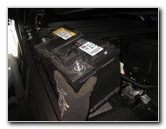
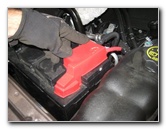
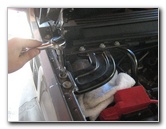
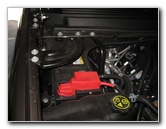 Tahoe 12V Battery - Left Side |
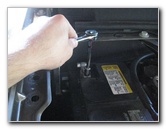
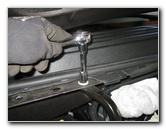
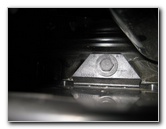
 Loosen 13mm Bolts |
 Four Corner Brace Bolts |
| This
automotive maintenance tutorial was specifically written to assist
owners of the third generation (2007, 2008, 2009, 2010, 2011, 2012,
2013 & 2014) Chevrolet Tahoe in changing a dead 12V automotive
battery in the engine bay. Owners of related General Motors full size SUV or truck vehicles such as the Suburban, Avalanche, GMC Yukon, Yukon XL, Yukon Denali, Sierra, Cadillac Escalade and Hummer H2 may also find these DIY instructions to be helpful. The OEM (original equipment manufacturer) battery in this 2014 Tahoe was ACDelco part number 48HPG. Other compatible H6 size replacement batteries include the following: Optima 8003-151 34R, Bosch S6585B S6, EverStart Plus H6-3, EverStart MAXX-H6, AutoCraft 48H6, Interstate MT-48/H6 and Optima R34-980. The tools needed to replace the battery include a 13mm socket, a six inch extension bar, a 3/8" drive ratchet and a 10mm socket with a 1/4" drive ratchet. |
||
|
|
||
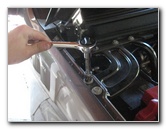
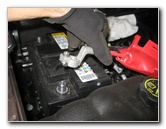
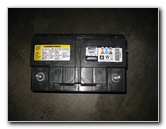
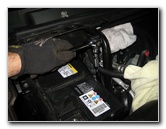
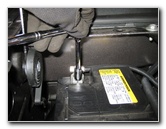
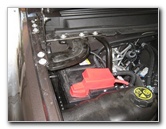
 Corner Brace Removed |
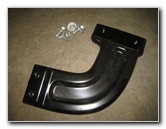 Brace Bar & Four 13mm Bolts |
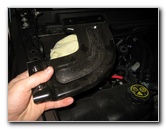
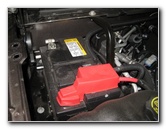 Car Battery Exposed |
| The first two steps
are to open the hood and then move to the left rear area of the engine bay
near the front passenger seat.
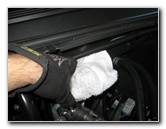
Place a towel or rag over the top of the old 12V battery to prevent any accidental contact with the terminals during the next steps. Please be careful and avoid touching the battery posts with your bare hands, arms or any metal tools. Loosen the four bolts that hold the black metal engine bay corner brace in place by turning them counter clockwise with a 13mm socket and ratcheting wrench. Set the four 13mm bolts and the corner brace aside in a safe place. |
||
 Loosen "-" 10mm Nut |
 Pull Off Negative Terminal |
 Cover Terminal With Rag |
| Loosen the nut on
the "-" negative terminal (black cable) by turning it counter clockwise with
a 10mm socket and ratcheting wrench. Pull the terminal straight off the battery post, wrap it with a rag and tuck it away to the side of the battery. |
||
 Remove "+" Rubber Cover |
 Loosen "+" 10mm Nut |
 Pull Off Positive Terminal |
| Pull the rubber
cover off the "+" positive terminal (red cable) and then loosen the 10mm nut
in the counter clockwise direction. Lift the terminal off the battery post, wrap it in a rag and tuck it away on the side of the battery. |
||
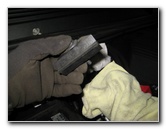
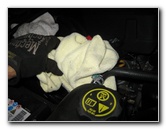 Cover "+" Terminal With Towel |
 Both Terminals Removed |
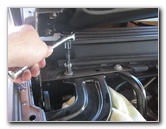
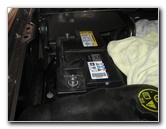
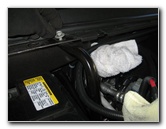
 Battery Tray Support Bar Bolt |
| Remove the bolt at
the top of the black metal battery tray support bar by turning it counter
clockwise with the 13mm socket and ratcheting wrench.
Gently push the battery tray support bar out of the way towards the center of the engine bay. |
||
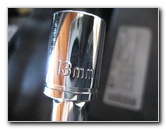 13mm Socket |
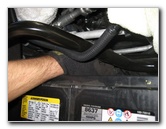
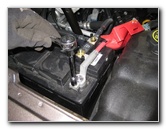
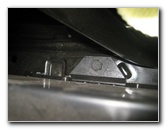 Battery Clamp On Tray |
 Loosen 13mm Clamp Bolt |
| Once the battery
tray support bar has been moved out of the way, you can access the battery
"hold-down" clamp bolt. Attach the 13mm socket to a 6" extension bar and the 3/8" drive ratcheting wrench. Loosen the battery clamp bolt on the lower right (driver side) of the battery by turning it counter clockwise with the 13mm socket and ratcheting wrench. |
||
|
|
||
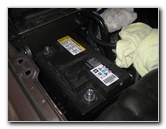
 Battery Hold Down Clamp |
 Lift Out Old 12V Battery |
 ACDelco # 48HPG Battery |
| Carefully pull out
the bolt and remove the battery clamp. Set them aside in a safe place. Lift the old battery straight out of the engine bay. Try to avoid tilting or dropping the battery to prevent from having battery acid leak out. The OEM (original equipment manufacturer) battery in this 2014 Tahoe with the Vortec 5300 5.3L V8 motor was ACDelco part number 48HPG. Please verify the correct replacement battery for your Tahoe, Suburban, Yukon or Avalanche by calling an auto parts store, contacting your dealership or visiting the Amazon Part Finder website before purchasing a new battery. The appropriate battery may vary by model year and/or engine type. |
||
 Install New H6 Group Battery |
 Replace Battery Clamp |
 Spin In 13mm Clamp Bolt |
| Carefully lower the
new 12V battery down on to the battery shelf with the "-" negative terminal
closer to the rear of the SUV. Replace the battery hold-down clamp on the right side of the tray and spin in the bolt by hand a few turns to prevent it from becoming cross threaded. |
||
 Tighten 13mm Clockwise |
 Replace Tray Support Bar Bolt |
 Replace "+" Positive Terminal |
| Tighten the battery
clamp bolt by turning it in the clockwise direction with the 13mm socket,
extension bar and ratcheting wrench. Move the battery tray support bar back in to position under its corresponding bolt hole at the rear edge of the engine bay. Tighten the bolt at the top of the battery tray support bar by turning it clockwise with the 13mm socket and ratcheting wrench. If you've had a problem with corrosion (white or blue powder) building up on the terminals or battery posts, I'd recommend placing some felt anti-corrosion washers over the battery posts. Then push the "+" positive terminal (red cable) back in to place on the positive battery post near the front of the engine bay. Secure the terminal in place by tightening the nut in the clockwise direction with the 10mm socket and ratcheting wrench. |
||
 Push On Rubber Cover |
 Tighten 10mm Negative Terminal |
 Both Terminals Replaced |
| Push the red rubber
cover back in to place over the positive terminal. Lower the "-" negative battery terminal (black cable) down over the negative battery post near the back of the engine bay. Tighten the 10mm nut on the negative terminal in the clockwise direction. Double check that both terminals are tight before moving on to the next steps. |
||
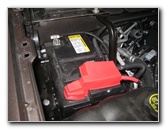
 Spin In Corner Brace Bolts |
 Tighten 13mm Bolts Clockwise |
 New Battery Installed |
| Place a towel over
the top of the battery to prevent accidental contact with the terminals. Move the engine bay corner brace in to position and thread in the four bolts by hand a few turns to prevent them from becoming cross threaded. Tighten the four bolts in the clockwise direction with the 13mm socket and ratcheting wrench. Remove the towel from the top of the new battery. Test the new 12V battery by starting the engine. If the engine won't start, you may need to clean the terminals or the battery posts, replace a corroded terminal or cable, or just tighten the terminals. For more,
check out my other
Chevrolet Tahoe DIY Repair Guides. |
||
| If you found this guide to be helpful,
please consider making a small donation by clicking on the PayPal.com
"Donate" button located to the right of this paragraph. Thank you!
(Note: I am not a registered charity. Donations are not tax deductible.) |