
Chevrolet
Traverse Reading Light Bulbs Replacement Guide
How to replace the rear passenger
overhead reading lamp bulbs in a 2009-2012 GM Chevy Traverse crossover SUV.

By Paul B. Michaels Author & Photographer Auto Mechanic Since 1989 |
||
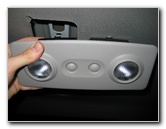
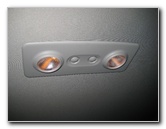
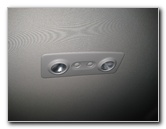 Passenger Reading Lights |
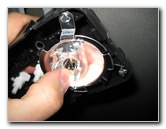
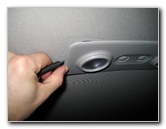 Pry Out Light Housing |
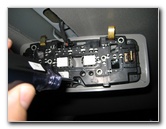
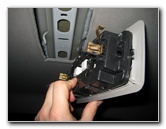 Friction Fasteners Released |
| This
automotive "how-to" guide was specifically written to assist owners
of the 2009, 2010, 2011, 2012, 2013, 2014, 2015 & 2016 GM Chevrolet Traverse crossover
SUV in replacing the overhead rear passenger reading light bulbs or
upgrading them with brighter LED units. Owners of other General Motors vehicles from GMC, Saturn, Buick, and Cadillac such as the Acadia, Terrain, Sierra, Yukon, Savana, Outlook, Verano, Regal, Lacrosse, Encore, Enclave, Spark, Sonic, Cruze, Malibu, Impala, Camaro, Equinox, Tahoe, Suburban, Colorado, Avalanche, Silverado, ATS, XTS, CTS, SRX, and Escalade may also find these DIY instructions to be helpful. Replacement reading lamp bulbs are part # 194 from manufacturers such as Sylvania, GE and Eiko. You can also use any other miniature wedge base bulbs such as the number 168, W5W, 2825, 158 or a compatible LED. The tools needed to replace the bulbs include a small flathead screwdriver and a Torx T-10 "star" bit screwdriver. |
||
|
|
||
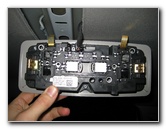 |
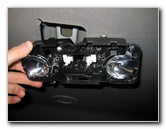
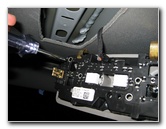
 Remove 3 Torx T-10 Screws |
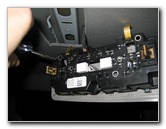 |
| Gently insert the
blade of the screwdriver in between the reading lights housing and the
headliner before prying it out. The housing is held in place by two friction clip fasteners and two metal hooks. Once you loosen the housing with the screwdriver, gently pull it straight down to release the fasteners and then swing it towards the rear of the vehicle to release the hooks. To access the bulbs, you'll need to remove the 3 Torx T10 screws that hold the black plastic bracket to the bottom cover that contains the buttons and translucent lens covers. |
||
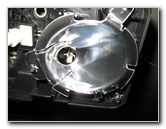
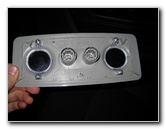 Bottom Lens Plate Removed |
 Light Bulbs Exposed |
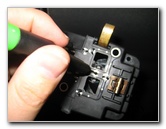 Gently Push Out Old Bulb |
| Set the bottom
cover aside in a safe place. Use the small flathead screwdriver to gently push out the old reading light bulb from the rear of the socket. |
||
|
|
||
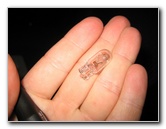 Old # 194 Light Bulb |
 Light Bulb Socket |
 Push In New 194 Bulb |
| Push in a new #
194 bulb straight into the socket.
(You may also use any other compatible miniature wedge base bulbs such as the # 168, W5W, 2825 or a brighter LED unit.) |
||
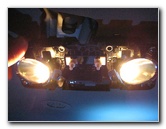 Test New Light Bulb(s) |
 Re-Attach Lens Plate |
 Tighten 3 T10 Screws |
| Test the new light
bulb by pressing the On/Off button. Line up the bottom cover plate with the black plastic bracket and tighten the 3 Torx T-10 screws. |
||
 |
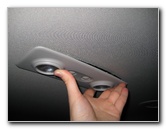 Re-Install Light Housing |
 Press On/Off - Test Bulbs |
| Re-insert the two
metal hooks first, and then push the reading light housing into place. Check
that the housing is flush with the headliner all around. Test the new bulb(s) again by pressing the two On/Off buttons. For more,
check out my other
Chevrolet Traverse Repair & Maintenance Guides. |
||
| If you found this guide to be helpful,
please consider making a small donation by clicking on the PayPal.com
"Donate" button located to the right of this paragraph. Thank you!
(Note: I am not a registered charity. Donations are not tax deductible.) |