
GMC Acadia Map Light Bulbs
Replacement Guide
How to change a burnt out map light bulb
in the overhead console of a 1st generation 2007 to 2016 GMC Acadia SUV.

By Paul B. Michaels Author & Photographer Auto Mechanic Since 1989 |
||
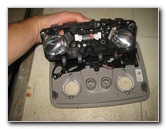
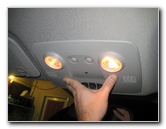
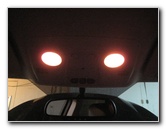
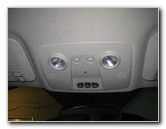 2016 Acadia Map Lights |
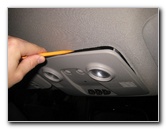 Gently Pry Down Panel |
 Release Metal Clips |
| This
automotive maintenance tutorial was specifically written to assist
owners of the first generation (2007, 2008, 2009, 2010, 2011, 2012,
2013, 2014, 2015 & 2016) GMC Acadia in changing a burnt out map
light bulb in the overhead console. Owners of other General Motors vehicles such as the Buick Verano, Regal, LaCrosse, Cascada, Encore, Enclave, Envision, GMC Canyon, Sierra 1500, Terrain, Yukon, Denali, Savana, Spark, Sonic, Cruze, Malibu, Impala, Volt, Camaro, Corvette, SS, Trax, Equinox, Traverse, Tahoe, Suburban, Colorado, Silverado and Express may also find these DIY instructions to be helpful. A replacement map light bulb is part number 168. You may also use any other miniature wedge base bulbs such as the # W5W, 2825, 158, 194 or a compatible LED unit. The tools needed to access and replace the bulbs include a flathead screwdriver or plastic automotive pry bar tool and a Torx T10 star bit screwdriver. |
||
|
|
||
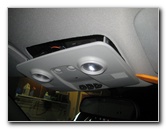
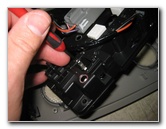
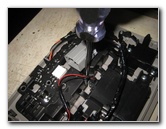
 Overhead Console Removed |
 Disconnect Power Plug |
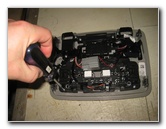 Loosen Counterclockwise |
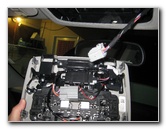
| The overhead
console is held in place to the headliner and roof panel by four metal
friction fasteners. Use a plastic automotive panel removal tool to gently pry down the four corners of the console to release the clips. Pull the overhead console out of the headliner. Press the release tab on the electrical connector before sliding the power plug straight out of its socket. |
||
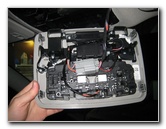
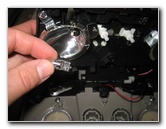
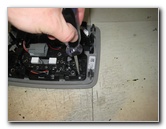
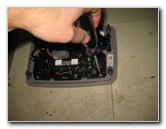 Remove 2nd T-10 Screw |
 3rd Screw - In Center |
 Three T10 Screws Removed |
| The black plastic
bracket that houses the two bulbs and the electronics is held in place by
three screws. Two screws are at the front corners and one screw is in the middle near the grey plastic electrical connector. Remove the three screws by turning them counterclockwise with the Torx T-10 star bit screwdriver. Set the 3 screws aside in a safe place. |
||
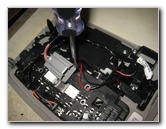
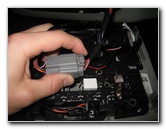
 Lift Off Bulb Housing |
 Push Out Old Light Bulb |
 Old Light Bulb Removed |
| Pull the black
plastic bulb housing off the overhead console. The easiest way to remove the old bulbs is to very gently push them out from their sockets with a small screwdriver. Insert the screwdriver in to the hole on the opposite side of the chrome silver plastic reflector and pop out the old bulbs. |
||
|
|
||
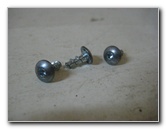
 Old # 168 Bulb |
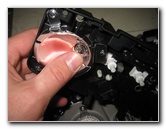 Push In New # 168 Bulb |
 Replace Bulb Housing |
| Push a new number
168 bulb straight in to the socket. If necessary, you may also be able to use any other miniature wedge base bulbs such as the # W5W, 2825, 194, 158 or a compatible LED unit. Lower the black plastic bulb housing back on to the overhead console. |
||
 Tighten T10 Screws |
 2nd T-10 Screw |
 Third Torx T10 Screw |
| Re-insert the three
screws and tighten them in the clockwise direction with the
Torx T10
screwdriver until they are snug. Try to avoid over tightening the screws to prevent from cracking the plastic bulb housing. |
||
 Push In Power Plug |
 Push In Friction Fasteners |
 Test New Map Light Bulbs |
| Hold the overhead
console near the headliner and push the power plug back in to place. Line up the four metal friction fasteners and firmly push the overhead console back in to place. Test the new map light bulbs by pressing the "On/Off" buttons. For more, check out my other
2007-2016 GMC Acadia DIY Repair & Maintenance Guides. |
||
| If you found this guide to be helpful,
please consider making a small donation by clicking on the PayPal.com
"Donate" button located to the right of this paragraph. Thank you!
(Note: I am not a registered charity. Donations are not tax deductible.) |