
Honda Pilot
3.5L V6 PCV Valve Replacement Guide
How to change the PCV valve on the 3.5L
i-VTEC SOHC 24V V6 engine in a 2nd generation 2009 to 2015 Honda Pilot.

By Paul B. Michaels Author & Photographer Auto Mechanic Since 1989 |
||
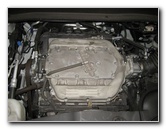
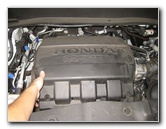
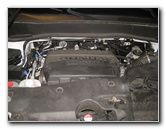
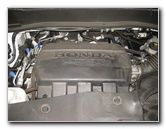 2012 Pilot 3.5L V6 Engine |
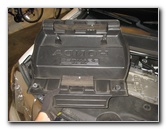
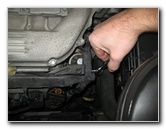
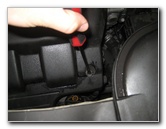
 1/4 Turn Counterclockwise |
 Engine Cover Fasteners |
| This
automotive maintenance tutorial was specifically written to assist
owners of the second generation (2009, 2010, 2011, 2012, 2013, 2014
& 2015) Honda Pilot SUV in checking or changing the PCV
(positive crankcase ventilation) valve in the 3.5 liter i-VTEC SOHC
24V V6 engine. Owner's of other Honda or Acura vehicles such as the Odyssey, Insight, Ridgeline, CR-V, Fit, Civic, CR-Z, Crosstour, Accord, MDX, RDX, RLX, TL, TSX and ILX may also find these DIY instructions to be helpful. A few compatible replacement PCV valves with their part numbers are as follows: Standard Motor Products V384 PCV, Wells PCV374, OES W0133-1709800-OES and Purolator PV1070. The tools needed to complete this procedure include a flathead screwdriver, a 10mm socket and a 1/4" drive ratchet. |
||
|
|
||
 1/4 Turn Counterclockwise |
 Pull Off Plastic Engine Cover |
 Top of Engine Exposed |
| The first two steps
are to open the hood and then locate the plastic fasteners that secure the
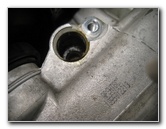
front of the engine cover in place. Rotate the two plastic fasteners 1/4 turn counterclockwise to unlock them. Gently pull off the plastic engine cover and set it aside in a safe place. The PCV valve is located at the front right corner of the 3.5L V6 engine on the passenger side of the vehicle. It is near the oil filler cap and by the electrical fuse box. |
||
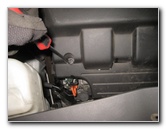
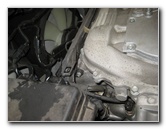 Front Right Corner of Engine |
 Pointing To PCV Location |
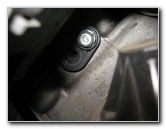 Black Plastic PCV Valve |
| In the middle picture above, I'm pointing to the PCV valve location with a red handled screwdriver. | ||
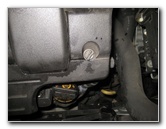
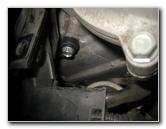
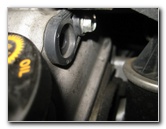 View of PCV Valve |
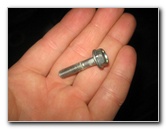
 Silver Metal 10mm Bolt |
 10mm Socket & Wrench |
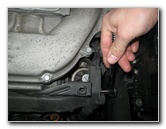
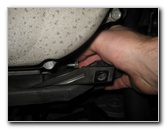
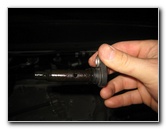
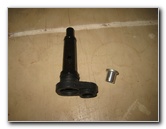
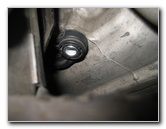
| The PCV valve is held in place by one bolt. | ||
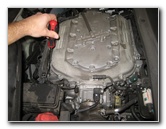
 Loosen Counterclockwise |
 Spin Out Bolt By Hand |
 10mm Bolt Removed |
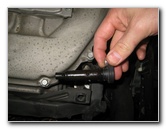
| Loosen the bolt by
turning it counterclockwise with the 10mm socket and 1/4" drive ratcheting
wrench. You may need a short extension bar to easily loosen the bolt. Once the bolt has been loosened, spin it out the rest of the way by hand to prevent from having fall down in to the engine bay. Set the bolt aside in a safe place. |
||
|
|
||
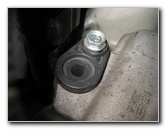
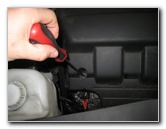
 Gently Pry Out PCV Valve |
 Old PCV Valve Removed |
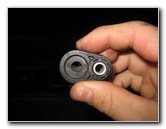 Inspect & Shake |
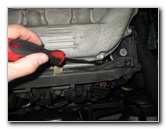
| If you have trouble
pulling the old PCV valve out of the engine, you may need to use a flathead
screwdriver to gently pry it out. Inspect the old PCV valve and shake it vigorously. If the valve still makes a healthy sounding rattle sound when you shake it, it can most likely be used again. You may also choose to clean it with carburetor cleaner spray or Sea Foam engine cleaner. Since it is such a cheap part, I'd recommend purchasing a new PCV valve. I recommend buying the Standard Motor Products V384 PCV since it has excellent reviews on Amazon. |
||
 Clean Old PCV Valve |
 PCV Valve Housing |
 Slide In New PCV Valve |
| Slide the new or cleaned PCV valve back in to the housing. | ||
 New PCV Valve Installed |
 10mm Bolt Attached To Socket |
 Spin In Clockwise |
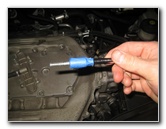
| I attached the 10mm
bolt to my socket with some blue painter's tape to keep it from falling down
in to the engine bay. Spin in the 10mm bolt a few turns in the clockwise direction by hand to prevent it from becoming cross threaded. |
||
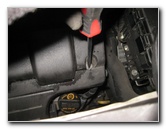
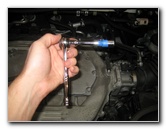
 Tighten 10mm Clockwise |
 PCV Valve Secured |
 Replace Engine Cover |
| Attach the
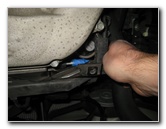
ratcheting wrench to the socket and tighten the 10mm bolt in the clockwise
direction until it is snug. Try to avoid over tightening the 10mm bolt to prevent from cracking the plastic mounting loop. Double check that the bolt is secure before moving on to the next steps. |
||
 1/4 Turn Clockwise - Lock |
 Engine Cover Secured |
 PCV Valve Replaced |
| Gently lower the
plastic engine cover back in to place. Rotate the two engine cover fasteners 1/4 turn clockwise to secure them. Be sure to record the PCV valve change in your Pilot's service records.
For more, please check out my other
2009-2015 Honda Pilot DIY Repair & Maintenance Guides. |
||
| If you found this guide to be helpful,
please consider making a small donation by clicking on the PayPal.com
"Donate" button located to the right of this paragraph. Thank you!
(Note: I am not a registered charity. Donations are not tax deductible.) |